
Your Guide on How Can I Preserve Jalapeno Peppers Long-Term
This post contains affiliate links. As an Amazon Associate, we earn from qualifying purchases.
To preserve jalapeno peppers, you have three proven paths: freeze them raw or roasted, pickle them in a vinegar brine, or pressure-can them for shelf-stable storage. Each method has a non-negotiable timeline, roasted peppers must be refrigerated within 2 hours and used or frozen within 3 days to prevent bacterial growth. Skipping that window turns flavor into risk.
That 3-day clock is the hinge. It’s not a suggestion. It’s the point where the sugars and moisture in a roasted pepper cross from fresh into the temperature danger zone where pathogens multiply. Freezing stops the clock entirely, pickling acidifies it, and pressure canning heats it past any microbial life. Your choice depends on whether you want peppers ready for cooking, for topping, or for the pantry.
What follows: the exact specs for each method, the two tools that prevent freezer burn, the altitude table for safe pickling, and the one canning mistake that can lead to botulism. By the end, you’ll know which method fits your kitchen and your time.
Key Takeaways
- Roasted jalapenos have a 72-hour window in the fridge. After that, freeze them or toss them.
- Home freezers cannot cool food in containers deeper than 2 inches efficiently. Use flat packs or tray-freeze first.
- Pressure canning is mandatory for plain canned peppers. A boiling water bath is only safe for pickled or acidified recipes.
- You can freeze peppers raw without blanching. Blanching is for texture, not safety.
- Altitude changes pickling processing time. At 6,000 feet, you process for 20 minutes, not 10.
Freezing Jalapeno Peppers: Raw vs. Roasted
Freezing is the fastest way to lock in flavor. You don’t need to blanch jalapenos. The thick flesh holds up in the freezer, and the capsaicin stays intact.
The choice between raw and roasted changes the prep, not the safety. Raw frozen peppers work in cooked dishes like chili or stews. Roasted and peeled peppers have a softer texture, better for sauces or rellenos.
Common mistake: Packing roasted peppers deep into a container before freezing. A home freezer cannot efficiently pull heat from food in containers deeper than 2 inches. The center stays warm too long, degrading texture and flavor.
Follow this sequence for quality: 1. Wash and dry peppers thoroughly. Water on the surface turns to ice crystals. 2. Prepare for use: Slice, dice, or leave whole. For roasting, blister the skins over a flame or under a broiler, then steam in a covered bowl for 10 minutes before peeling. 3. Tray-freeze first (optional but recommended). Spread pieces in a single layer on a parchment-lined baking sheet. Freeze for 2-3 hours until solid. This prevents them from clumping into a brick. 4. Pack into airtight containers. Use rigid containers like deli cups or bags. For long-term storage, a FoodSaver vacuum sealer is the best defense against freezer burn. Remove as much air as possible. 5. Label with date and contents. Frozen jalapenos are best used within 12 months for peak flavor.
| Freezing Method | Best For | Texture After Thawing |
|---|---|---|
| Raw, whole | Cooked soups, blending | Firm, holds shape |
| Raw, sliced/diced | Omelets, quick cooking | Slightly soft |
| Roasted & peeled | Sauces, dips, spreads | Very soft, almost pureed |
If you’re already preserving other produce, the principles are the same as tray-freezing tomatoes or freezing fruit. The goal is rapid freezing and an airtight seal.
The 3-Day Rule for Roasted Peppers
This is the timeline most guides gloss over. You roast a batch of peppers, peel them, and think they’re safe in the fridge for a week. They aren’t.
The NMSU chile pepper processing guide states it directly: roasted, peeled chiles should be refrigerated within 2 hours of roasting. Once in the fridge, they must be used or frozen within 3 days.
Why three days? Roasting breaks down the pepper’s cellular structure, releasing moisture and sugars. That liquid is a growth medium. Combined with the pepper’s low acidity, it creates an ideal environment for bacteria if left in the refrigerator’s “danger zone” temperatures (40°F–140°F) for too long. Freezing halts this process completely.
I won’t recommend storing roasted peppers in a deep bowl. The mass insulates the center, and it can take hours for the core to chill below 40°F. Spread them on a plate or in a shallow container. That extra step cuts the risk in half.
If you don’t plan to use them within 72 hours, move them to the freezer on day one. The flavor and color are brightest then.
Pickling Jalapeno Peppers
Pickling uses acid to preserve. A vinegar brine with at least 5% acidity lowers the pH enough to prevent spoilage. This is the method for peppers you want to eat cold, on tacos, sandwiches, or as a garnish.
The basic brine is equal parts 5% vinegar and water, brought to a boil with salt and optional spices like garlic, oregano, or peppercorns. Pour it over packed peppers.
You must adjust for altitude. The processing time in a boiling water canner isn’t universal. The USU Extension chile preservation guide provides this non-negotiable table:
| Altitude | Processing Time |
|---|---|
| 0–1,000 ft | 10 minutes |
| 1,001–6,000 ft | 15 minutes |
| Above 6,000 ft | 20 minutes |
At higher elevations, water boils at a lower temperature. The extra minutes ensure the jar’s contents reach a temperature high enough to destroy molds and yeasts. Ignoring this table is how pickles go soft or cloudy.
The steps are straightforward but precise: 1. Wash Ball Mason Jars and lids in hot, soapy water. 2. Pack clean, sliced peppers into jars, leaving ½-inch headspace. 3. Heat your brine to a rolling boil. 4. Pour hot brine over peppers, maintaining the ½-inch headspace. 5. Wipe the jar rims, apply lids and bands, and process in the boiling water canner for the time specified for your altitude. 6. Let jars cool, check seals, and store in a cool, dark place.
Pickled jalapenos stored at 70°F or below will keep for at least 12 months. This method is a cornerstone of preserving vegetables and shares techniques with preserving garlic in oil for safe acidification.
Canning Jalapeno Peppers Safely
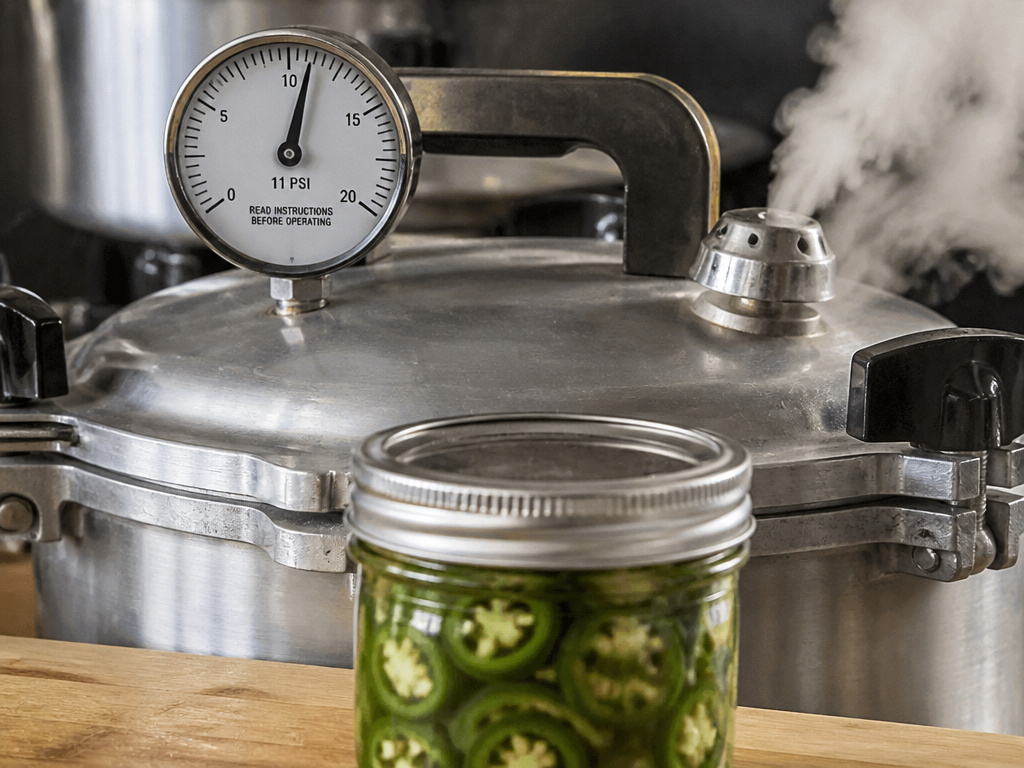 Canning plain peppers, without added acid, is a different beast. This is low-acid food preservation, and the stakes are botulism.
You must use a pressure canner. A boiling water bath cannot reach the 240°F required to destroy Clostridium botulinum spores. The MSU Extension food safety article and the MU Extension canning guide are unambiguous on this point.
Where this goes sideways: Using a water bath canner for plain packed peppers. The toxin is odorless and tasteless. By the time you see a bulging lid, it’s too late.
The safe procedure follows tested guidelines: – Pack raw, peeled, or roasted peppers into jars. Add boiling water or brine, leaving 1-inch headspace. – Process in a dial-gauge pressure canner at 11 PSI or a weighted-gauge canner at 10 PSI. – Adjust PSI for your altitude (consult your canner manual). – Process pints for 35 minutes and quarts for 45 minutes.
After processing, let the canner depressurize naturally. Remove jars, cool, and check seals. Store canned peppers in a cool, dark place. At a steady 70°F, they are safe for up to 12 months. This high-heat method is a core part of food preservation science, similar to the principles used in preserving tomatoes for sauce.
Drying and Dehydrating Jalapenos
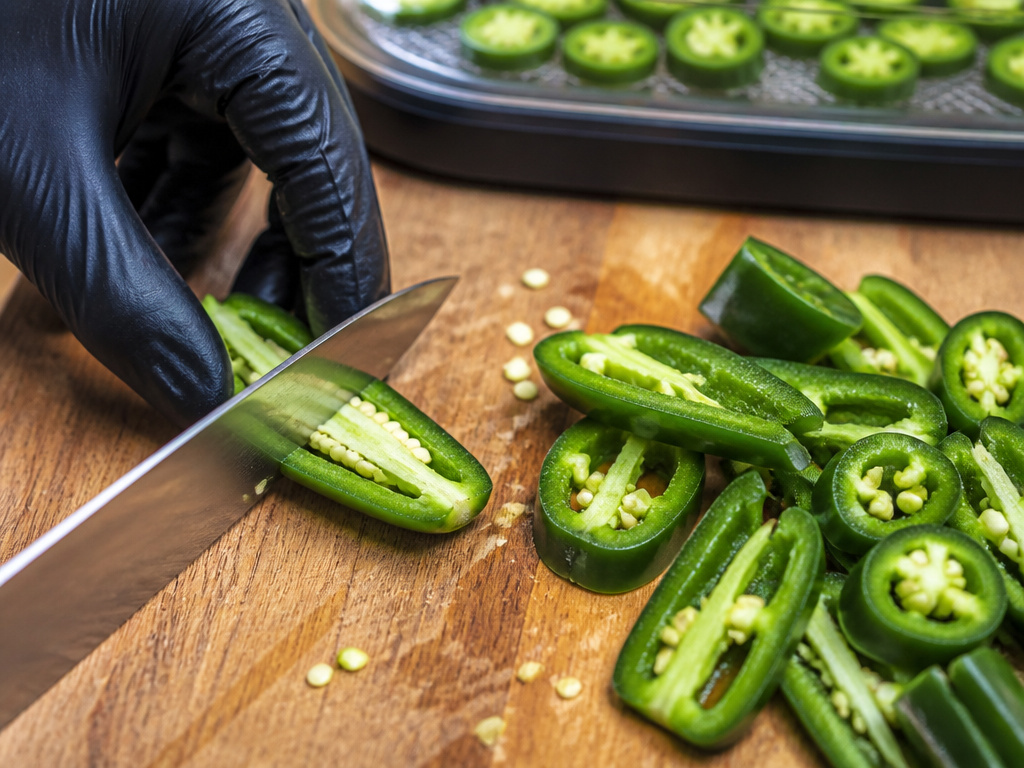 Drying removes the water that microbes need to live. It’s the oldest preservation method, but jalapenos present a challenge: their thick walls.
You cannot dry a whole jalapeno effectively. The flesh is too dense, and the interior moisture will linger, leading to mold before the outside is fully dry. The solution is to cut them open.
Slice jalapenos in half lengthwise or chop them into rings. This exposes the inner membrane and seeds to air circulation. A dehydrator at 135°F will take 8–12 hours. In a low oven (140°F–150°F), it can take 24 hours or more.
In humid climates, drying may fail entirely. The UC Davis Postharvest factsheet notes that commercial storage requires humidity over 95% to prevent shrivel, but home drying needs the opposite, dry, moving air. If you live in a humid area, a dehydrator with a fan is non-negotiable.
Dried jalapenos can be stored in airtight jars in a pantry for over a year. Grind them into pepper flakes or powder. This technique is a branch of the same drying fruit process, relying on consistent low heat and airflow.
Storing Fresh Jalapenos Short-Term
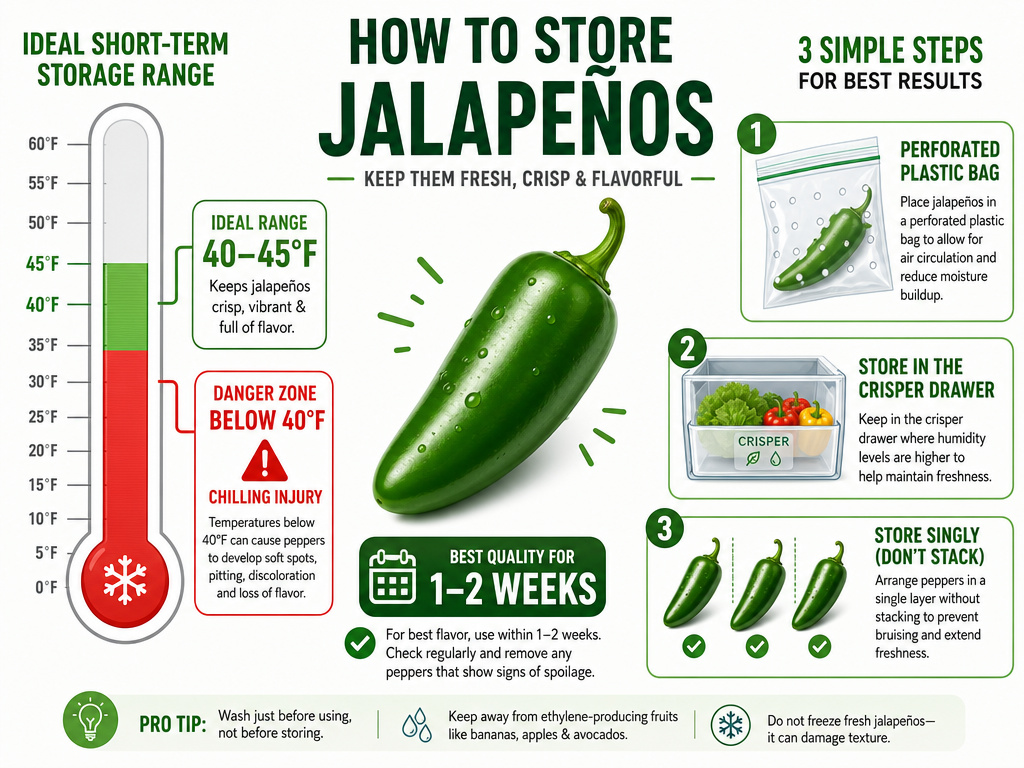 You bought a bag and won’t process them all today. The goal is to slow down respiration and water loss.
The university produce facts sheet shows commercial storage is optimized at 45°F with over 95% humidity. Your home fridge is colder (around 37°F) and drier.
Chilling injury is a real risk. Peppers stored below 40°F for more than two weeks can develop pitting, surface scald, or seed discoloration. For short-term storage of 1–2 weeks: – Place unwashed peppers in a perforated plastic bag or a bag lined with a paper towel. – Store them in the high-humidity crisper drawer. – Do not stack them heavily; bruising leads to soft spots.
If you need to keep them longer, move to freezing. This short-term handling is similar to the care needed for preserving basil or other fresh herbs before processing.
Equipment That Makes a Difference
The right tools don’t just make the job easier; they make the outcome safer.
- A Pressure Canner (for canning). Not a pressure cooker. A dedicated canner like an All-American or Presto has a gauge and is designed for the processing times required for low-acid foods.
- A Vacuum Sealer (for freezing). A FoodSaver vacuum sealer removes air that causes freezer burn. It extends the quality shelf-life of frozen peppers by months compared to zip-top bags.
- A Dehydrator (for drying). Provides steady, low heat with airflow. Ovens can work but are less energy-efficient and often run hotter than the ideal 135°F.
- Canning Jars and Lids. Use new lids every time. Bands can be reused if not rusted.
Investing in a vacuum sealer pays off across your kitchen, not just for peppers. It’s the single best way to prevent freezer burn on any produce.
Frequently Asked Questions
Can I freeze jalapenos whole without blanching?
Yes. Blanching is not required for safety with peppers. Freezing them whole is fine, but they will take longer to thaw and are harder to chop while frozen. Slicing before freezing is more convenient.
How long do pickled jalapenos last?
Properly canned pickled jalapenos are shelf-stable for 12–18 months. Once opened, refrigerate the jar and use the contents within 2 months for best quality.
Is it safe to can peppers in a water bath?
Only if the recipe includes enough acid, like a pickling brine or a pepper relish with added vinegar or lemon juice. Plain peppers packed in water must be pressure canned.
Why did my frozen peppers get mushy?
Two reasons. First, they were likely frozen too slowly in a thick block, forming large ice crystals that rupture cell walls. Second, they may have been blanched too long or roasted before freezing, which breaks down pectin. Tray-freezing raw slices prevents mushiness.
Can I preserve jalapenos with other peppers?
Absolutely. You can mix peppers in any preservation method. The key is to match the processing time to the densest ingredient. If canning, use the time required for the largest pepper piece.
What’s the best way to preserve jalapenos for salsa?
Freezing. Chop the peppers and freeze them in measured portions (e.g., ½-cup bags). When you make salsa, you can add the frozen peppers directly to the blender or pot with other fresh ingredients. This is more flexible than canning a finished salsa.
Before You Go
Preserving jalapenos breaks into three lanes: freezing for convenience, pickling for flavor, and canning for shelf stability. The 3-day rule for roasted peppers is your guardrail, ignore it, and quality drops fast.
Remember the two-inch limit for freezing packs. Remember the altitude table for pickling. Remember the pressure canner for plain jars. Those three specifics are what separate a successful batch from a wasted one.
Your choice depends on your kitchen and your time. For most home cooks, freezing raw slices offers the most flexibility with the least fuss. Want peppers ready to eat? Pickle a jar. Building a pantry? Pressure can a batch. Now you have the timelines and the tools to do any of them right.
