
Organize a Small Pantry to Prevent Food Waste | Full Guide
This post contains affiliate links. As an Amazon Associate, we earn from qualifying purchases.
To organize a small pantry, you need a system, not just containers. Match your storage to the pantry’s real dimensions, use food safety timelines to purge, and build zones that fit how you cook. A 9.5-inch deep shelf changes every container choice you make.
That shelf depth is a hard limit. Most advice assumes you have a foot of space.When you only have nine and a half inches, a standard cereal bin hangs over the edge. It blocks light, creates a shadow zone, and guarantees you’ll lose track of what’s behind it.
What follows is a method, not a makeover. We’ll walk through a three-step reset that happens before you buy a single bin. You’ll get specific container recommendations that fit shallow spaces, learn which foods to never decant, and see how to use a lazy Susan in a corner that standard shelves waste.
Key Takeaways
- Measure your shelf depth first. A 9.5-inch shelf requires containers under 9 inches wide, or you create instant blind spots.
- Use the Clemson University food storage guidelines as your purge checklist. Canned tomatoes last 12-18 months; brown rice goes rancid in 6.
- Decant only shelf-stable, dry goods you use weekly. Never decant flour if you bake twice a year, it invites pests and wastes space.
- Lazy Susans are mandatory for corners and deep shelves. They turn dead space into accessible storage for oils and sauces.
- Label everything with the purchase date, not just the contents. “FIFO” (first in, first out) fails without a date.
The 3-Step Reset Process (Before You Buy Anything)
Most people start with a shopping cart full of baskets. That’s how you end up with pretty containers that don’t fit and a system that collapses in a month. The reset comes first.
Step one is the total unload. Pull every single item out onto your kitchen table or counter. This isn’t optional. You have to see the entire inventory at once. Group items as you go: all canned goods together, all baking supplies, all snacks, all pastas and grains. This grouping reveals your actual consumption categories, not the ones a magazine article told you to have.
Step two is the purge, guided by science, not guesswork. This is where most pantry organization guides get vague. They say “toss anything expired.” The Clemson HGIC pantry storage factsheet gives you the numbers. Canned meats and vegetables are safe for 2-5 years, but home-canned goods should be used within a year. Olive oil lasts about 6 months before it turns. Brown rice has half the shelf life of white rice. Use these timelines. Check dates, but also smell and look. If a bag of flour has been open for a year, it’s likely stale or attracting weevils.
Common mistake: Decanting everything for aesthetics. If you only use cornstarch once a year, leave it in its original, pest-resistant packaging. Decanting opens it to air and pests, and you’ll waste a container on a dormant item.
Step three is the critical measurement. Get a tape measure. Write down the depth, height, and width of every shelf. That 9.5-inch depth I mentioned earlier? It’s from a real pantry. It means any container marketed as a “pantry staple” is probably too deep. Your entire shopping list for organizers depends on this number.
| Shelf Measurement | Target Container Width | Why It Matters |
|---|---|---|
| Depth < 10 inches | Max 9 inches | Prevents overhang and shadow zones; allows full visibility. |
| Height 12-14 inches | Two stacking bins | Doubles vertical space without needing a riser. |
| Corner space | 10-inch Lazy Susan | Accesses items without digging; utilizes dead space. |
The goal of this reset is a data set: what you own, what’s still good, and the exact dimensions you need to fill. Now you can shop.
Choosing Containers That Actually Fit
With your measurements in hand, you can ignore 80% of the storage container market. You’re looking for specific profiles that turn small spaces into high-density storage.
Airtight containers are your first purchase, but not for everything. Their job is to keep dry goods fresh and visible. For a kitchen pantry with shallow shelves, the OXO Pop 4.4-quart container is the benchmark. It’s 8.7 inches wide, so it fits a 9.5-inch shelf with room to spare. The pop-top seal is reliable, and the rectangular shape wastes less space than cylinders. Use these for flour, sugar, rice, and pasta that you use regularly.
For smaller items like beans, lentils, or nuts, the Rubbermaid Brilliance 2.1-quart container is a better fit. It’s about 7 inches wide. The completely clear sides and lid eliminate the guessing game. These are the workhorses for implementing a true organizing system.
Where this goes sideways: Buying square containers for round cans. Cans are round. A square can organizer that fits your shelf depth will still leave wasted space. The solution is a stepped can rack or a tiered shelf that angles the labels upward.
Your second priority is a can organizer. A simple wire rack that sits on your shelf and rolls cans forward is the easiest win. You load from the back, take from the front, and the FIFO system runs itself. No more digging for the black beans. For very small pantries, a vertical can riser that holds cans in a single column is even better. It uses the height you have.
Your third priority is the lazy Susan. Not one, two. A 10-inch diameter turntable belongs in any corner or on any shelf deeper than your arm’s reach. Use one for cooking oils, vinegar, and soy sauce. Use a second for nut butters, jams, and honey. The spin function saves you from the knock-over-three-bottles domino effect.
Building Zones, Not Just Rows
Zoning is what makes a system sustainable. A zone is a category of items with a specific home. In a small space, zones prevent category creep, where snacks end up with baking supplies.
The eye-level zone is for daily drivers. This shelf holds your most-reached-for items: the coffee, the oatmeal, the go-to snacks, the cooking oils on their lazy Susan. If you use it at least three times a week, it earns this prime real estate. Nothing here should require a step stool or moving another item.
The baking zone consolidates all the specials. Flour, sugar, baking powder, vanilla, chocolate chips, sprinkles. It all goes together, preferably in those airtight containers. If your shelves are tall enough, use a stacking bin system here. One bin for flours, one for sugars, one for extras. This keeps the powder spills contained.
The canned goods zone lives on its organizer. This is a functional zone defined by its tool. The rack is the zone. This strict boundary stops you from tossing a box of crackers in front of the cans and breaking the FIFO flow.
The appliance graveyard gets eliminated. That bulky rice cooker you use twice a year? It doesn’t belong in a small pantry. Neither does the stand mixer if you have a cabinet elsewhere. Small pantry storage is too valuable for dormant appliances. Re-home them or seriously question how often you use them.
| Zone Name | Typical Contents | Best Storage Tool |
|---|---|---|
| Daily Drivers | Coffee, cereal, snacks, oils | Lazy Susan, front-of-shelf bins |
| Baking Central | Flour, sugar, baking soda, spices | Airtight containers (OXO Pop, Rubbermaid) |
| Canned Goods | Beans, tomatoes, soup, tuna | Rolling can organizer or tiered rack |
| Bulk & Backstock | Extra pasta, rice, paper towels | High shelf with labeled bins |
What Not to Do: The Quick Fail Checklist
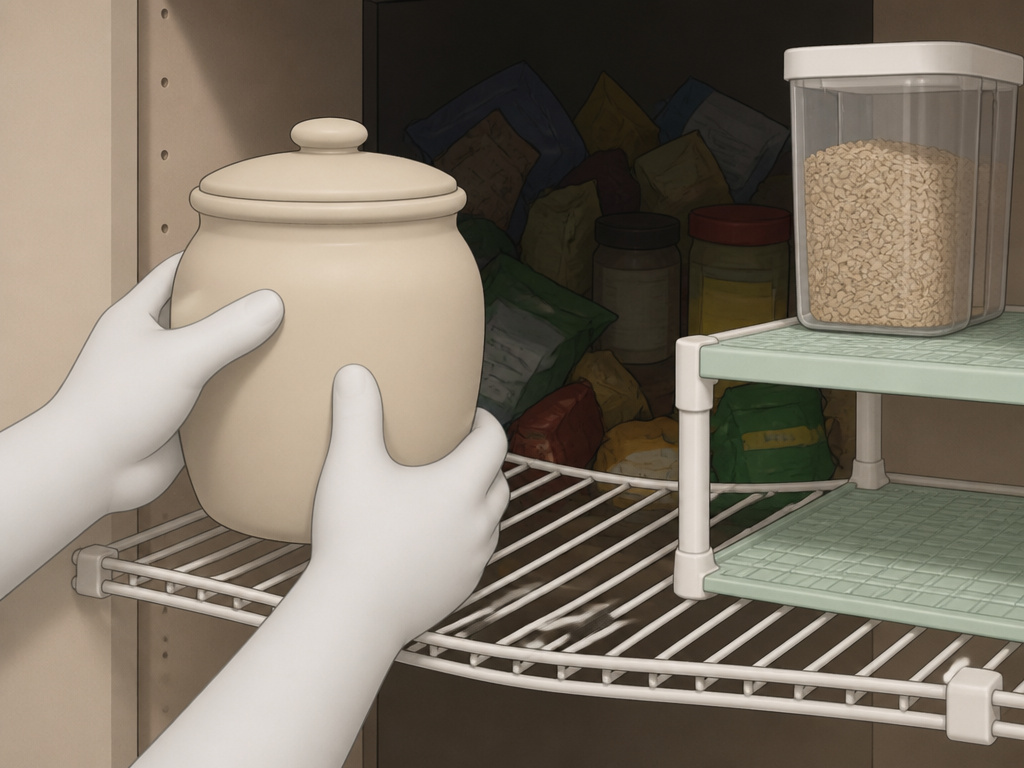
Good organization avoids these traps. They’re the difference between a system that lasts and one you resent in three weeks.
Don’t decant into opaque containers. Clear is non-negotiable. If you can’t see it, you will forget it exists. This is the core principle of pantry storage. The moment you hide your quinoa in a cute ceramic jar, you’ve bought a future duplicate.
Don’t use flimsy wire shelving without reinforcement. Many closet pantries come with cheap wire shelves that bow under the weight of cans and containers. Before you load up, consider adding a solid shelf liner or replacing them with wooden boards. A sagging shelf is a collapsing system.
Don’t ignore vertical space with deep shelves. If you’re dealing with deep pantry shelves, your enemy is the black hole at the back. The solution is access. Use slide-out bins or tiered shelf risers to create two visible levels.A deep shelf without pull-out access is a waste of 50% of its volume.
Worth knowing before you start: Potatoes and onions should not be stored next to each other in a pantry. They release gases that accelerate each other’s spoilage. Give them separate shelves, or better yet, store onions in a ventilated basket and potatoes in a dark, cool bag.
Don’t skip the labels. A label maker is a one-time investment that pays off every time you grocery shop. Label with the contents and the date you stored it. “Penne 10/24” is perfect. This turns your pantry organizing tips into automatic action.
Frequently Asked Questions
What is the first thing I should buy to organize my pantry?
Buy a can organizer and a lazy Susan. These two tools solve the most common small-pantry problems: lost items in the back and inaccessible corners. Everything else, containers, bins, baskets, should be purchased after you’ve completed the purge and measurement steps.
How do I organize a very narrow, closet-style pantry?
Treat it like a bookshelf. Use the full height with stacking bins or shelf risers. Prioritize slim, vertical containers. Use the inside of the door with an over-the-door organizer for spices, packets, and wraps. Every inch of width is precious, so avoid bulky containers that eat into the narrow walkway space.
Are clear plastic containers safe for food storage?
Yes, if they are labeled as food-safe (look for a cup-and-fork symbol or “BPA-free” designation). Containers like OXO Pop and Rubbermaid Brilliance are made from materials approved for food contact. Avoid using decorative or non-food-grade bins for direct food storage.
How often should I reorganize my pantry?
Do a mini-review every time you grocery shop, putting new items behind old ones. Do a full, empty-it-out purge and reassessment every 6 to 12 months. Seasonal changes are a good trigger. You’ll catch expired goods and adjust zones based on your changing cooking habits.
What’s the best way to organize spices in a tiny pantry?
Don’t alphabetize. Group them by cuisine or frequency of use. Your go-to salt, pepper, and garlic powder belong front and center. Use a tiered spice rack, a small lazy Susan, or a drawer insert. The goal is to see all the lids at once without moving bottles.
The Bottom Line
Organizing a small pantry is an exercise in constraints. Your shelf depth is the boss. Food safety timelines are the schedule. Your actual cooking habits are the blueprint.
Start with the empty shelf. Measure it. Let those numbers veto any container that doesn’t fit. Use tools like can organizers and lazy Susans to create access, not just storage. Label with dates, and be ruthless about what earns a spot in your prime eye-level zone.
The system that works is the one built on your pantry’s real dimensions and your kitchen’s real rhythm. Keep it visible, keep it dated, and keep the appliance graveyard somewhere else.
