
A Step-by-Step Guide on How to Use a Dryer’s Drying Rack
This post contains affiliate links. As an Amazon Associate, we earn from qualifying purchases.
To use a dryer’s drying rack, you must match three things: the correct installation for your brand, the right items (like sweaters and tennis shoes), and the specific “Timed Dry” or “Rack Dry” cycle. Using any automatic or sensor-based cycle will cause the rack to fail, and heat will melt foam or rubber components within one cycle.
The “Timed Dry only” rule isn’t a suggestion. It’s the electrical and mechanical guardrail that stops the rotating drum from trying to tumble a stationary rack. Get the cycle wrong, and you’re asking the motor to fight itself.
What follows: the exact installation steps that differ by brand, the one cycle you must select, and the short list of items that actually belong on the rack, plus the ones that will ruin it.
Key Takeaways
- Use only “Timed Dry” or “Rack Dry” cycles. Automatic cycles rely on a tumbling motion to sense dryness; a stationary rack fools the sensor and the dryer will run indefinitely.
- Installation is brand-specific. Whirlpool/Maytag racks hook into the door opening; Samsung and Fisher & Paykel legs slot into the rear drum wall.
- Never mix a rack load with a regular tumble load. The tumbling clothes will snag and pull items off the rack, damaging both.
- Air circulation is non-negotiable. Overloading blocks airflow, creating damp pockets that mildew within hours.
- Foam, rubber, or plastic items require “Air Only” or “No Heat.” Even low heat can warp shoe inserts or melt glued seams.
How a Dryer Drying Rack Actually Works
The rack sits still while the drum rotates around it. Heated air is blown through the stationary items. This is the opposite of normal drying, where tumbling exposes all sides of a garment to hot air.
A dryer’s drying rack is a stationary platform installed inside the rotating drum. It is intended solely for use with manual “Timed Dry” or dedicated “Rack Dry” cycles, which provide continuous, non-sensing heat and airflow without the tumbling action that would dislodge items. Automatic cycles that use moisture sensors will not function correctly with a stationary load.
That mechanical mismatch is why the cycle choice is absolute. An “Auto Dry” cycle waits for the moisture sensor to trip. With no tumbling, the sensor never reads an average dryness, so the dryer just keeps heating. You can literally burn out the heating element on a single long cycle.
Why does the drum still turn? The motor and belt turn the entire drum assembly; there’s no way to disconnect it just because the rack is in. The rack is designed to clear the rotating drum walls, another reason item placement matters.
Step-by-Step: How to Install and Load Your Drying Rack
The process splits here by brand. Getting the installation wrong means the rack can dislodge mid-cycle.
For Whirlpool, Maytag, and Many Kenmore Models
- Open the dryer door. Find the two small holes in the metal frame of the door opening.
- Align the two front hooks on the rack with those holes. Press down firmly until the hooks seat fully.
- Rest the rear support of the rack on the back ledge of the dryer drum.
- Load items flat on the rack’s surface. Ensure nothing hangs over the edge or between the wires.
- Leave a 2-inch gap between items and from items to the drum wall.
- Select “Timed Dry”. Do not choose “Auto Dry,” “Normal,” or any sensor cycle.
- Set heat to “Low” or “Air Only” for delicates, or “Medium” for sturdier items like canvas shoes.
For Samsung and Fisher & Paykel Models
- Insert the rear legs first. Tilt the rack and slot the two rear legs into the recessed areas on the dryer’s rear wall.
- Lower the front legs. Press down so the front legs click into slots on or near the lint filter grille.
- Verify stability. Gently shake the rack. It should not wobble.
- Load items evenly. Distribute weight to prevent tipping as the drum rotates.
- Select “Rack Dry”. On these models, this dedicated cycle is often the only option that will work correctly. > Where this goes sideways: Using a regular “Cotton” or “Mixed” cycle with the rack installed. On a Fisher & Paykel, the control panel will display a “check rack” error and pause the cycle until you fix it.
- Set the drying time. These cycles usually default to 60 minutes; adjust based on item thickness.
| Brand | Front Attachment | Rear Attachment | Mandatory Cycle |
|---|---|---|---|
| Whirlpool/Maytag | Hooks into door frame | Rests on back ledge | Timed Dry |
| Samsung | Legs into lint filter slots | Legs into rear wall slots | Rack Dry |
| Fisher & Paykel | Legs into lint filter slots | Legs into rear wall slots | Rack Dry |
| Kenmore (some) | Hooks into door frame | Rests on back ledge | Timed Dry |
The one step nobody skips: Checking the lint screen after a rack cycle. Lint from sweaters or towels collects on the screen just like a regular load, but it often packs down tighter. A clogged screen cuts airflow by half, doubling drying time on your next regular load.
Which Items Should (and Shouldn’t) Go on the Rack?
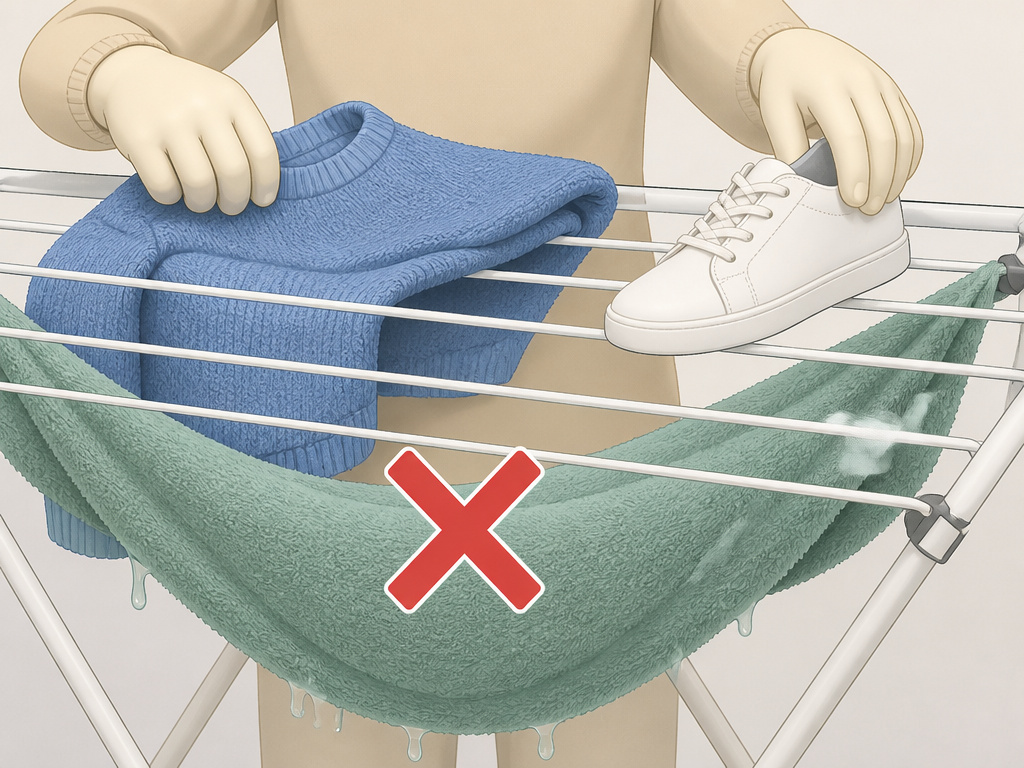
The rack is for items that tumbling would damage. That’s a shorter list than most people think.
Do use it for:
- Sweaters & Knits: Tumbling mats wool and felts cashmere. The rack preserves shape.
- Tennis Shoes & Sneakers: Dries them without the banging that breaks down foam midsoles.
- Hats & Structured Caps: Keeps brims from deforming.
- Stuffed Toys: Prevents limbs from getting tangled and torn.
- Delicate Bras or Lingerie: Avoids underwire snagging and strap stretching.
Do not use it for:
- Items with foam, rubber, or plastic components (like some shoe inserts or waterproof linings) unless you use “Air Only” (no heat). Low heat can still soften adhesives.
- Dripping wet items. Wring or spin them first. Excess water drips onto the heating element or drum, causing steam, rust, and a burnt smell.
- A single, heavy, sopping-wet towel. It will sag through the rack wires, unbalance the drum, and sound like a wrecking ball.
- Any item you’d normally line-dry that contains elastic. The heat, even on low, degrades spandex and elastic waistbands faster than air drying.
Common mistake: Throwing a pair of running shoes with removable foam insoles onto the rack on a “Low” heat setting. The insoles warp permanently in 40 minutes. Pull them out and dry them separately with no heat.
The Critical Choice: Picking the Right Dryer Cycle and Settings
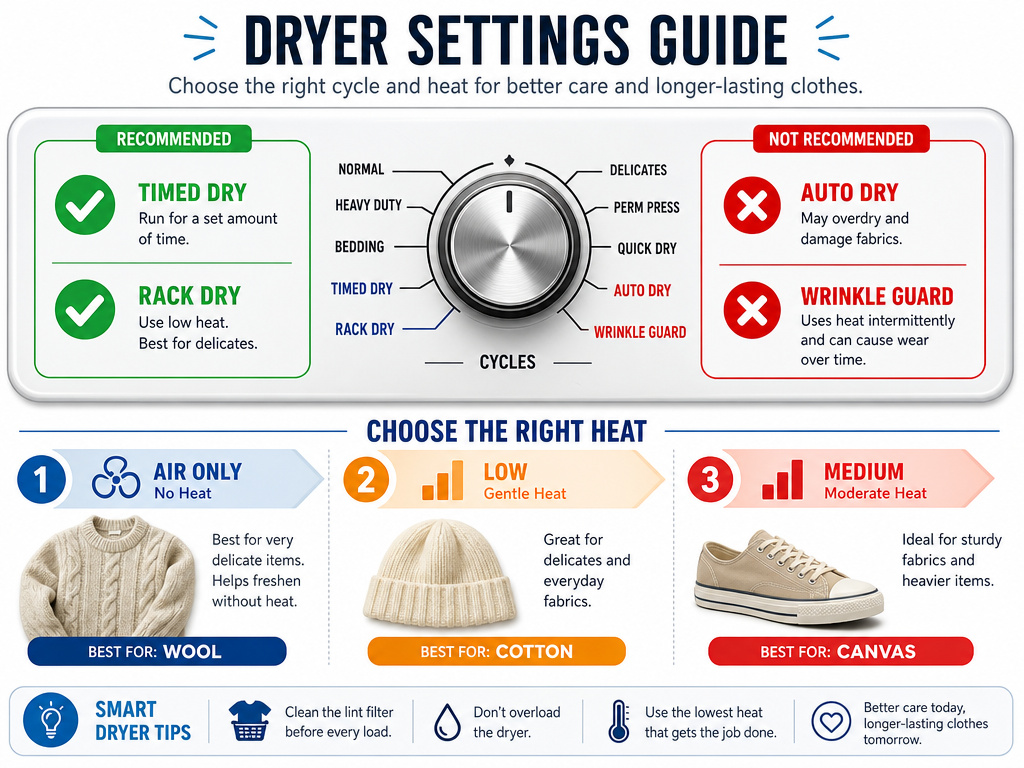
This is the make-or-break decision. The labels vary, but the principle doesn’t.
| Cycle Label | What It Means | Use With Rack? | Why or Why Not |
|---|---|---|---|
| Timed Dry / Air Only | Manual timer, no moisture sensing, optional heat. | YES | The dryer runs for a set time regardless of moisture. Safe for stationary rack. |
| Rack Dry | Dedicated stationary-dry cycle. | YES | Manufacturer-programmed for rack use. Often the only allowed cycle. |
| Auto Dry / Normal | Uses moisture sensor to end cycle. | NO | Sensor needs tumbling to work. Cycle may never end, over-drying items. |
| Wrinkle Guard / Wrinkle Free | Tumbles without heat after drying. | NO | Post-cycle tumbling will knock items off the rack. |
| Delicate / Low Heat | Often a sensor cycle with low heat. | NO | Still uses moisture sensing. Do not assume it’s safe. |
Heat settings follow a simple rule: The more synthetic or delicate the item, the less heat you use. * Air Only / No Heat: For plastic, rubber, foam, or very delicate woolens. It’s just a fan. * Low: For most sweaters, acrylic blends, and structured items. * Medium: For canvas shoes, cotton hats, and sturdy stuffed toys.
Time settings are a guess-and-check game. Start with 30 minutes for small items like a hat. For a pair of canvas shoes, try 60 minutes. Check for dampness at the core, like the tongue of a shoe, and add time in 15-minute increments.
Troubleshooting Common Drying Rack Problems
The rack won’t stay in place.
Double-check your brand’s installation. For hook-style racks, the hooks must snap into the holes, not just rest against them. For leg-style racks, ensure the rear legs are fully seated in the recesses on the back wall, not just leaning on the drum.
Items are still damp after a full cycle.
You likely overloaded the rack. Air needs space to flow around each item. Reduce the load by half. Also, check the lint screen; a clogged screen from a previous rack cycle is a frequent culprit.
The dryer makes a loud thumping noise with the rack in.
Something is hanging off the rack and hitting the rotating drum. Stop the dryer immediately. Reposition the item so no part overhangs the rack’s edges.
A Fisher & Paykel dryer displays an error code (like “E64” or “Check Rack”).
The rack has become dislodged or a garment fell off. The cycle is paused. Open the door, re-seat the rack securely, replace any fallen items, and close the door to resume.
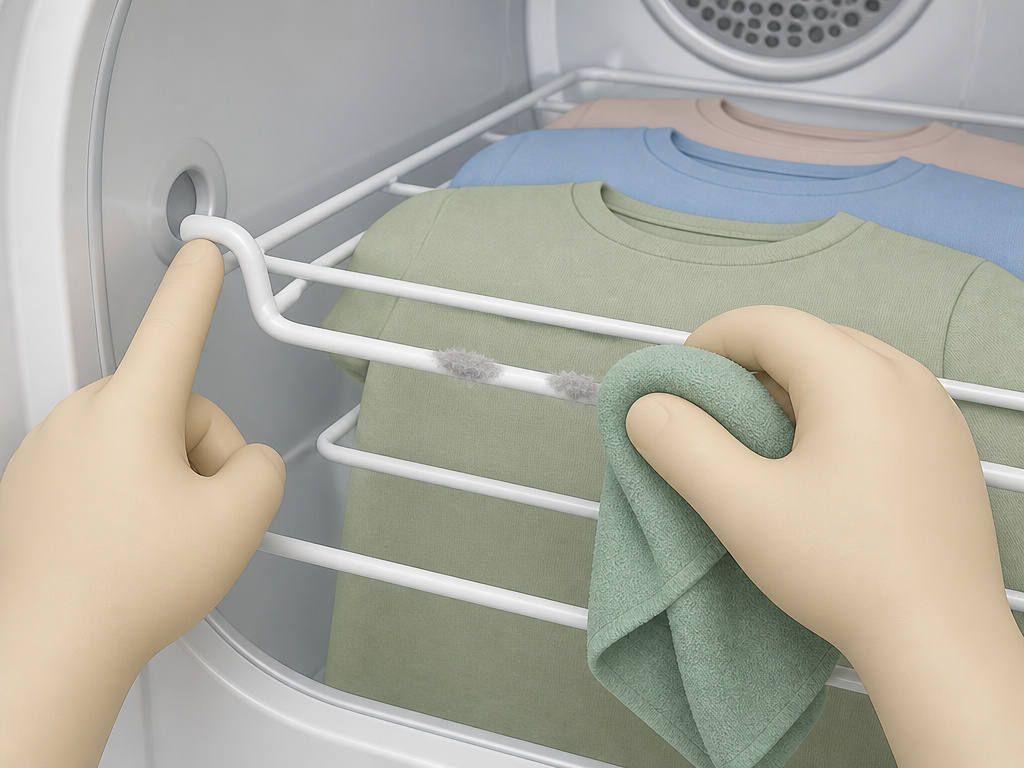
Easy to miss: The rack itself can be a source of lint. Wipe it down with a damp cloth every few uses, especially after drying towels or sweaters. Built-up lint transfers onto dark items.
Drying Rack Alternatives and When to Use Them
The dryer rack isn’t always the best tool. For some items, other methods are safer or faster.
A foldable indoor drying rack is better for very heavy, wet items or loads larger than the dryer rack can handle. It puts no strain on your appliance.
A wall-mounted dish rack or a simple towel bar is superior for drying vegetables as part of preserving vegetables, you want maximum air exposure, not the enclosed humidity of a dryer.
For baked goods like banana bread, a wire cooling rack is essential. It allows steam to escape from the bottom, preventing a soggy crust, a key step in storing baked goods so they keep their texture.
The bottom line: Use the dryer rack for appliance-friendly, heat-tolerant items that can’t tumble. For everything else, especially water-heavy or food-related drying, reach for a dedicated tool.
Frequently Asked Questions
Can I dry shoes on a dryer rack?
Yes, but remove any insoles first. Dry the shoes on the rack using “Air Only” or “Low” heat for up to 60 minutes. Dry the insoles separately, flat on the rack with no heat. This prevents the foam from warping.
What is the Samsung drying rack part number?
For Samsung dryers where the rack is an accessory, the official part code is DC93-00374G. You can order it through Samsung parts dealers or appliance retailers.
Can I use the drying rack on any dryer cycle?
No. You must use only “Timed Dry,” “Air Only,” or the specific “Rack Dry” cycle. Using an automatic, sensor-based cycle can cause the dryer to overheat and potentially damage the items or the appliance.
How do I clean my dryer’s drying rack?
Wipe it with a damp cloth to remove lint and debris. For stuck-on residue, use a mild soap solution, rinse, and dry it completely before reinstalling. Do not put the metal rack in the dishwasher.
Is it okay to put a sweater on the drying rack?
Yes, it’s one of the best uses for the rack. Use the “Low” heat or “Air Only” setting and dry for 20-30 minutes. This prevents the sweater from shrinking or becoming matted from tumbling.
Before You Go
Using a dryer rack comes down to respecting its limits. It’s a stationary tool in a rotating machine, so the “Timed Dry only” rule is law. Install it right for your brand, hooks for Whirlpool, legs for Samsung. Load it lightly so air can move. And keep foam, rubber, and plastic on “Air Only” unless you want them misshapen.
For everything else, from cooling cookies to air-drying herbs, a simple wire cooling rack or a foldable stand is the more versatile choice. The dryer rack solves one specific problem: drying tumble-sensitive items quickly indoors. Now you know the three steps that guarantee it works.
