
Butcher Paper Same as Freezer Paper? The Coating Explained
This post contains affiliate links. As an Amazon Associate, we earn from qualifying purchases.
Butcher paper and freezer paper are not the same. The critical difference is a thin polyethylene plastic coating on one side of freezer paper, which creates a moisture barrier for freezing food. Butcher paper is uncoated, making it breathable and unsuitable for long-term freezer storage. Using the wrong one leads to rapid freezer burn and meat quality loss.
That plastic coating is the whole game. It stops air and moisture from moving in or out. Without it, meat dehydrates in the freezer, turning dry and grey within weeks.
What follows: the exact science of that coating, when each paper actually works, a step-by-step wrap that locks out air, and the three storage methods that beat freezer paper outright.
Key Takeaways
- Freezer paper has a polyethylene plastic coating on one side for a moisture barrier; butcher paper has no coating and is porous.
- Use freezer paper for wrapping raw meat, poultry, and fish for the freezer. Always place the shiny plastic side against the meat.
- Use butcher paper for wrapping cooked meats (like barbecue), lining counters, or short-term fridge storage of dry items.
- Never put freezer paper in the oven. The plastic coating can melt, smoke, or catch fire.
- For storage longer than two months, vacuum sealing or a double-wrap system with plastic wrap provides far better protection than freezer paper alone.
The Core Difference: A Plastic Coating
Look at a roll of freezer paper. One side has a slight sheen. That’s a thin layer of polyethylene plastic, laminated onto a sturdy paper base. Butcher paper feels the same on both sides because it’s just paper, no coating.
Freezer paper is a two-ply paper that consists of a paper outer layer and a thin plastic inner layer to ensure any liquid that may purge from the meat is contained. This makes it the most cost-effective packaging option for an airtight seal when done properly.
That plastic layer is a barrier. It blocks moisture vapor from escaping your steak and stops ambient air from getting in. In freezer terms, “airtight” and “moisture-vapor resistant” are the specs that matter. Freezer paper is designed to hit them. Butcher paper is designed to breathe, which is why it’s the gold standard for wrapping a smoked brisket, it lets steam escape so the bark stays crisp.
The coating also changes how you handle the paper. You must place the plastic side against the food. This prevents the meat from sticking to the paper and creates a tighter seal. Getting this wrong, putting the paper side against the meat, defeats the entire purpose.
Why the Coating Exists (And Why It Works)
The polyethylene coating isn’t just a spray-on treatment. It’s a continuous film. This matters because it creates a true seal when you fold and tape it, unlike the microscopic gaps in porous butcher paper. When you wrap a roast, you’re essentially creating a mini plastic bag out of paper. The paper layer provides structure and puncture resistance; the plastic layer does the actual preserving.
Without this barrier, water molecules sublime directly from the meat’s surface into the freezer’s dry air. This is freezer burn. It starts as small greyish-white patches and makes the texture dry and stringy. The UGA freezing products PDF notes that proper packaging is the first defense against this quality loss. Freezer paper provides that defense. Butcher paper accelerates the problem.
| Characteristic | Freezer Paper | Butcher Paper |
|---|---|---|
| Coating | Polyethylene plastic on one side | None (uncoated) |
| Primary Use | Freezing raw meats, long-term cold storage | Wrapping cooked meats (BBQ), short-term storage, lining surfaces |
| Barrier Properties | Moisture-vapor resistant, airtight when sealed | Porous, breathable |
| Oven Safety | No — coating melts/burns | No — will burn at high heat |
| Best For | Creating a moisture barrier | Allowing steam to escape |
When to Use Each Paper (And When to Avoid Them)
Your choice depends on the job: keeping moisture in or letting it out.
Reach for freezer paper when:
- You’re packaging raw meat, poultry, or fish for the freezer. This is its sole, perfect job.
- You need to overwrap store packaging. The foam-and-plastic tray meat comes in is air-permeable. The USDA meat packaging guide states you can freeze meat in it for a month or two, but for longer storage, an overwrap like freezer paper is needed to prevent freezer burn.
- You want a cheap, effective moisture barrier for non-heat applications.
Reach for butcher paper when:
- You’re wrapping hot, cooked meat like pulled pork or brisket. The paper absorbs grease while letting excess steam vent, preserving the bark.
- You need a disposable, absorbent liner for a countertop during food prep.
- You’re wrapping sandwiches or dry goods for short-term fridge storage (a few days).
Common mistake: Using freezer paper for baking. The polyethylene coating melts at oven temperatures, potentially releasing chemicals into your food and creating a smoky mess. That’s a job for parchment paper.
The Products That Confuse Everyone
This is where people grab the wrong roll from the drawer. Know these three:
- Parchment Paper: Coated with silicone, not plastic. It’s non-stick and heat-resistant up to about 420°F. Use it for baking cookies, lining pans, and roasting vegetables.
- Wax Paper: Coated with a thin layer of wax (usually paraffin). It’s water-resistant but not heat-safe. The wax melts in the oven. Use it for wrapping cheese or separating burger patties before freezing.
- Freezer Paper: Coated with polyethylene plastic. It is not oven-safe. Its only job is cold storage.
Mixing these up has consequences. Wax paper in the oven makes a puddle. Freezer paper in the oven makes smoke. Butcher paper in the freezer makes wasted meat.
How to Wrap Meat with Freezer Paper (The Right Way)
A sloppy wrap lets in air. A tight wrap locks it out. The goal is “skintight” packaging, where minimal air is trapped inside. The South Dakota State University Extension emphasizes this for preventing dehydration.
You need three things: a clean surface, a roll of quality freezer paper (like Reynolds), and freezer tape or a good-quality masking tape.
Step 1: Cut and Orient.
Cut a sheet about three times the length of your meat. Place it with the shiny plastic side facing up. Your meat will go directly onto this coated surface.
Step 2: The Butcher Wrap (for roasts and irregular cuts).
This method, illustrated in the UGA freezing products PDF, is best for bulky items. 1. Place the meat in the center of the sheet. 2. Fold the bottom corner up and over the meat, tucking it snugly underneath. 3. Fold the left and right sides over the meat, one at a time, creating neat, angled folds like you’re wrapping a gift. Crease the paper sharply. 4. Roll the package away from you, keeping tension on the paper. The final seam should be on top. 5. Seal all seams and the end flap with tape. Label it with the contents and date.
Step 3: Handling Problem Cuts.
For bone-in chops or stew meat, the SDSU Extension suggests a trick: place a layer of plastic wrap between individual pieces before the final paper wrap. This makes them easy to separate later. For very bony cuts, use two sheets of paper for extra puncture resistance.
Where this goes sideways: Wrapping irregular shapes loosely. An air pocket against a bone becomes an ice crystal factory. Within six weeks, that spot will be freezer-burnt. Press the paper into every crevice.
The final package should feel firm, with no loose paper that can flutter. If it does, re-wrap it. The few minutes you save now cost you the quality of the meat later.
Freezer Paper’s Limits and Better Alternatives
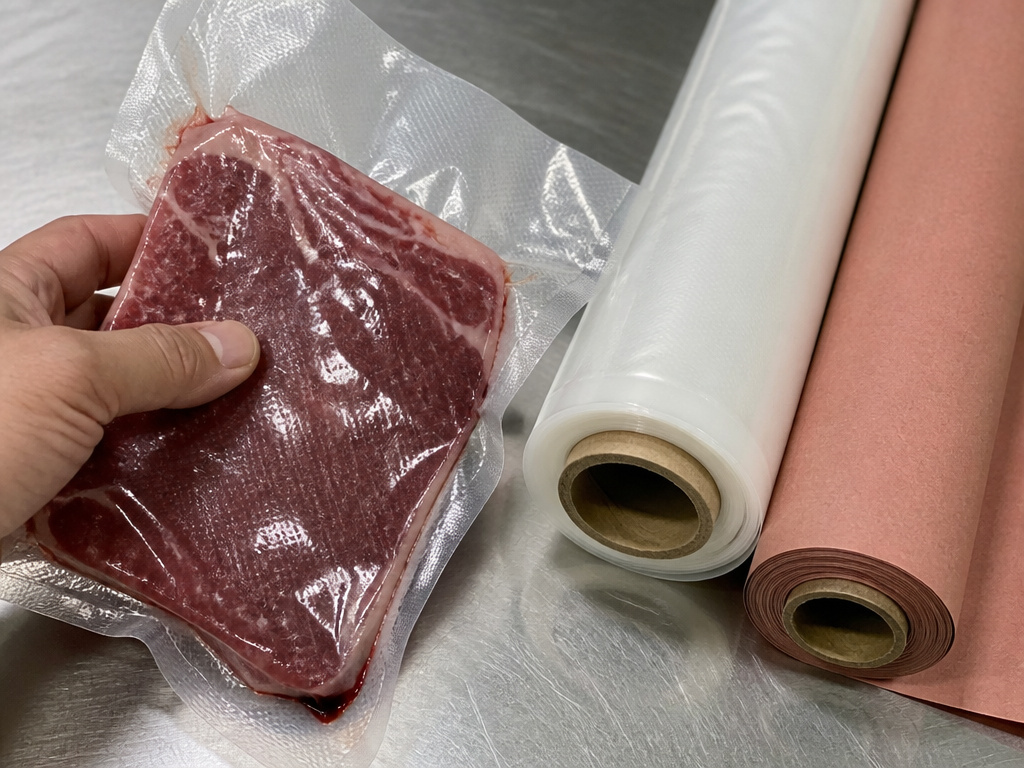
Freezer paper is good, but it’s not the best. Its protection is minimal compared to more modern methods. Think of it as a solid B-grade option for medium-term storage.
For cuts you’ll use within two months, a proper freezer paper wrap is sufficient. For anything longer, a side of beef, seasonal game, or bulk poultry, you need an upgrade.
Option 1: The Double-Wrap System.
This is a professional kitchen trick. First, wrap the meat tightly in plastic wrap (cling film), squeezing out every air bubble. Then, wrap it in a layer of butcher paper or a second layer of plastic wrap. The plastic provides the barrier; the outer layer protects against tears and freezer odors. This method often outperforms a single layer of freezer paper.
Option 2: Vacuum Sealing.
This is the gold standard. A vacuum sealer removes almost all the air from a specially designed plastic bag before sealing it. The K-State freezing food packaging article confirms that looking for the word “freezer” on packaging is key, and vacuum bags are made for this. It’s more expensive upfront but eliminates freezer burn for years, not months. It’s the only method I use for long-term storage of garden harvests or bulk meat purchases.
Option 3: Freezer-Grade Plastic Containers.
For stew meat, ground beef, or leftovers, rigid containers labeled for freezer use work well. They are made from thicker plastic that resists cracking at low temperatures. Leave about a half-inch of headspace for liquids to expand.
Freezer paper’s role is clear. It’s a specific tool for a specific task. Understanding its coating is what separates usable frozen food from wasted, burnt-out disappointment.
Frequently Asked Questions
Can you put freezer paper in the oven?
No. Never. The polyethylene coating will melt at oven temperatures, potentially releasing fumes and causing a fire hazard. Freezer paper is for cold storage only. For baking, use parchment paper.
Is freezer paper the same as wax paper?
No. Wax paper has a wax coating; freezer paper has a plastic coating. Neither are oven-safe, but wax paper is better for wrapping cheeses or separating foods, while freezer paper is specifically for freezing meats.
Can you freeze meat in butcher paper?
Not for the long term. Butcher paper is porous, so air will reach the meat and cause freezer burn within a few weeks. For short-term freezing (under a month), you can use it if you first wrap the meat tightly in plastic wrap, then use the butcher paper as an outer protective layer.
Which side of freezer paper touches the food?
The shiny, plastic-coated side should always touch the food. This creates the moisture barrier and prevents sticking. If you put the paper side against the meat, moisture will soak through and defeat the purpose.
How long can meat last in freezer paper?
With a perfect, airtight wrap, most meats will maintain good quality for 4 to 6 months. Ground meats and poultry have a shorter shelf life, around 3 to 4 months. For longer storage, use a vacuum sealer.
Can you reuse freezer paper?
It’s not recommended. Once used, the plastic coating can be compromised with tiny tears or food residues, reducing its effectiveness. It’s a single-use product for food safety and performance.
The Bottom Line
Butcher paper and freezer paper are different tools. Freezer paper’s hidden plastic coating is what makes it a freezer staple, while butcher paper’s breathability makes it a barbecue essential. Confusing them ruins food.
For freezing, remember the shine. Place that coated side tight against your meat, wrap it like a gift, and seal it well. For anything you plan to keep longer than a season, invest in a vacuum sealer. It’s the difference between merely storing food and preserving it.
