
A Complete Guide on How to Sterilize Canning Jars Properly
This post contains affiliate links. As an Amazon Associate, we earn from qualifying purchases.
To sterilize canning jars, you must boil or steam them for 10 minutes at elevations under 1,000 feet. This is only mandatory when your recipe’s processing time is less than 10 minutes. For longer processing times, the canning process itself sterilizes the jars, making pre-sterilization an unnecessary step.
The 10-minute threshold is the time required at a full boil to destroy the specific heat-resistant bacterial spores that cause food spoilage in a low-acid environment inside a clean jar. Shorter processing times don’t reach that thermal kill point, which is why jams and some pickles need a sterile starting jar.
What follows: the exact conditions that trigger the sterilization requirement, the two approved methods (boiling-water and atmospheric steam), the precise altitude math, and what you should never do to your lids. By the end, you’ll know whether your next batch needs the extra step or if you can skip it safely.
Key Takeaways
- Sterilize jars only when your recipe’s processing time is under 10 minutes. For 10+ minute processes, the canner does the job.
- The sterilization countdown starts when water reaches a full, rolling boil or steam hits 212°F, verified by a thermometer.
- Add 1 minute of sterilization time for every 1,000 feet above sea level. At 5,000 feet, boil for 15 minutes.
- Never boil the flat metal lids. Heat damages the sealing compound. Wash them in hot, soapy water instead.
- Use the hot water from sterilizing jars to process your filled jars, saving time and energy.
The 10-Minute Rule: When Sterilization is Mandatory
Do you actually know your recipe’s processing time? That number, not a guess about cleanliness, decides everything.
Processing times under 10 minutes demand pre-sterilized jars. Processing times of 10 minutes or longer do not.
This rule comes directly from the National Center for Home Food Preservation guide and the UC Master Food Preserver canning basics PDF. It’s based on thermal dynamics. A full 10 minutes of boiling heat (212°F) is needed to destroy spoilage organisms like mold spores and yeast that could survive on a jar’s surface. If your recipe’s processing time provides that full 10-minute exposure, sterilization happens during canning. If the processing time is shorter, say, 5 minutes for a jam, the jar doesn’t spend enough time at lethal temperatures unless you sterilize it first.
| Scenario | Pre-Sterilize Jars? | Why |
|---|---|---|
| Jam, jelly, or pickle with <10 min process | Yes | Process time is insufficient to kill surface microbes. |
| Fruit, tomato, pickle with ≥10 min process | No | The canning process itself sterilizes for the required duration. |
| Vegetables, meat, poultry (pressure canned) | No | Pressure canning reaches higher temperatures; jars are sterilized during processing. |
| Always want to sterilize anyway | Optional | Wastes time and fuel, but won’t harm the food. |
This rule applies to boiling-water canning. Pressure canning is different, the higher temperatures (240°F+) achieved inside a pressure canner are more than sufficient for sterilization, so pre-sterilizing jars for vegetables or meats is never required.
Common mistake: Sterilizing jars for every recipe “to be safe.” You’re adding 30+ minutes of active prep and boiling for no safety gain. That time and energy cost adds up over a canning season.
The Edge Cases: Jams, High Altitude, and Steam
The “under 10 minutes” rule targets high-acid, sugary, or pickled foods where the primary preservation comes from acidity or sugar, not just heat. These often have short processes.
Some jam recipes allow you to increase the process time to 10 minutes to avoid pre-sterilization. This works for most fruit pectin gels. But if your fruit is low in pectin, that extra boiling can break down the gel structure, leaving you with a runny syrup. In that case, stick to the shorter time and sterilize the jars.
Altitude changes the boiling point of water. Water boils at a lower temperature as elevation increases, which reduces its microbial killing power. The official correction is straightforward.
How Altitude Changes Your Sterilization Time
The 10-minute clock starts at sea level. If you live above 1,000 feet, your water boils at a slightly lower temperature. To compensate, you must boil longer.
Add 1 minute of sterilization time for each additional 1,000 feet of elevation.
This adjustment is specified in the USDA Complete Guide to Home Canning PDF to ensure the thermal kill is equivalent to 10 minutes at sea level.
| Your Elevation | Sterilization Boil Time |
|---|---|
| 0 – 1,000 feet | 10 minutes |
| 1,001 – 2,000 feet | 11 minutes |
| 2,001 – 3,000 feet | 12 minutes |
| & so on… | +1 min per 1,000 ft |
You use the same adjustment for your recipe’s processing time. If a jam processes for 10 minutes at sea level and you live at 3,000 feet, you must process it for 12 minutes. If you’re sterilizing jars for that jam, you also boil them for 12 minutes.
Forgetting this is how jars that sealed perfectly at your mom’s house (at sea level) fail at your mountain cabin. The math is non-negotiable.
Step-by-Step Sterilization: Two Approved Methods
You have two equipment choices: a standard boiling-water canner or an atmospheric steam canner. Both work if you follow the specifics.
Wash jars in hot, soapy water and rinse thoroughly. Inspect the rims for chips or cracks. A flawed rim cannot seal. This cleaning step is mandatory, even for brand-new jars straight from the box.
Method 1: Boiling-Water Canner
This is the classic, most referenced method. The key is the water level.
- Place clean jars upright on the canner rack. Fill the canner with hot (not boiling) water until it covers the jars by at least one inch. This ensures the entire jar is submerged at a lethal temperature.
- Cover the canner and bring to a full, rolling boil. Only now start your timer for 10 minutes (plus altitude adjustment).
- After sterilizing, reduce heat to a simmer. Keep the jars in the hot water until you are ready to fill them. This prevents thermal shock when you add hot food.
- Remove jars one at a time. Carefully pour the hot water from inside each jar back into the canner. This preserves the hot water you’ll use to process the filled jars later.
Method -2: Atmospheric Steam Canner
Atmospheric steam canners are lighter and use less water. They rely on pure steam at 212°F, which requires verification.
- Place clean jars upright on the canner rack. Add water to the base as per your canner’s manual, usually just a few inches.
- Seal the lid with the vent holes facing away from you. Turn the heat to high.
- Heat until a calibrated thermometer in the vent reads 212°F. This confirms you have pure, saturated steam. Now start your timer for 10 minutes (plus altitude adjustment).
- Reduce heat to maintain steam. Keep jars hot until filling.
- Remove the lid, directing steam away. Carefully lift jars out one at a time. There’s no water to pour back.
The result is the same: 10 minutes of exposure to 212°F heat. The steam method is valid only if your thermometer proves the correct temperature. Guessing doesn’t count.
What Not to Sterilize (And How to Handle Lids)
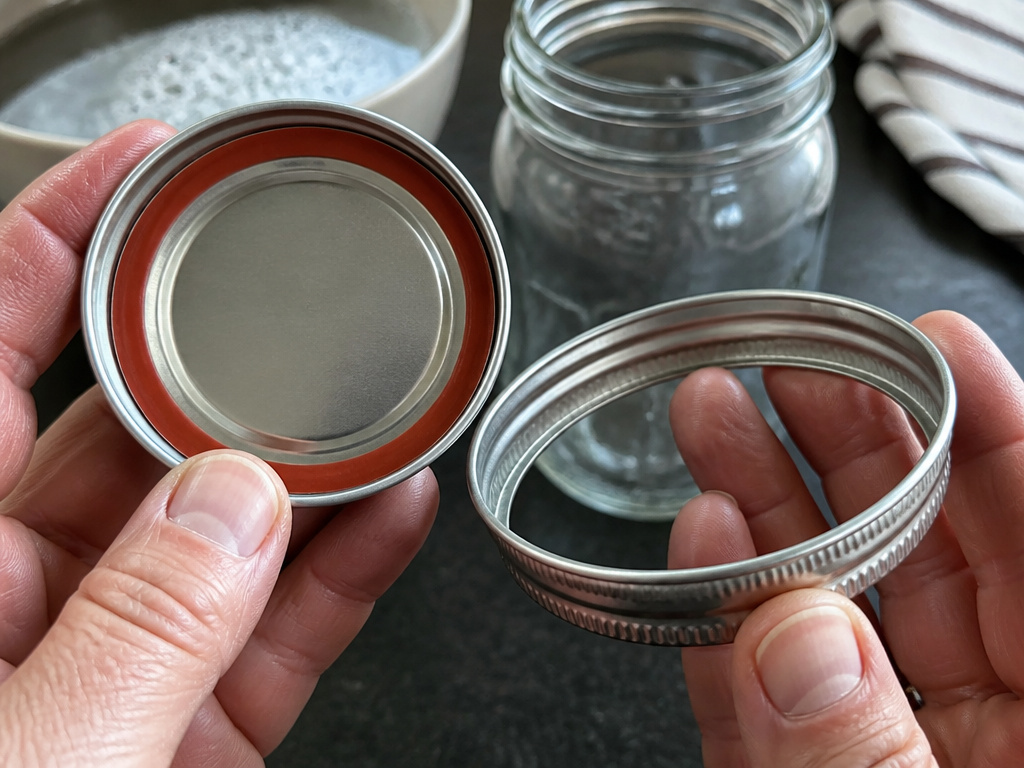
This is the part that breaks more seals than anything else.
Do not boil or sterilize the flat metal lids.
Modern two-piece lids have a sealing compound around the rim. This compound is designed to soften and flow during processing to create the vacuum seal. Boiling the lids beforehand can over-soften or damage this compound, leading to seal failures. The official instruction is simple: wash lids in warm, soapy water and rinse. No heat treatment.
The bands (screw rings) are just metal rings. They don’t seal, so they don’t need sterilization. Wash them as usual.
For long-term storage of empty jars, keep them in a clean, dry place. Don’t store them above 95°F, near a furnace, in a damp basement, or in direct sunlight. Heat and moisture can degrade the glass and any residual cleanliness.
Tools and Jars: Setting Up for Success
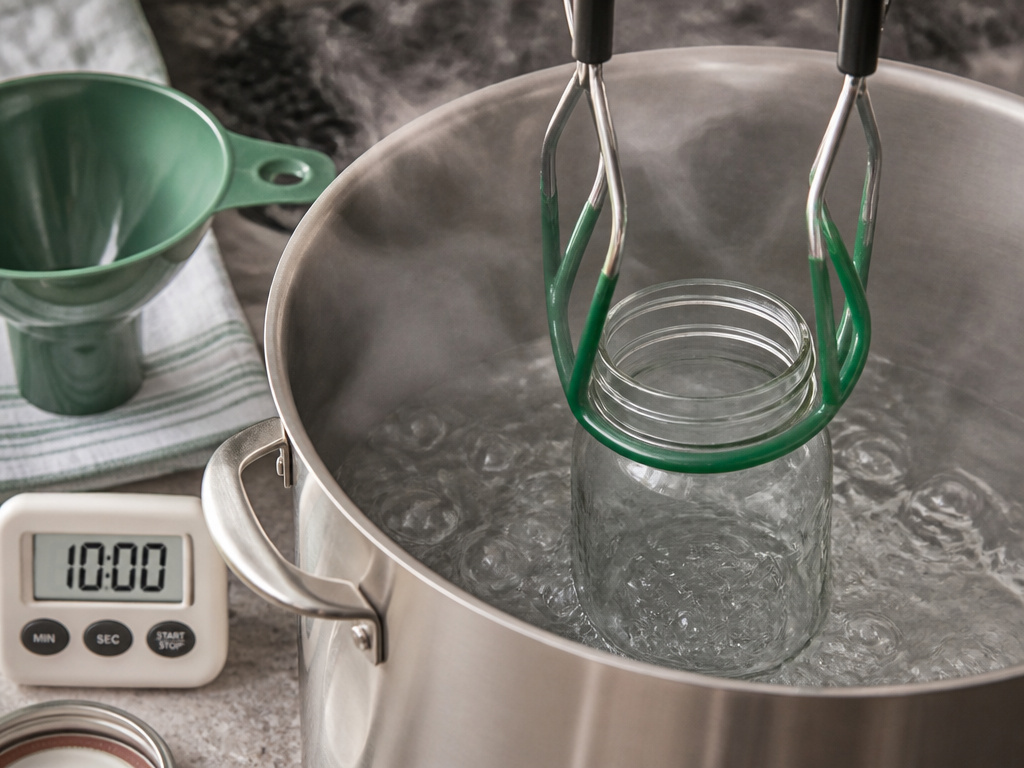
Your equipment choice matters less than your attention to the steps. You don’t need a specialty kit, but a few tools make the process reliable.
- A Boiling-Water Canner: A large, deep pot with a fitted rack. Brands like Ball and Granite Ware make dedicated canners, but any pot deep enough to cover jars by 1+ inches of water and hold them off the bottom will work.
- Jar Lifter: Essential for safely moving hot, slippery jars.
- Canning Funnel: Minimizes spills and keeps jar rims clean for sealing.
- Timer: One you can hear over the stove.
- Calibrated Thermometer: Critical if using a steam canner.
For jars, stick with standard Mason jars from Ball or Kerr. These are tempered for thermal shock. Do not use commercial mayonnaise or salad dressing jars for canning. They are more prone to breakage and have a narrower sealing surface. They’re fine for dry storage, but not for the canner.
Using the right canning supplies turns a finicky process into a routine. A good canning kit for beginners bundles these tools, but you can assemble your own.
Frequently Asked Questions
Do brand new jars need to be sterilized?
Yes, if the processing time is under 10 minutes. New jars are clean, but not sterile. They can have dust, glass particles from packaging, or microorganisms. Always wash new jars, then sterilize if required by the time rule.
Can I sterilize jars in the oven or dishwasher?
No. Oven drying does not provide the moist heat necessary for sterilization and creates a risk of thermal shock. A dishwasher’s final rinse may be hot, but it does not maintain a precise 212°F for a continuous 10 minutes. The only approved methods are boiling water or atmospheric steam.
How do I know my altitude?
Search “[your city] altitude” online. Your local county extension office or the National Weather Service site will have the exact figure. For canning, round up to the nearest 1,000-foot increment to be safe.
Why do some recipes say “sterilize jars” even for long processes?
It’s a holdover from older guidelines or an overly cautious author. According to current USDA and UC Master Food Preserver science, it’s unnecessary. Following the 10-minute rule based on your verified processing time is the scientifically sound approach.
Can I reuse jars from store-bought products?
It’s not recommended. Commercial jars (like from pickles or sauces) are often made of thinner glass not designed for repeated thermal cycling. They are more likely to crack or break in a home canner. Invest in proper durable canning jars designed for the job.
What about sterilizing jars for fermentation, like sauerkraut?
For fermentation, cleanliness is crucial, but sterilization is often overkill and can kill the beneficial bacteria you’re trying to cultivate. Wash jars and equipment in very hot, soapy water. Some fermenters pour boiling water over jars as a sanitizing step, but a full 10-minute boil is typically not needed.
Before You Go
Sterilizing canning jars is a specific response to a specific condition: a processing time shorter than 10 minutes. Hit that full boil, start the timer, adjust for altitude, and keep your lids out of the hot water.That covers it.
The goal is to know which steps you can skip. Most of your canning, pickles, tomatoes, fruits, won’t need this.But when a jam recipe calls for a 5-minute process, you now know the drill. Boil the jars, not the lids, and use that same hot water to process the filled jars. It turns two separate heating events into one efficient sequence. Your shelves will be full, and your seals will hold.
