
How to Store Dehydrated Food | The Step Most People Skip
This post contains affiliate links. As an Amazon Associate, we earn from qualifying purchases.
Store dehydrated food in airtight containers placed in a cool, dark, and dry location after a mandatory 7-10 day conditioning period. Conditioning, shaking sealed jars daily, equalizes moisture to prevent mold. Target 60°F or lower; every 18°F drop triples shelf life.
That 18-degree rule changes the math. A pantry at 78°F cuts your storage window in half compared to a basement at 60°F. The difference isn’t a few months. It’s the line between a crisp apple chip and a jar of fuzzy disappointment.
What follows: the non-negotiable conditioning ritual most guides skip, the container shortlist that actually works, and the temperature science that decides whether your food lasts six months or three years.
Key Takeaways
- You must condition. Seal dried food in a jar for 7-10 days, shaking it daily. This equalizes hidden moisture pockets. Skip it, and mold grows in the thickest piece within a month.
- Temperature is everything. Store at 60°F or lower. The Waring dehydrator manual states every 18°F drop increases shelf life 2 to 3 times. A 78°F pantry halves the lifespan of a 60°F basement.
- Glass beats plastic for long-term. Use mason jars or food-grade glass. Plastic containers can impart flavors and aren’t truly oxygen-proof for multi-year storage.
- Freeze for indefinite storage. If you want to keep vegetables beyond a year, freeze them in moisture-proof bags. Thaw in the fridge and use within four days.
- Label and rotate. Mark every container with the date. Use the oldest stock first and replenish during harvest season.
Why Conditioning is Non-Negotiable
Your food is not dry when it comes out of the dehydrator. It just looks dry.
Thick slices, uneven trays, and room humidity leave microscopic moisture pockets inside the chewiest piece. If you bag that piece immediately, the trapped water migrates. It finds a home. Within weeks, that home grows a grey-green fuzz.
Conditioning stops that.
Conditioning is the process of evenly redistributing any remaining moisture across a batch of dehydrated food after drying. It’s an essential step in the dehydration process, often overlooked, but critical for food safety and long-term storage.
The UC Master Food Preserver article calls this the overlooked step. The Iowa State conditioning instructions say it’s the forgotten ritual. They’re right.
Here is the exact sequence, sourced from extension service manuals.
- Cool the food completely on the trays. Packaging warm food creates condensation.
- Fill clean, dry glass jars two-thirds full. Do not pack tight.
- Seal the lid. Shake the jar once a day for 7 to 10 days.
- Watch the glass. If you see fog or droplets, or if pieces clump, the batch is too wet. Return everything to the dehydrator for another few hours.
The jar is your diagnostic tool. Shaking moves moisture from wetter pieces to drier ones. After a week, the entire batch reaches equilibrium. At that point, it’s safe to transfer to final long-term storage.
Where this goes sideways: Skipping the daily shake. The pieces settle. Moisture pools at the bottom of the jar, and the fruit at the top stays brittle while the bottom fruit sweats. You get a stratified batch, and the damp layer molds by day 14.
Conditioning is mandatory for fruit, tomatoes, and leathers. For herbs and thinly-sliced vegetables dried to crispness, you can sometimes skip it. Do you want to bet your year’s work on “sometimes”? Do the shake.
The Temperature Rule That Multiplies Your Shelf Life
Storage advice usually says “cool and dry.” That’s vague. Here is the specific, sourced number that matters.
The Waring Commercial 10-Tray Food Dehydrator (WDH10) instruction manual contains a critical line: “every 18˚F drop in temperature, the shelf life increases 2 to 3 times.”
That’s not linear. It’s exponential.
| Storage Temperature | Fruit Shelf Life (OSU Extension) | Vegetable Shelf Life |
|---|---|---|
| 60°F (15.5°C) | 1 year | ~6 months |
| 80°F (26.6°C) | 6 months | ~3 months |
| 40°F (4.4°C) – Refrigerated | 2-3 years (estimated) | 1-1.5 years (estimated) |
The OSU Extension safety tips provide the baseline: dried fruits last a year at 60°F, six months at 80°F. Vegetables have about half that shelf life.
Apply the Waring multiplier. Dropping from 80°F to 62°F is roughly an 18°F fall. Shelf life potentially triples. This is why a basement or cool closet outperforms a pantry next to the oven.
What does “after a year” mean? The OSU guide states nutrient loss speeds up, browning begins, and rehydration becomes less efficient. The food is safe but declines in quality.
The short version: Find the coldest, darkest, driest spot in your home. That spot is your storage goldmine. If the only option is a warm kitchen cabinet, plan for a six-month rotation, not a two-year stockpile.
The Container Shortlist: What Actually Works
Your container has one job: block air and moisture forever. Not all containers are equal.
Common mistake: Using a “sealed” plastic tub from the discount store. Most are not food-grade, and the lids warp over time, letting in humidity. You’ll smell stale, off odors within eight months.
The hierarchy is clear.
For quality & visibility: Glass jars.
Mason jars or any food-grade glass jar with a tight-sealing lid are the default. You can see condensation. They don’t impart flavors. A recommended airtight food container list will start here.
For bulk & very long-term: Mylar bags with oxygen absorbers.
This is the standard for serious long-term food storage. Seal the bag with a heat iron. The metal layer blocks all light and oxygen. Add a 300cc oxygen absorber to suck out residual air.
For the freezer: Vacuum-seal bags.
The Nesco FD-16DZD manual specifies vacuum-sealing for freezer storage. Use bags rated for freezing. Solid containers risk freezer burn from air pockets.
Avoid for long-term: Basic plastic containers.
The safety of plastic food containers is conditional. For a few months, they’re fine. Over years, plastics can off-gas and flavors migrate. They are a secondary choice.
The Oxygen Absorber Debate
Extension services disagree. The Iowa State AnswerLine says an absorber “may be added but is not necessary.” The UC Master Food Preserver program suggests “food-safe desiccant packets” for longer-term storage.
Who’s right? It depends on your margin of error.
If your conditioning was perfect and your storage spot is consistently below 60°F, you can skip them. If you have any doubt, your closet gets warm in summer, your slices were uneven, add a packet. For Mylar bags, always use one. The cost is trivial against the risk of a ruined 5-gallon bag of dehydrated vegetables.
How to Store Different Dehydrated Foods
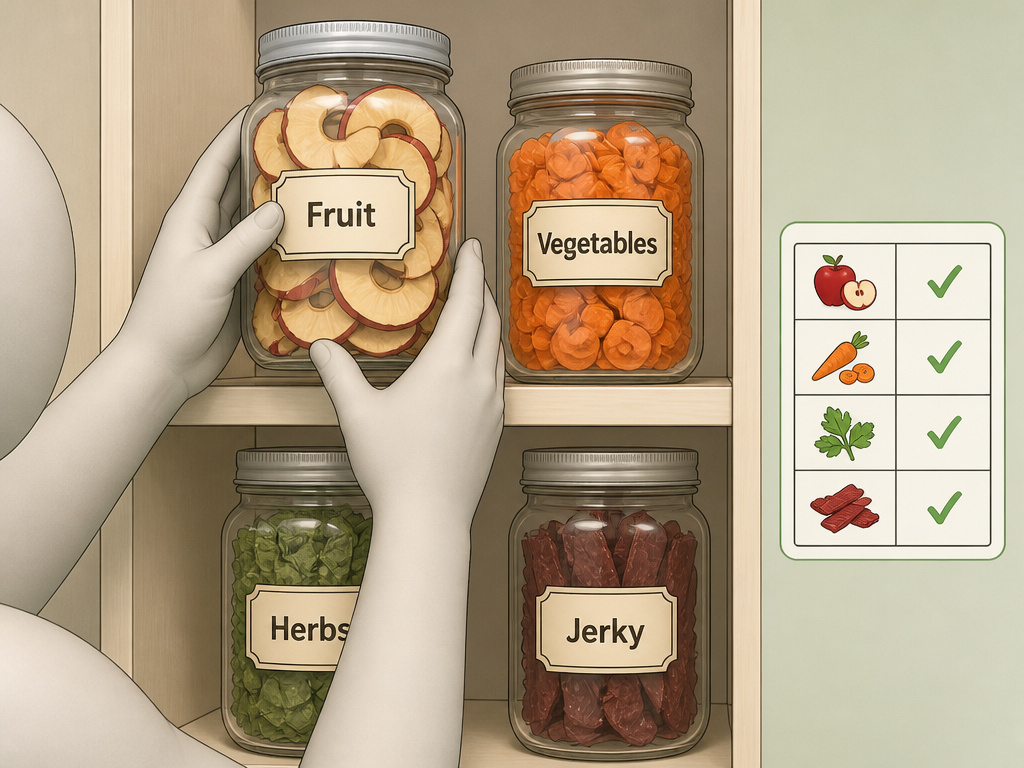
Not all dried foods are the same. Fruit, vegetables, herbs, and meats each have a best practice.
Fruits & Tomatoes
These are high-sugar and can retain moisture. Conditioning is critical. Store in glass jars after the 7-10 day shake-down. For preserving dehydrated fruit beyond a year, consider freezing.
Vegetables
More brittle, but shorter-lived. The OSU data gives them half the shelf life of fruit. Store in airtight containers, preferably in the coolest location you have. For long-term storage for dehydrated vegetables, freezing is the recommended extension method.
Herbs
Herbs are dry to the point of crumbling. Conditioning is often unnecessary. Store whole leaves in small, dark glass jars to preserve volatile oils. Crush them only when you’re ready to use them.
Meats & Jerky
These are high-risk for fat oxidation. Store in vacuum-sealed bags in the freezer for anything beyond a month or two. In a cool pantry, use Mylar bags with oxygen absorbers and consume within a few weeks.
This table summarizes the approach:
| Food Type | Conditioning Needed? | Best Container | Special Note |
|---|---|---|---|
| Fruit | Yes, 7-10 days | Glass Jar | High sugar; watch for clumping. |
| Vegetables | Yes, 2-4 days | Glass Jar or Mylar Bag | Freeze to extend beyond 6 months. |
| Herbs | No | Dark Glass Jar | Store whole to preserve flavor oils. |
| Meat/Jerky | No | Vacuum Bag (Freezer) | Fat can go rancid; freeze for long-term. |
The Freezing Fallback for Indefinite Storage
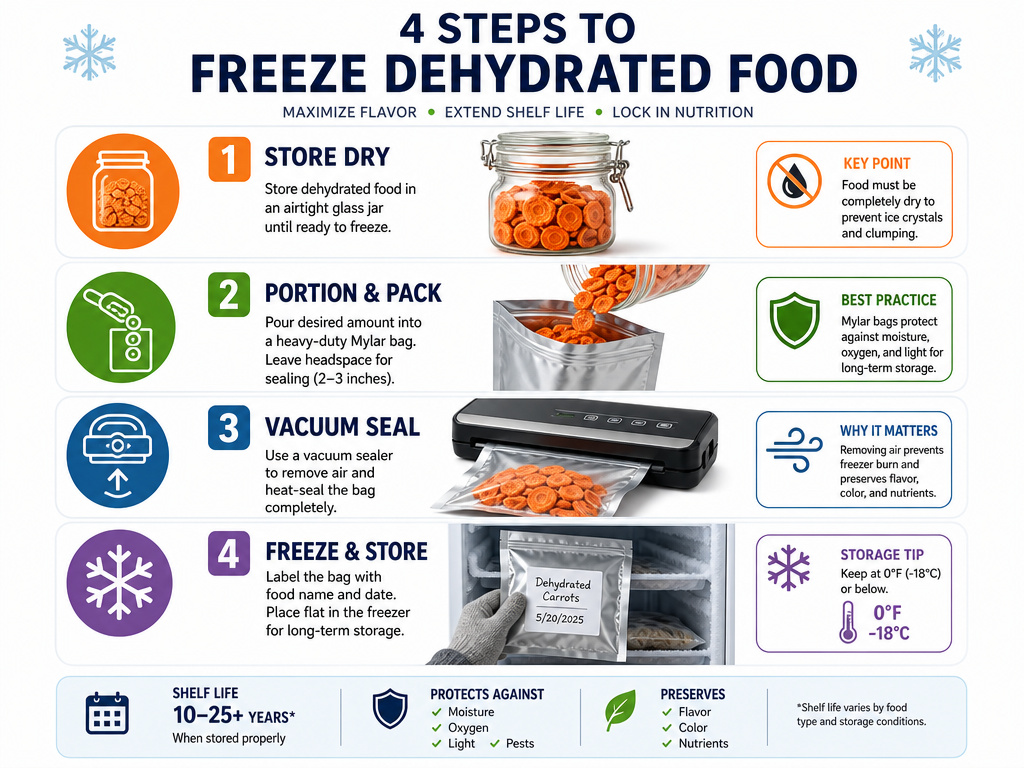
What if you dried 20 pounds of garden carrots and want them for two years?
The Oregon State University food safety guide has the edge-case answer: freeze them.
If you want to store vegetables longer than recommended, you can freeze them in moisture-vapor-proof freezer packaging. Thaw in the refrigerator and use within 4 days.
Freezing pauses the clock. It stops all enzymatic and oxidative reactions. This is the same principle used for flour storage and long-term sugar storage to maintain freshness.
The steps are simple. 1. Complete the conditioning process in jars. 2. Portion the food into freezer-safe vacuum bags or heavy-duty Mylar bags. 3. Remove as much air as possible and seal. 4. Label and place in the freezer.
Thaw a bag in the refrigerator overnight before use. Do not refreeze thawed dehydrated food. The condensation from thawing introduces moisture you cannot remove.
Freezing is your insurance policy. It turns a 6-month vegetable shelf life into a 3-year one.
Frequently Asked Questions
Can I store dehydrated food in the original dehydrator trays?
No. The trays are for drying, not storage. They expose food to air and dust. Transfer food to airtight containers within a few hours of cooling.
How can I tell if my dehydrated food has gone bad?
Look for visible mold (fuzz, spots). Smell it, off odors, mustiness, or rancidity are clear signs. Feel it, unexpected softness or dampness in a previously crisp batch means moisture is active.
Do I need to use oxygen absorbers for jar storage?
For jar storage in a cool place, it’s optional but recommended for storage over a year. For Mylar bags, always use them. They remove the last traces of oxygen that cause quality loss.
Can I mix different dehydrated foods in one container?
Avoid it. Different foods have different moisture contents and storage lives. Strong flavors (like onions or peppers) can also migrate. Store each type separately.
Is vacuum sealing better than jar storage?
For the freezer, yes. For shelf storage, jars are often better because you can visually inspect the contents. Vacuum-sealed bags on a shelf are opaque, so you cannot see mold forming until you open them.
The Bottom Line
Store dehydrated food with respect for moisture and temperature. The conditioning step is not optional, it’s your quality checkpoint. A cool, dark spot below 60°F is worth hunting for; it multiplies your shelf life.
Your final move: label every jar and bag with the contents and date. Rotate your stock, using the oldest first. When next year’s harvest comes in, you’ll have empty jars ready for a new batch, not a science project.
That’s how you build a pantry that lasts.
