
How to Preserve Vegetables Properly for Maximum Shelf Life
This post contains affiliate links. As an Amazon Associate, we earn from qualifying purchases.
To preserve vegetables, you must match each type to one of three storage environments: cold & moist (32–40°F, 95% RH), cool & moist (45–50°F, 90–95% RH), or cool & dry (32–50°F, 65–70% RH). Storing a cucumber in the cold, moist zone ruins it in days. For long-term preservation, pressure canning is the only safe method for low-acid vegetables, requiring a tested gauge and 240°F for the time listed in a research-based guide.
Most advice gets the first step wrong. Your home refrigerator averages 40°F at 50–60% humidity. That’s cold, but not cold enough, and it’s dry. Store a carrot there without a bag, and it shrivels in two weeks. Store a pepper there, and it gets pitted and soggy. The mismatch is why garden harvests go bad before you can eat them.
What follows: the three storage categories with exact numbers, the pressure-canning safety line you cannot cross, and the drying methods that work when you lack a cellar. The goal is to keep vegetables from the July glut edible into January.
Key Takeaways
- Store vegetables by their required temperature and humidity, not by where you have space. A 10°F increase over ideal cuts shelf life by up to 25%.
- Pressure canning is mandatory for low-acid vegetables like beans, carrots, and corn. A boiling-water bath cannot kill Clostridium botulinum spores.
- Check your pressure canner’s dial gauge for accuracy every year. An old canner (10+ years) may lack proper venting instructions, which risks under-processing.
- Use perforated plastic bags for cold, moist storage. Sealed bags cause condensation and rot.
- Some vegetables, like cucumbers and peppers, suffer chilling injury below 50°F. They need the cool, moist zone, not the refrigerator.
The Three Storage Categories (and Where Your Fridge Fails)
Your refrigerator is a compromise. It’s set for dairy and leftovers, not for garden produce. The center section runs between 38 and 42°F with humidity around 50–60%. That’s cold and dry. Vegetables need more precision.
The University of Wisconsin storage guide splits them into three groups. Get the group wrong, and the vegetable breaks down fast.
| Storage Category | Temperature Range | Relative Humidity | Common Vegetables | Home Fridge Match? |
|---|---|---|---|---|
| Cold & Moist | 32–40°F | 90–95% | Carrots, broccoli, lettuce | No – too dry |
| Cool & Moist | 127–50°F | 90–95% | Cucumbers, peppers, snap beans | No – too cold |
| Cool & Dry | 32–50°F | 65–70% | Onions, garlic, winter squash | Partial – too moist |
Cold & moist is the trickiest at home. The ideal is 32°F, but most refrigerators can’t hold that without freezing other items. Even at 40°F, the humidity is wrong. The crisper drawer helps, but it’s still not 95% RH.
Where this goes sideways: Storing a cucumber in the cold, moist zone. Below 50°F, cucumbers develop pitting, water-soaked spots, and decay within a week. They belong in cool, moist storage—a basement shelf or a pantry corner that stays around 45°F.
The Wisconsin guide notes that for every 10°F increase over the ideal storage temperature, shelf life shortens by up to 25%. A carrot stored at 50°F instead of 32°F loses a quarter of its storage window. That’s the difference between keeping for four months and keeping for three.
For cold, moist vegetables, you need to add moisture. A perforated plastic bag is the fix. The holes allow just enough air flow to prevent condensation while keeping humidity high around the vegetable. A sealed bag traps water against the skin, and rot follows.
The part nobody mentions: A perforated bag isn’t optional for lettuce or broccoli. Without it, the refrigerator’s dry air pulls moisture from the leaves, and they wilt in days. With it, they can last two to three weeks.
Pressure Canning: The Only Safe Method for Low-Acids
Freezing and drying work, but for shelf-stable preservation that doesn’t require electricity, pressure canning is the answer. It’s also the only safe answer.
Vegetables are low-acid foods. In a jar, they create a moist, oxygen-free environment. That’s the exact condition Clostridium botulinum spores need to grow and produce toxin. These spores survive boiling water. They die only at 240°F, which requires steam under pressure—11 to 15 pounds per square inch, depending on your altitude.
The Clemson HGIC preservation factsheet states it plainly: “Pressure canning is the only safe method for home canning vegetables.” A boiling-water bath is for fruits, pickles, and tomatoes—never for green beans, corn, or carrots.
The process has non-negotiable steps.
- Vent the canner for 10 minutes. This drives out air so the jar interiors reach 240°F. Old canners (10+ years) sometimes skip this step in their manuals. If your manual doesn’t mention venting, find a newer guide.
- Process at the correct pressure for the full time. Time varies by vegetable and jar size. Asparagus: 30 minutes for pints, 40 for quarts. Mixed vegetables: 75 minutes for pints, 90 for quarts. Use a research-based timetable.
- Let the pressure drop to zero naturally. Forcing the lid open risks siphoning and incomplete processing.
Before you start: Check your dial gauge for accuracy every year. Local extension offices often offer this service. An off-by-2-PSI gauge means your jars may not hit 240°F, and the toxin risk is real. Botulism toxin is odorless and tasteless.
Drying and Dehydrating: When You Lack a Cold Room
Not everyone has a root cellar. Drying removes the water microbes need, turning a summer squash into a shelf-stable ingredient for winter soups.
You have two paths: sun drying or using a dehydrator. Sun drying works in hot, dry climates with consistent airflow. It’s slow and risks mold if humidity spikes. A dehydrator is reliable.
The dehydrator rules:
- Slice evenly. Thickness decides drying time. Aim for 1/4-inch slices.
- Blanch vegetables like beans, carrots, and peas before drying. This stops enzyme action that causes off-flavors during storage.
- Dry until leathery or brittle. Beans should snap, not bend. A residual moisture test: cool a piece, then squeeze. If no moisture beads, it’s done.
- Condition before storage. Place dried pieces in a sealed container for a week, shaking daily. This equalizes moisture. If condensation appears, return them to the dehydrator.
After conditioning, store in airtight containers in a cool, dark place. For details on containers and oxygen absorbers, see our guide on storing dehydrated vegetables.
I won’t recommend sun drying for anyone east of the Mississippi unless you have a screened solar dryer. The humidity here reclaims the moisture overnight, and you wake up to a tacky, half-moldy batch. A basic Nesco dehydrator costs less than the garden yield it saves.
Root Cellars and Outdoor Storage: The Old-School Baseline
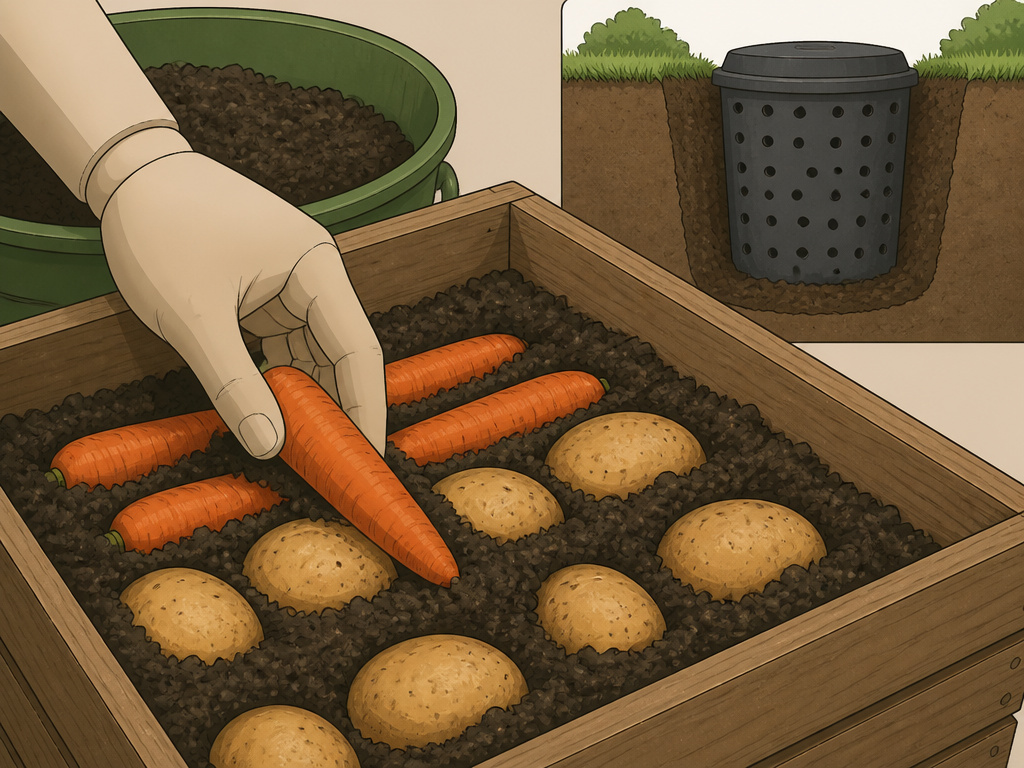 If you have the space and the climate, underground storage mimics nature’s perfect conditions. A root cellar provides the cold, moist environment carrots and potatoes crave.
The principles are simple: insulation from freezing, drainage so water doesn’t pool, and darkness to prevent sprouting. You don’t need a stone-lined cave. A buried trash can or an insulated box in an unheated garage can work.
The University of Minnesota storage guide notes that ideal cold storage is 32°F, but that’s difficult to achieve at home. An outdoor storage pit or mound can get closer than your basement.
What to store underground:
- Root vegetables (carrots, beets, parsnips)
- Potatoes (keep them in the dark to prevent solanine formation)
- Cabbage
- Winter squash (cure them first at 80°F for 7–10 days)
What to keep out:
- Vegetables prone to chilling injury (cucumbers, peppers)
- Onions and garlic (they need cool and dry, not cold and moist)
Pack vegetables in moist sand, sawdust, or peat moss to maintain humidity. Layer them so they don’t touch, reducing disease spread. Perforate any plastic liners.
Pickling and Fermentation: The Flavor-Preservation Bridge
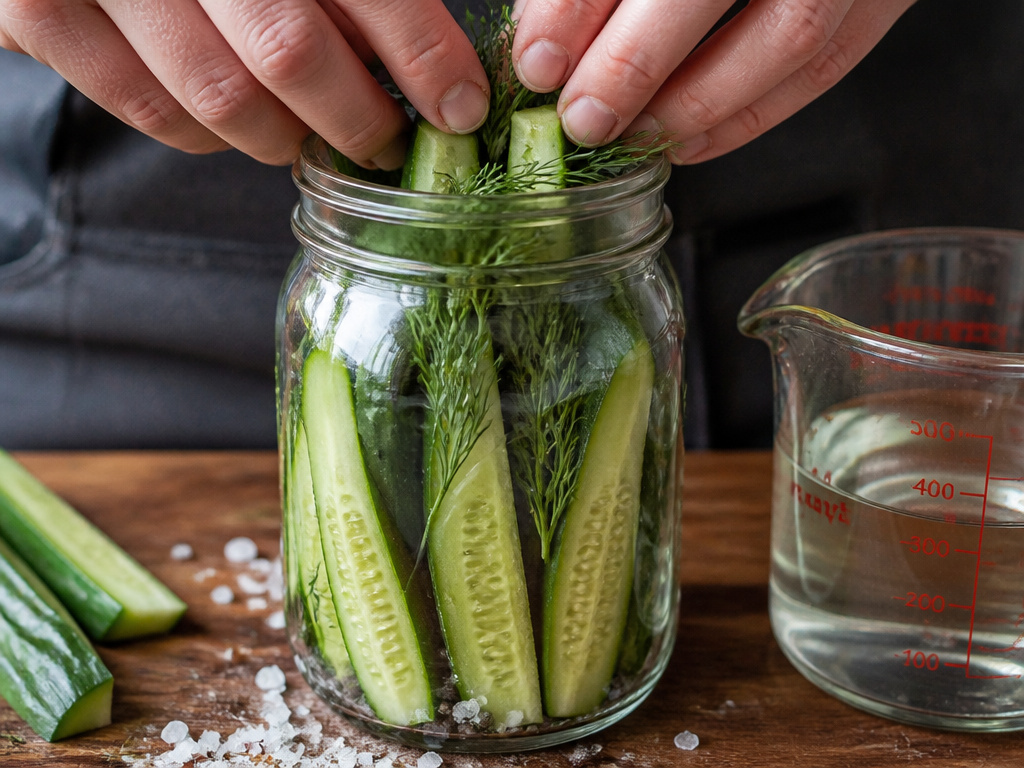 These methods use acid or salt to create an environment hostile to spoilage microbes. They’re not always shelf-stable outside the fridge, but they extend life for months.
Pickling submerges vegetables in a vinegar brine. The acetic acid drops the pH below 4.6, where C. Botulinum can’t grow. Refrigerator pickles are quick and last weeks. For shelf-stable pickled vegetables, you must still process the jars in a boiling-water bath to kill yeast and molds.
Fermentation uses salt to draw out vegetable juices, creating a brine where beneficial lactobacillus bacteria thrive. They produce lactic acid, which preserves the vegetables. Sauerkraut and kimchi are the classics.
Easy to miss: The salt ratio. For vegetable fermentation, aim for 2–3% salt by weight of the vegetables plus water. Under-salting lets bad bacteria win; over-salting stalls the fermentation. Weigh everything.
These methods are excellent for vegetables you eat regularly. They’re less about long-term storage and more about transforming the harvest into a ready-to-use condiment. For a deep dive on one popular crop, see our article on preserving tomatoes.
How to Choose Your Method: A Decision Table
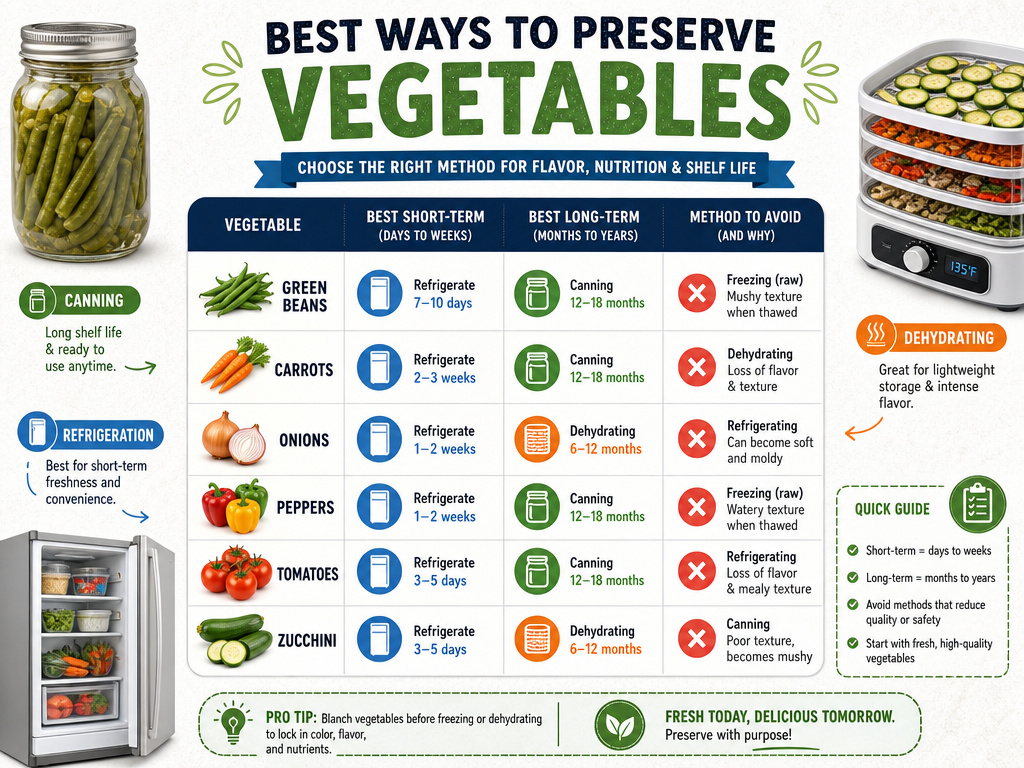 Your choice depends on the vegetable, your equipment, and how long you need to store it.
| Vegetable | Best Short-Term (≤1 month) | Best Long-Term (6+ months) | Method to Avoid |
|---|---|---|---|
| Green Beans | Refrigerate in perforated bag | Pressure canning | Boiling-water bath |
| Carrots | Cold, moist storage (perforated bag) | Pressure canning or drying | Warm, dry storage |
| Onions | Cool, dry storage (mesh bag) | Drying or braiding | Sealed plastic bag |
| Peppers | Cool, moist storage (45–50°F) | Drying or freezing | Refrigeration below 45°F |
| Tomatoes | Cool, dry countertop | Canning (acidified) or drying | Refrigeration (loses flavor) |
| Zucchini | Refrigerate (short window) | Drying or freezing | Canning (becomes mushy) |
Short-term means living in your kitchen’s microclimates. Long-term means investing an afternoon with a canner or dehydrator. The avoid column is where food waste happens.
For specific guides on common crops, we have detailed steps for preserving potatoes at home and preserving onions at home.
Frequently Asked Questions
Can you preserve vegetables without a pressure canner?
For low-acid vegetables like beans, carrots, and corn, no. Drying and freezing are safe alternatives that do not require a pressure canner. Pickling with sufficient vinegar (making them high-acid) also works, but that changes the food’s character. Never use a boiling-water bath for plain low-acid vegetables.
How long do home-canned vegetables last?
Properly canned vegetables retain best quality for about one year. They remain safe to eat indefinitely if the seal holds and there are no signs of spoilage (bulging lid, spurting liquid, off odor). However, nutrient loss and quality degradation increase over time. Eat older jars first.
What is the best way to store vegetables without a refrigerator?
Use the correct outdoor storage method for the vegetable’s category. Root vegetables can go in a root cellar. Onions and garlic need a cool, dry, dark place like a pantry. Tomatoes and peppers should sit on a cool countertop (55–70°F). The key is matching the temperature and humidity.
Why did my canned vegetables become mushy?
Overprocessing. Heat continues to cook the vegetables during canning. Follow the recommended processing time exactly. Also, some vegetables, like zucchini and summer squash, are inherently soft and do not can well for texture—dry or freeze them instead.
Is it safe to can vegetables in an old pressure canner?
Maybe. The canner itself may be fine if the gasket is intact and it holds pressure. The danger is in the instructions. Canning guidelines have changed. If your canner’s manual is over 10 years old, it may not include the critical 10-minute venting step. Use a current, research-based guide like the Clemson HGIC preservation factsheet for processing times and procedures.
The Bottom Line
Preserving vegetables isn’t about one trick. It’s about matching the plant’s biology to the right environment. Start with the storage category: cold/moist, cool/moist, or cool/dry. Your refrigerator is only a partial match for the first.
For putting food by, pressure canning is the safety-critical skill. It requires a tested gauge, verified instructions, and time. When that feels like too much, drying is a forgiving alternative.
The real goal is to close the gap between harvest and meal. A July bean becomes January’s soup. A September pepper flavors a March stew. That’s the point—making the summer surplus feed you all year.
