
How to Keep Food Warm in Lunch Box: Safe Temperature Guide
This post contains affiliate links. As an Amazon Associate, we earn from qualifying purchases.
To keep food warm in a lunch box, use an insulated container like a thermos, pre-heat it with boiling water for 10–15 minutes, and fill it with food cooked to at least 165°F. The food must stay above 140°F to be safe. A quality thermos maintains this for 5–6 hours. Electric lunch boxes actively reheat but have limited battery life and do not refrigerate.
The 140°F threshold is the lower boundary of the temperature danger zone where bacteria multiply fastest. The goal is a safe meal that does not invite foodborne illness.
What follows breaks down the three proven methods: the classic thermos, insulated bags with supplemental heat, and electric warmers. Each has a specific hold time, a failure point, and a set of non-negotiable food safety steps that start in your kitchen hours before the lunch box closes.
Key Takeaways
- The safe temperature floor is 140°F (60°C). Below that, food enters the danger zone where bacteria thrive.
- A properly pre-heated thermos keeps food above 140°F for 5 to 6 hours, according to the Gouvernement du Québec.
- Electric lunch boxes like the LunchEAZE Lite reheat but do not refrigerate; perishable food left inside them for extended periods is a safety risk.
- Always pre-heat an insulated container with boiling water for at least 10 minutes. A cold container steals heat on contact.
- For foods that lose texture (like crispy fries), use a dry thermal bag with a hot water bottle or a heated food pad instead of a steamy thermos.
The Core Principle: Beat the Temperature Danger Zone
Food safety requires holding temperature outside the range where pathogens grow. The University of Maine Extension states bacteria thrive between 40°F and 140°F.Your lunch strategy must keep hot food above that 140°F line from the moment it’s packed until it’s eaten.
Common mistake: Assuming a thermos straight from the cupboard is ready for hot food. The stainless steel acts as a heat sink, dropping the temperature of your meal by 20–30 degrees in the first 30 minutes if not pre-heated.
The consequence is a lunch that spends its morning in the danger zone. By noon, bacterial counts can reach unsafe levels even if the food still feels warm to the touch. This is why the pre-heat step is non-negotiable.
Why 140°F Is the Magic Number (And 165°F Is for Cooking)
The 140°F target is a holding temperature. It’s the line that keeps existing bacteria from multiplying. The cooking temperature, 165°F for most reheated foods, is needed to kill bacteria outright. You must cook or reheat the food to at least 165°F before it goes into the pre-heated container. The container’s job is to slow the cooling so it stays above 140°F for the duration.
This USDA bag lunch safety guidelines reiterate that hot food should be kept at 140°F or above. It’s a federal baseline for a reason.
Method 1: The Insulated Thermos (The Classic Workhorse)
This is the most reliable passive method. A vacuum-insulated stainless steel bottle or a wide-mouth food jar creates a barrier that slows heat transfer to a crawl. Performance hinges on two things: the pre-heat and how full you pack it.
The Non-Negotiable Pre-Heat Ritual
- Boil water.
- Fill the thermos to the brim with boiling water.
- Seal it and let it sit for 10 to 15 minutes. This brings the inner steel up to near-boiling temperature.
- Pour the water out immediately before adding your piping-hot food.
Skipping this step is why thermoses fail. The cold metal absorbs the food’s thermal energy, guaranteeing a plunge into the danger zone long before lunch.
A quality thermos, pre-heated correctly and filled with food at 165°F or above, will keep that food above 140°F for 5 to 6 hours. That’s the official guidance from the Gouvernement du Québec.
Choosing and Packing the Right Thermos
Not all thermoses are equal. For soups and stews, a wide-mouth food jar is essential. For drier items, a standard bottle works. The best container for hot food is one you can pack tightly, air space is the enemy of heat retention.
| Thermos Type | Best For | Packing Tip |
|---|---|---|
| Wide-mouth food jar | Soups, stews, pasta, chili | Fill to within ½ inch of the rim to minimize air. |
| Standard bottle | Broth-based soups, hot tea | Pre-heat with boiling water, even for liquids. |
| Stackable food flask | Multiple courses, sides | Pre-heat each compartment individually. |
For a deep dive on technique, see our guide on how to use a thermos for hot food.
Method 2: Insulated Bags with Supplemental Heat
A thermos isn’t always the right answer. For foods where texture is king, crispy chicken nuggets, dry fries, pizza, the moist environment of a thermos turns them soggy. Here, an insulated thermal bag paired with a separate heat source is the better play.
The Hot Water Bottle or Heat Pack Approach
This method creates a warm ambient environment inside a sealed bag. 1. Fill a hot water bottle or use a microwaveable heat pack. 2. Wrap it in a thin towel to prevent direct contact with the food container. 3. Place it at the bottom of your insulated lunch box. 4. Put your food container (like a stainless steel bento box) on top, and pack any remaining space with a kitchen towel or napkin to reduce air movement.
The heat source radiates warmth, keeping the air inside the bag well above room temperature. It won’t keep food at 140°F, but it will significantly slow cooling, preserving texture for 2–3 hours.
Heated Food Pads: A Step Up
These are single-use chemical pads that activate when you bend a metal disc. They provide focused, dry heat for about 30-40 minutes. Place one under a compact food container inside a snug thermal bag. They’re a good solution for shorter holds but are not a substitute for proper hot holding over many hours.
Method 3: Electric Lunch Boxes (Active Warming)
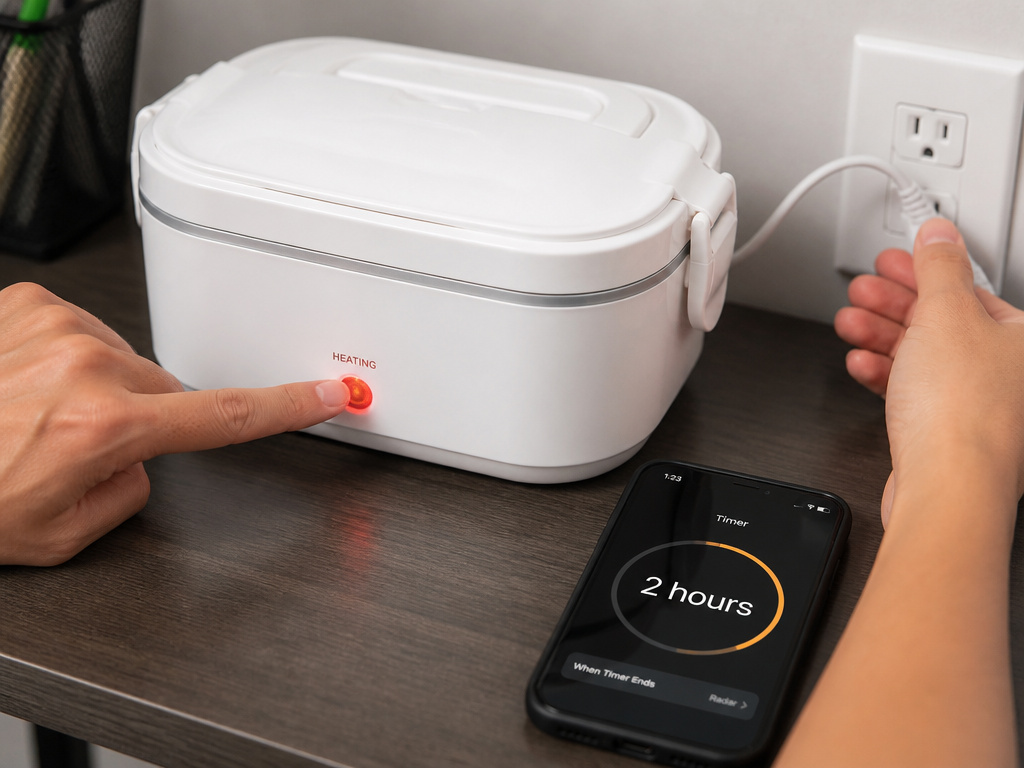
Electric lunch boxes like the LunchEAZE Lite or HotLogic Mini use a heating element to actively reheat food. They’re not magic. They have specific limitations that, if ignored, create food safety hazards.
Where this goes sideways: Treating an electric lunch box like a refrigerator. The LunchEAZE Lite manual explicitly states it “does NOT keep food refrigerated.” Packing perishable food in the morning for a late lunch is a direct risk.
How They Work and Where They Fail
These devices are portable food warmers, not insulated containers. They typically need 1-2 hours to bring food from a cold or room-temperature state up to a safe eating temperature. The LunchEAZE Lite, for example, is programmed to start heating 2 hours before your set mealtime.
| Consideration | Electric Lunch Box | Insulated Thermos |
|---|---|---|
| Heat Source | Active (battery/plug) | Passive (vacuum insulation) |
| Safety Focus | Must not store perishables | Must stay above 140°F |
| Best Use Case | Access to outlet, reheating | Long holds without power |
| Texture Preservation | Good (separate compartments) | Poor (steamy environment) |
The battery is the other constraint. The LunchEAZE Lite offers about 2.5 hours of heating per charge. If your meal timing is off or the battery degrades, you’re left with lukewarm, unsafe food. For adults with desk access, a plug-in model like the HotLogic is more reliable. Explore options in our review of the best heated lunch box for adults.
Critical Food Safety Steps Before You Pack
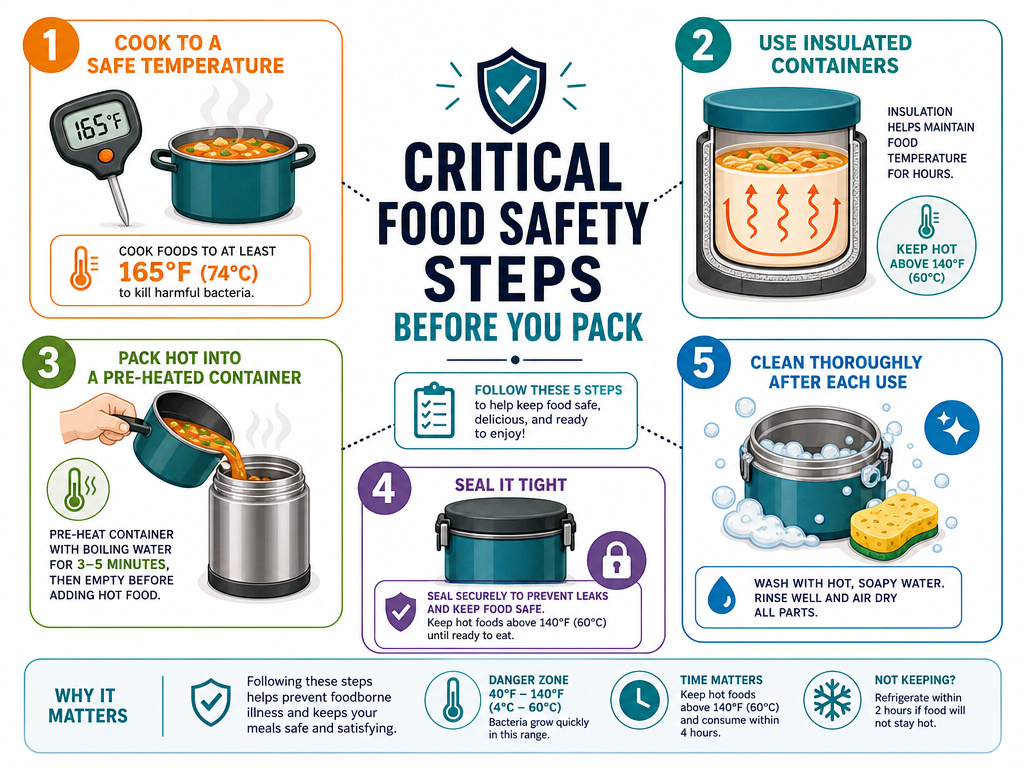
The container is only part of the equation. What you put in it and how you prepare it matters more.
- Cook/Reheat to Minimum Safe Temperatures. Bring leftovers to a minimum of 165°F throughout. Use a food thermometer. Visual cues like “steaming” are not reliable.
- Pre-Heat the Container. Already covered, but it bears repeating for every insulated method.
- Pack Immediately. Transfer the scalding-hot food directly from the pot to the pre-heated container. Don’t let it cool on the counter.
- Keep It Closed. Once packed, seal the container and do not open it until lunchtime. Every peek releases a burst of steam and heat.
- Clean Daily. Wash the thermos or food container with hot, soapy water after every use. Old food residue harbors bacteria that can contaminate the next meal.
This University of Maine food safety guide provides a comprehensive overview of these practices for packed lunches.
What About Keeping Kids’ Lunches Warm?
The principles are identical, but the execution needs to be child-proof. A wide-mouth, easy-open thermos is better than a screw-top bottle for small hands. The best lunch box for kids will be an insulated soft bag that can accommodate a pre-heated food jar and maybe a separate compartment for a warm roll or muffin.
For younger children, skip the electric options due to burn risks and battery concerns. Stick with a high-quality, pre-heated thermos. Practice opening and closing it with them at home so lunchtime isn’t a struggle.
Frequently Asked Questions
Can I keep food warm for 8 hours?
Probably not safely with passive methods. The 5–6 hour hold time for a thermos is the verified ceiling from health authorities. For an 8-hour shift, an electric lunch box that can plug in at your desk is the only reliable choice, provided you follow its safety protocols.
Does aluminum foil really keep food warm?
Aluminum foil is a radiant barrier, not an insulator. Wrapping a container in foil can slow cooling by a few minutes, but it will not maintain safe temperatures. It’s a hack for very short-term warmth, not a substitute for an insulated container.
How do I keep food warm without a thermos?
Your next best option is a high-quality thermal bag paired with a hot water bottle or chemical heat pack. Pack the container tightly and minimize air space. This method is better for texture-sensitive foods but has a shorter safe hold window, plan for 2-3 hours max.
Is it safe to reheat food in a plastic lunch container?
Only if the container is labeled microwave-safe. Reheating in non-microwave-safe plastic can cause chemicals to leach into the food and may warp or melt the container. When in doubt, transfer food to a ceramic or glass plate before reheating.
Why did my thermos food get cold?
Three likely reasons: you didn’t pre-heat the thermos, you didn’t fill it enough (too much air space), or the thermos itself is old and the vacuum seal has failed. A failing thermos will feel warm on the outside when filled with hot liquid, a sign the insulation is gone.
The Bottom Line
Forget gimmicks. Keeping food warm and safe comes down to physics and microbiology. Use a pre-heated thermos for liquid-based meals that need a 5-hour hold. Use a dry thermal bag with a heat source for crispy foods that need a shorter hold. Use an electric warmer only if you can manage its battery life and never use it to store perishables.
The Hong Kong packed meals safety page sums it up: cook hot, pack hot, keep hot. Your best lunch box is the one that lets you follow those three commands without compromise.
