
Why Your Freezer is Frosting Up: Common Causes & Solutions
This post contains affiliate links. As an Amazon Associate, we earn from qualifying purchases.
Freezer frosting happens when warm, moist air gets inside and meets the cold surfaces, or when the automatic defrost system fails. The main culprits are a damaged door seal, frequent door openings, a faulty defrost heater or thermostat, and a freezer temperature set too high. Manuals from Electrolux and Frigidaire specify defrosting is important when frost reaches between ¼ and ½ inch thick.
That threshold isn’t arbitrary. Frost acts as an insulator. Once it passes a quarter inch, the compressor must work harder to maintain temperature, which spikes your energy bill and can shorten the appliance’s life. The ice also physically blocks airflow vents, creating warm spots where your food thaws and refreezes.
What follows is a breakdown of the four most common failure points, how to test each one with simple tools, and the specific manufacturer specs that tell you when action is mandatory. You’ll also learn why a perfectly sealed door can still frost over if the defrost timer is off by a few minutes.
Key Takeaways
- Defrost when frost reaches ¼ to ½ inch, per Electrolux and Frigidaire manuals. Thicker ice insulates the coils and makes the compressor run constantly.
- A freezer door left open for five minutes triggers an ajar alarm on many models, but even brief, frequent openings introduce moisture.
- Frost concentrated on one side of the freezer usually points to a warped drawer or bin that isn’t sealing, not a system-wide failure.
- The defrost heater is the most common point of failure in auto-defrost systems. It’s a resistive wire that can burn out like a lightbulb filament.
- The ideal freezer temperature is 0°F (-18°C). A setting just a few degrees warmer dramatically increases frost formation rate.
The 4 Most Common Causes (and How to Spot Them)
Freezer problems follow a predictable shortlist. The trick is matching the symptom on your appliance to the component that caused it. Start with the simplest and most external issues before opening up the back panel.
A Faulty Door Seal (Gasket)
The rubber gasket around your freezer door is the first line of defense. When it’s cracked, brittle, or has food debris stuck in the channel, warm room air seeps in. That air carries moisture, which instantly freezes on the cold interior walls.
Common mistake: Assuming a seal is good because it looks intact. The failure is often a loss of magnetic pull, not a visible tear.
You can test it with the dollar bill test. Close the door on a dollar bill halfway. If you can pull the bill out with little resistance, the seal is weak at that spot. Check the entire perimeter. A localized frost patch on the upper front wall, near where the door meets the cabinet, is a classic sign of a gasket leak. This is because warm air rises, so it hits that upper surface first.
Defrost System Failure
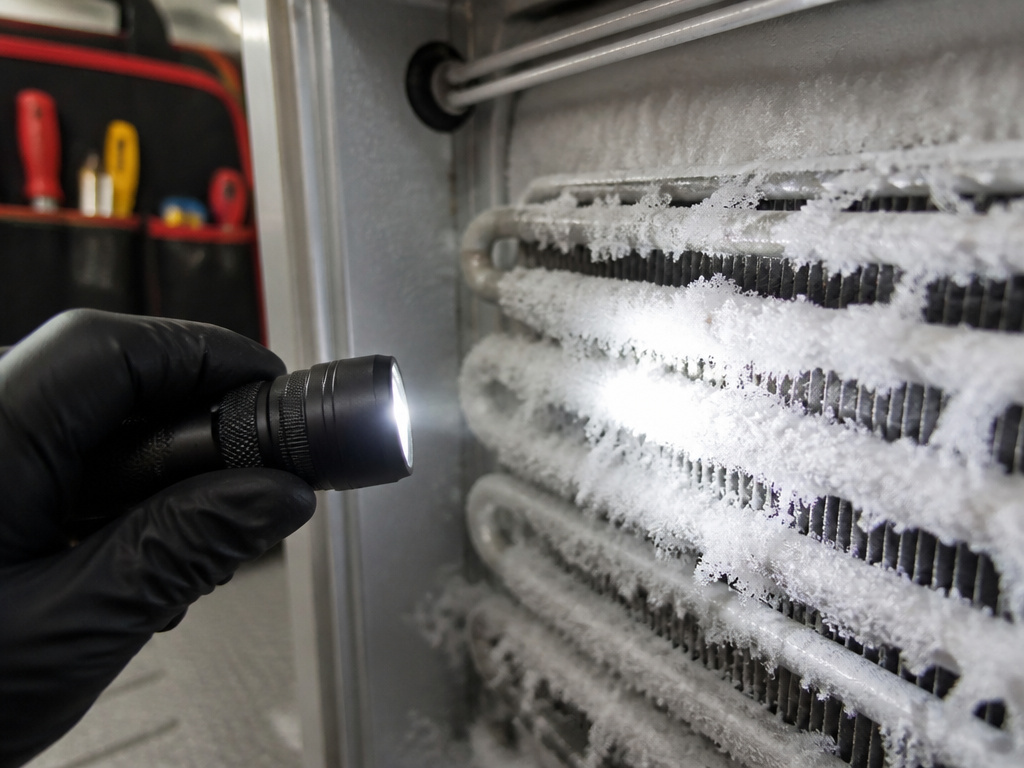
Frost-free freezers have a hidden cycle. Every 6 to 12 hours, a timer triggers a defrost heater to melt frost off the evaporator coils. A defrost thermostat cuts power to the heater once the coils get warm enough. If either component fails, frost builds up on the coils until it blocks the air passage.
You’ll notice this problem indirectly. The freezer might not cool as well, or you might hear the compressor running non-stop. The telltale sign is a solid sheet of ice on the back wall or floor of the freezer compartment, behind the panels. If your freezer operation seems normal but frost is rampant, the defrost system is the prime suspect.
| Component | Function | Failure Symptom |
|---|---|---|
| Defrost Timer | Advances the cycle to heat mode | Heater never turns on; thick ice on coils |
| Defrost Heater | Melts frost on evaporator coils | No heat; continuity test shows open circuit |
| Defrost Thermostat | Cuts power to heater at ~55°F | Heater won’t turn on, or won’t turn off (rare) |
| Evaporator Fan | Circulates air over cold coils | Frost only on coils; warm air not reaching cabinet |
Frequent Door Openings or Hot Food
Every time you open the door, humid kitchen air floods in. If you’re in and out repeatedly while meal prepping, or if you leave the door open while searching for something, you’re loading the freezer with water vapor. The same happens when you place a warm, uncovered dish directly inside. The rapid cooling condenses the moisture directly onto the walls and shelves.
Most modern units have a door ajar alert that sounds after five minutes. But the damage is done in the first 30 seconds. If your household goes through a lot of frozen goods, this might be your primary cause. The frost pattern will be even and light across all surfaces, not just one area.
Incorrect Temperature Setting
Your freezer has a sweet spot. The universal manufacturer recommendation, stated by GE and LG, is 0°F (-18°C). If the control is set to a warmer setting, like 10°F (-12°C), the evaporator coils aren’t cold enough to freeze all incoming moisture instantly. That moisture instead deposits as frost slowly over time.
Check your control dial or digital display. If it’s not at 0°F, adjust it and wait 24 hours for the temperature to stabilize. Use an inexpensive standalone freezer thermometer to verify the actual internal temperature. A setting that’s too cold wastes energy, but a setting that’s too warm ruins food and creates frost.
Step-by-Step Frost Diagnosis
Don’t just defrost and hope. Follow this sequence to find the root cause. You’ll need a flashlight, a multimeter (for electrical tests), a hair dryer or portable heater, and a few hours.
1. Inspect the Door Seal
Start with the simplest check. Visually inspect the entire gasket for cracks, tears, or deformities. Then perform the dollar bill test every few inches around the door. Mark any spots where the seal fails. Clean the gasket and the door frame with warm, soapy water, dried-on syrup or grease can create a tiny gap.
If you find a bad section, the gasket is replaceable. You can often find the part number on a sticker inside the freezer or on the manufacturer’s website. Replacing it is a fussy but straightforward job that beats a $200 service call.
2. Check for Proper Airflow
Inside your freezer, cold air comes from vents. Locate these vents, usually on the back wall or ceiling, and ensure they aren’t blocked by frozen food packages or a thick layer of ice. Frost buildup on the vents themselves is a major red flag; it means moisture is condensing right at the source. Clear any blockage carefully.
This is also when you check if the freezer is level. An unlevel appliance can cause the door to sag slightly, breaking the seal at the top or bottom. Use a bubble level on the top of the unit. The manual for a Frigidaire model states leveling is “VERY IMPORTANT” to prevent door alignment and cooling issues.
3. Test the Defrost System (For Frost-Free Models)
This step involves accessing the evaporator coils, usually behind the rear interior panel of the freezer. Unplug the appliance first.
- Remove the interior back panel. You’ll see the evaporator coils, they look like a dense, finned radiator.
- Look for the defrost heater, a glass tube or metal rod running along the base of the coils. Also find the defrost thermostat, a small disc attached to the coils.
- Use a multimeter set to measure resistance (Ohms). Disconnect the wires from the heater and touch the probes to its terminals. You should get a reading, often between 20 and 50 Ohms. A reading of “OL” (open line) means the heater is burned out and needs replacement.
- Test the thermostat the same way. At freezer temperature, it should show continuity (a low Ohm reading or a beep). To test its “open” function, you’d need to warm it to about 55°F with a hairdryer, then it should read “OL”.
Where this goes sideways: Replacing a defrost heater but not the thermostat. If the thermostat was stuck closed, it may have caused the heater to burn out. Always replace both as a pair.
If these components test fine, the defrost timer (usually located behind the kickplate at the front bottom of the fridge) might be stuck. Manually advancing its dial with a screwdriver should trigger a click and start the defrost cycle. If it doesn’t, the timer is faulty.
When to Defrost and Clean
You can’t prevent frost entirely, but you can manage it. The official guidance from Electrolux Owner’s Guide A12735807 is clear: defrost and clean when frost accumulation reaches ¼” to ½”.
Frost may tend to accumulate faster on upper part of the freezer due to warm, moist air entering the freezer when the door is opened.
Letting it go beyond half an inch turns a simple maintenance job into a hardship. The ice becomes so thick that melting it can flood your kitchen floor. It also forces the compressor to run longer, hiking your electricity bill by 10-15% or more. For a full defrosting a freezer guide, the process involves unplugging the unit, removing food, and using towels and basins to catch water. A fan or bowl of hot water inside speeds things up.
After defrosting, it’s the perfect time for a deep freezer cleaning. Use a mix of baking soda and warm water to wipe down all surfaces. This eliminates odors and gives you a clean baseline to monitor new frost growth.
Advanced and Niche Causes
 Sometimes the usual suspects check out fine. In those cases, look at these less common issues.
The Appliance Environment
Where your freezer lives matters. If it’s in a hot garage or a humid basement, the surrounding air holds more moisture. Every door opening introduces a heavier load of water vapor. Similarly, a freezer crammed too full blocks the internal airflow, creating cold pockets where frost forms preferentially. Leave some space between packages.
Underlying Mechanical Issues
A failing evaporator fan motor won’t circulate air properly, letting frost build up on the stationary coils. You might hear a faint buzzing or clicking from the back. A refrigerant leak will cause the coils to get excessively cold, freezing moisture almost instantly into a snowy, fluffy frost. This is a job for a professional technician.
The Science of Frost Formation
Frost isn’t just frozen water; it’s a porous structure of ice crystals that grows outward from the cold surface. A peer-reviewed frost formation research paper notes that while hydrophobic coatings on evaporator coils seem like a good idea, they can disrupt designed airflow patterns in some applications. The engineering balance between delaying frost and maintaining efficient heat transfer is delicate.
Frequently Asked Questions
Is some frost in the freezer normal?
Light, even dusting of frost is normal, especially in older manual defrost models or if you open the door frequently. The problem starts when it becomes thick or uneven. Refer to your manual, many specify that a quarter inch is the action threshold.
Can a freezer have too much frost?
Absolutely. Thick frost acts as insulation, making the compressor work harder and longer to cool the space. This increases energy consumption and wear on the compressor. Ice can also physically jam door drawers, block vents, and reduce usable storage space.
Why is there frost only on one side of my freezer?
Localized frost is a classic sign of an air leak at that specific spot. The most common cause is a freezer drawer or bin that isn’t seated properly, warped, or cracked. The gap lets moist air from the refrigerator section seep into that part of the freezer. Check the seals on your bins and make sure they close flush.
What’s the difference between a frost-free and manual defrost freezer?
manual defrost freezer has no automatic defrost cycle. You must periodically unplug it and melt all the ice buildup yourself. A frost-free model uses a timer, heater, and thermostat to melt frost off the hidden evaporator coils every few hours, so you rarely see ice inside the food compartment. Frost-free models are more complex and have more parts that can fail.
Before You Go
Freezer frost points directly to a problem: too much moisture getting in, or a failure to melt it off. Start with the door seal and the temperature setting, they’re the easiest fixes. If frost is heavy on the back wall, your defrost system needs testing. Remember the manufacturer’s rule: at a quarter inch of frost, it’s time to act. Clearing that ice isn’t just about cleanliness; it’s about efficiency and protecting your food from the thaw-refreeze cycle that leads to freezer burn. Keep the seal clean, the temperature at 0°F, and avoid overpacking, and you’ll see far less of the white stuff.
