
Master How to Clean a Deep Freezer With Our Proven Method
This post contains affiliate links. As an Amazon Associate, we earn from qualifying purchases.
To clean a deep freezer, you need three things: the right timing, the correct baking soda solution, and a methodical approach that protects the appliance and your food. The exact ratio from Electrolux manuals is 2 tablespoons (25 grams) of baking soda per quart of warm water. GE and Frigidaire specify about 1 tablespoon per quart. Unplug the unit, remove all food into coolers, defrost if needed, wash with the solution, dry completely, and then restart.
That ratio is the concentration manufacturers tested to clean without leaving residues that affect food taste or damage plastic liners. Using more doesn’t clean better; it leaves a gritty film.Using less, like plain water, won’t neutralize the fatty acids that cause persistent smells.
What follows breaks the job into a safe, repeatable system. We’ll cover when to do it (the quarter-inch frost rule), what cleaners will void your warranty, how to handle your food so nothing thaws, and the one mistake that leads to immediate re-frosting.
Key Takeaways
- Use the manufacturer’s baking soda solution: 2 tbsp per quart (Electrolux) or 1 tbsp per quart (GE/Frigidaire). Stronger cleaners can damage liners and leave toxic residues.
- Defrost manually when frost reaches 1/4 to 1/2 inch thick. In high humidity, check monthly. Frost-free uprights skip this step but still need annual cleaning.
- Unplug the freezer and move food to coolers with ice packs. Food stays safe above freezing for 24 hours if the door stays shut.
- Never use abrasive pads, bleach, or ammonia. On stainless steel, avoid chloride-based cleaners, they cause permanent pitting.
- Dry every surface, especially the door gasket and drain hole, with a towel before restarting. Any leftover moisture triggers rapid frost buildup.
The 3-Step Deep Freezer Cleaning Process
Cleaning is a timed operation where food safety, appliance longevity, and future performance are all on the line. The process has three non-negotiable phases: preparation, washing, and restart.
Phase 1: Preparation and Safe Food Removal
Your first job is to create a cold holding area for your food. This isn’t optional. The moment you unplug the freezer, the clock starts.
Gather these supplies: large coolers or insulated boxes, pre-frozen ice packs or bags of ice, thick towels, and a plastic scraper. Plugged-in coolers work, but standard ones with ice packs are more reliable for a 2–3 hour job.
Unplug the freezer from the wall outlet. Do not turn a control knob to “off”, that doesn’t disconnect power. Pull the plug.
Move food quickly, packing items tightly together in the coolers to retain cold. Place ice packs on top. Cover everything with towels for insulation. Organized people label bins or group items by type (meats, vegetables, prepared meals) to streamline reloading.
If you have a lot of food, work in sections. A full deep freezer holds temperature surprisingly well; you can clean one half while food remains frozen in the other, but only if you work fast and keep the lid closed as much as possible.
Before you start: The freezer contains isobutane (R600a), a flammable refrigerant. Never puncture cooling lines or use sharp tools near the back panel. If you damage a line, ventilate the area immediately and call a professional, do not attempt repair yourself.
Phase 2: Defrosting (If Needed) and Washing
Now address the interior. Is this a manual defrost chest freezer or a frost-free upright? Frost-free models have a heating element that melts frost during regular cycles, so you only wash. Manual defrost units require you to remove ice buildup first.
For manual defrost freezers: Defrost when frost is 1/4 to 1/2 inch thick, per Electrolux guidelines. Thicker ice strains the compressor and wastes energy. Place towels and shallow pans inside to catch melting water. Let ambient air melt the ice. Never use a hair dryer, heat gun, or sharp metal tool, these can warp plastic, crack liners, or puncture coolant lines. A plastic scraper used with a gentle pulling motion is safe for stubborn spots.
For all freezers, the wash is the same. Mix your cleaning solution. The science here matters: baking soda (sodium bicarbonate) is a mild alkali that neutralizes fatty acids and odors without being corrosive.
| Manufacturer | Baking Soda | Water | Notes |
|---|---|---|---|
| Electrolux | 2 tbsp (25g) | 1 quart (1.136L) | The stronger ratio for general cleaning. |
| GE Appliances | ~1 tbsp | 1 quart | Also recommends an open box for odor absorption. |
| Frigidaire | ~1 tbsp (15ml) | 1 quart (1L) | Mild solution for periodic cleaning. |
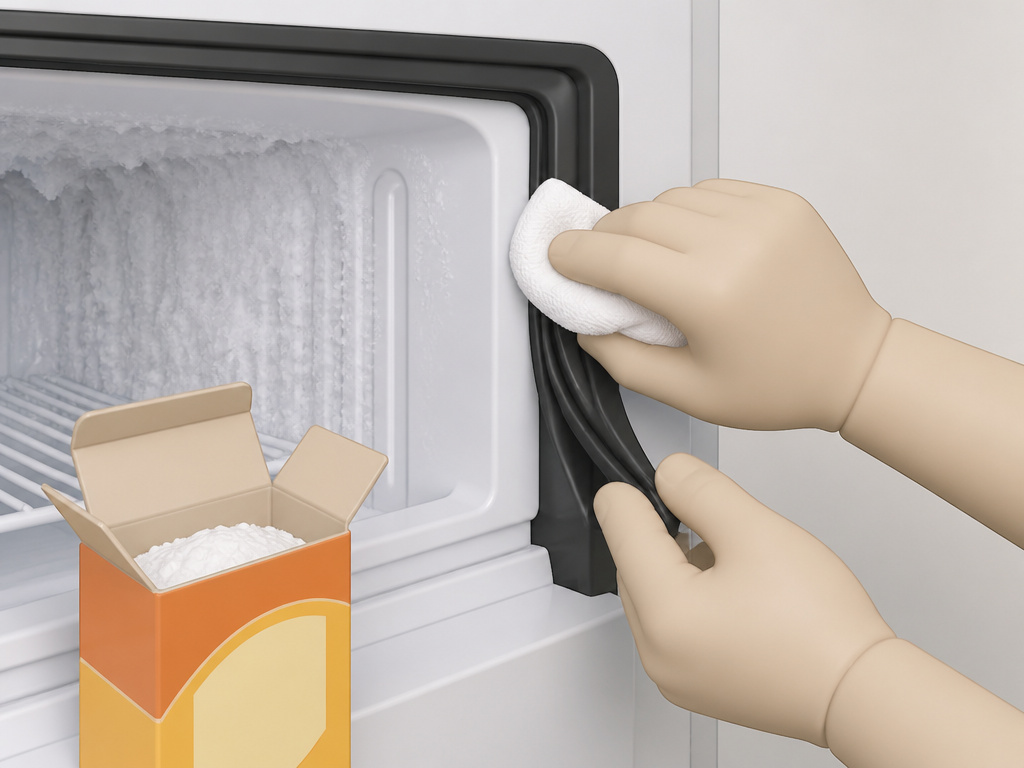
Dip a soft cloth or sponge in the solution, wring it well, and wipe all interior surfaces, walls, floor, ceiling, and shelves. Pay close attention to crevices and the door gasket where spills hide.
The part nobody mentions: Rinse your cloth in clean water and do a second pass to remove any baking soda residue. That faint white film left behind is hygroscopic, it attracts moisture and becomes the nucleation point for your first layer of new frost.
For exterior cleaning, use mild detergent and warm water. For stainless steel models, wipe with the grain and avoid any cleaner containing chloride or bleach, as the manuals explicitly warn these cause permanent corrosion.
Phase 3: Drying and Restarting
This is the step that determines if your work lasts. Every single surface must be bone-dry.
Use clean, absorbent towels to dry the entire interior. Get inside the door gasket folds and any drain hole at the bottom of the unit. A dry gasket is crucial for an airtight seal; moisture here freezes and creates a gap that lets warm, humid air in.
Leave the freezer door open for 30–60 minutes in a well-ventilated room to air out any final dampness. You should see no condensation or feel no cool damp spots.
Now, plug the unit back in. Set the temperature control to its normal setting, usually midway. The compressor will kick on. According to every major brand’s manual, you must allow 4 hours for the freezer to cool down completely before reloading food. This cool-down period is non-negotiable for food safety and compressor health.
Reload your food, organizing as you go. This is the perfect time to discard anything unidentifiable or past its prime.
How Often Should You Clean a Deep Freezer?
Frequency is dictated by frost, odor, and spills.
For a manual defrost freezer, the primary trigger is frost thickness. The 1/4 to 1/2 inch rule is your guide. In a dry climate, that might be once a year. In a humid coastal area, it could be every three months. GE notes that in high humidity, frequent frost is “not unusual,” meaning their “twice a year” guideline is a baseline, not a limit.
For frost-free uprights, which defrost automatically, cleaning is about hygiene and odor. Aim for an interior wash at least once a year. If you store strong-smelling foods like fish or garlic, or if a spill occurs, clean immediately.
An open box of baking soda placed inside helps control odors between cleanings. GE recommends changing it every three months.
| Scenario | Cleaning Trigger | Typical Frequency |
|---|---|---|
| Manual Defrost Chest Freezer | Frost 1/4–1/2″ thick | 1–4 times per year |
| Frost-Free Upright Freezer | Annual maintenance / spills | 1 time per year |
| After Spilling Liquids | Immediate contamination | As needed |
| Persistent Odors | Smell persists | Clean + baking soda box |
Supplies You Need (And What to Absolutely Avoid)
Your toolkit determines your success. Using the wrong item can cause damage that isn’t covered under the standard one-year warranty for parts and labor.
What You Need:
- Baking soda
- Measuring spoons
- Soft cloths or sponges
- Plastic scraper (for manual defrost)
- Towels (for drying and catching water)
- Mild dish soap (exterior only)
- Coolers and ice packs (for food)
What to Avoid Completely:
Manufacturer manuals are very specific about prohibited cleaners. These can degrade plastics, corrode metal, and leave toxic residues.
Common mistake: Using abrasive scrubbers or harsh chemicals. Electrolux manuals forbid “metallic scouring pads, brushes, abrasive cleaners, alkaline solutions, harsh cleaners, CHLORIDE or cleaners with bleach (for stainless steel).” These strip protective coatings and scratch surfaces, making future cleaning harder and creating places for bacteria to hide.
Never put removable freezer parts like baskets or ice maker bins in the dishwasher. The high heat and detergent can warp plastic and degrade the material.
Troubleshooting Common Cleaning Problems
 Sometimes, cleaning reveals or creates issues. Here’s how to handle them.
Problem: Frost returns immediately after cleaning.
Cause: Incomplete drying. Even a small amount of residual moisture sublimates directly into frost on the cold surfaces.
Fix: Unplug, empty the new frost, and thoroughly re-dry every surface, especially the door gasket. Ensure the room isn’t excessively humid during the dry-out period.
Problem: Persistent smell after cleaning.
Cause: Odors have absorbed into the plastic liner or a spill has seeped into a seam.
Fix: After washing with baking soda solution, place several open boxes of baking soda inside, close the door, and leave the freezer running for a week. For severe cases, a paste of baking soda and water left on the affected area for an hour before wiping can help. Check our guide on how to get rid of smells for more intensive methods.
Problem: Freezer won’t get cold after restarting.
Cause: Not waiting the full 4-hour cooldown period, or a faulty door seal letting cold air escape.
Fix: Be patient. It runs continuously for the first several hours. If after 8 hours it’s still not cold, check that the door is sealing perfectly. A dollar bill closed in the door should be held firmly when pulled. If not, the gasket may need replacing or cleaning. Learn more about sealing a chest freezer for a long-term fix.
Frequently Asked Questions
Can I use vinegar to clean my deep freezer?
You can, but baking soda is better for this specific job. Vinegar (acetic acid) is great for dissolving mineral scale and disinfecting. However, freezer grime is mostly fats and proteins. Baking soda neutralizes those fatty acids directly, which is why manufacturers specify it. Vinegar can leave a strong smell that might transfer to food.
Do I need to clean a frost-free freezer?
Yes, but you skip the defrost step. Frost-free models have a heater that melts frost during a cycle, draining the water away. However, spills, crumbs, and odors still accumulate. You should clean the interior, including shelves and drawers, at least annually. Don’t forget to clean the freezer ice maker if your model has one.
How do I prevent frost buildup so I have to clean less often?
Minimize moisture entry. That means ensuring a perfect door seal, letting hot foods cool to room temperature before freezing, and wrapping foods tightly in moisture-proof packaging. Also, avoid opening the door frequently or for long periods. If you see frost buildup between cleanings, your gasket is likely the culprit.
Is it safe to leave food in the freezer while cleaning one section?
It’s risky. Every time you open the lid, warm, humid air rushes in over the remaining food, causing condensation and frost. For a thorough job, it’s safer to remove all food. The process of defrosting a freezer is designed around a completely empty unit. If you must clean in sections, work with extreme speed and keep the lid closed as much as possible.
Before You Go
Cleaning a deep freezer is straightforward when you follow the manufacturer’s specs. Remember the ratio: 2 tablespoons of baking soda per quart of water for Electrolux, 1 tablespoon for others. Defrost at a quarter-inch of frost, dry every surface completely, and always wait four hours before reloading. This cleaning is preventive maintenance that keeps your compressor running smoothly and your food safely frozen for years. For your next step, a full freezer cleaning guide can help you maintain other types of freezers in your home.
