
The Ultimate Method for How to Store Dried Beans Long Term
This post contains affiliate links. As an Amazon Associate, we earn from qualifying purchases.
To store dried beans for long-term storage, control three things: moisture content (8-12% for long-term), oxygen level (remove with oxygen absorbers), and temperature (cool and stable). Package beans in airtight, light-blocking containers like Mylar bags in buckets or #10 cans. This method, validated by a BYU study, can preserve beans for 30 years or more with over 80% consumer acceptance.
Those three controls are non-negotiable. Ignore one, and your storage timeline collapses from decades to months. The difference isn’t a slight drop in quality; it’s the gap between beans that cook tender in two hours and beans that stay hard as pebbles no matter how long you boil them.
What follows is the breakdown of each control point, the step-by-step method used by preppers and commercial growers, and the specific mistakes that turn a 30-year stash into a compost heap in under a year.
Key Takeaways
- Beans stored above 12% moisture risk mold; for true long-term storage, aim for 8-9%.
- Oxygen, not just air, causes rancidity and off-flavors. Only oxygen absorbers in sealed Mylar or metal cans remove it.
- Ultraviolet light darkens beans within two weeks. Opaque storage is as critical as an airtight seal.
- Never handle or move beans when they are colder than 20°F (-6.7°C) or below 10% moisture—the seed coat shatters.
- A 30-year-old pinto bean is not a myth. A BYU study found beans stored that long had over 80% acceptance in taste panels for emergency use.
The Core Three: Moisture, Oxygen, Temperature
Long-term storage involves managing a biological clock slowed to a near stop. Three variables control the speed of that clock.
Moisture content dictates the risk of microbial growth, oxygen availability drives oxidative rancidity of bean oils, and temperature determines the rate of all chemical reactions. For dry beans, the target is ≤12% moisture for short-term storage and 8-9% for long-term, according to the Standards Organisation of Nigeria.
Moisture content is the first gate. The consensus “cool, dry place” advice is useless without a number. Dry is relative. For beans, “dry” means 12% moisture or less for storage under a year. For a stash you want to forget about for a decade, you need 8% to 9%. Beans above 18% moisture are actively spoiling.
Why? Water enables every destructive process. Mold and yeast grow. Insects hatch. Enzymatic reactions that harden the seed coat accelerate. The USU Extension bean storage guide states that beans in normal food-grade plastic bags last about a year. In oxygen-free Mylar or cans, they last ten times longer. The variable removed is moisture migration.
Oxygen is the silent killer. A sealed container still has 21% oxygen inside. That oxygen slowly oxidizes the fats in beans, creating rancid off-flavors. It also supports any insect life that survived packaging. An oxygen absorber is the essential tool that turns a sealed bag into a true anaerobic environment, stopping these processes cold.
Temperature is the throttle. Chemical reactions double in speed for every 10°C (18°F) increase. A bean stash in a garage that swings from 40°F in winter to 90°F in summer ages five times faster than one in a steady 55°F basement. The NDSU dry bean storage research found beans stored at 80°F were significantly darker than those at 40°F after just 120 days, especially at higher moisture levels.
| Storage Factor | Ideal Target | Consequence of Deviation |
|---|---|---|
| Moisture Content | 8% – 12% | >18%: Mold within weeks. <8%: Seed coat cracks on handling. |
| Oxygen Level | 0% (Anaerobic) | 21% (Normal air): Rancidity, insect survival, shorter shelf life. |
| Temperature | Cool, Stable (40-60°F) | Warm & Fluctuating: Rapid darkening, hard-to-cook defect accelerates. |
| Light | Complete Darkness | UV Exposure: Dramatic darkening within 2 weeks. |
Choosing Your Long-Term Storage Container
Your container is the physical barrier that maintains the core three. It must be airtight, light-blocking, and durable.
Mylar Bags + Food-Grade Buckets: This is the default for a reason. The Mylar bags are a metalized polyester that blocks all light and oxygen transmission. Sealed with a flat iron and placed inside a bucket, they are rodent-proof, stackable, and cost-effective. A single 2-gallon bucket holds about 12-15 pounds of beans—a manageable size. This is the method that reliably hits the 25-30 year mark.
#10 Cans: These are the commercial standard. They are rigid, airtight, and block all light. Sealed with a can seamer (or purchased pre-sealed), they offer perhaps the most absolute protection. They are perfect for storing smaller, pre-portioned amounts of specialty beans you use less frequently. They are, however, more expensive per pound than the bucket method and require special equipment or a supplier.
Glass Jars: Repurposed jars work for smaller quantities you plan to cycle through within a few years. You must pair them with a vacuum sealer attachment or an oxygen absorber and store them in total darkness (a cupboard or box). The breakage risk and light exposure make them a second-tier choice for true multi-decade storage, but they excel for pantry storage of active ingredients.
Common mistake: Using any container that isn’t both airtight AND opaque. A clear plastic bin or glass jar on a shelf lets in light, which the NDSU study proved “dramatically darkened beans within two weeks.”
Step-by-Step Packaging for a 30-Year Shelf Life
Follow this sequence. Skipping a step introduces a failure point.
Step 1: Source & Inspect Your Beans. Start with high-quality, clean beans from a reliable source. Check for debris, insect damage, or excess dust. Older beans will still store, but they may already be on the path to becoming “hard-to-cook.”
Step 2: Gather Your Materials. You need Mylar bags sized for your bucket or can, oxygen absorbers (a 1000-2000cc size for a 5-gallon bucket), a food-grade bucket with a gasket lid, a flat iron, and a measuring cup.
Step 3: Bag and Seal.
- Place the Mylar bag inside the bucket. It makes handling easier.
- Pour in your beans, leaving several inches of bag empty at the top.
- Drop in the correct number of oxygen absorbers. Do not open the absorber packets until you are ready to seal.
- Press as much air out of the bag as possible by hand.
- Wipe the top inch of the bag’s interior clean and dry.
- Seal the bag shut with the flat iron on a cotton setting, making a straight, continuous seal. Some people do a double seal for insurance.
- Fold the sealed top over, place the lid on the bucket, and hammer it shut.
Step 4: Label and Store. Write the date, bean type, and any notes on the bucket with a permanent marker. Move it to its final storage location: a cool, dark, and dry basement interior wall is ideal. Avoid attics, garages, or exterior walls where temperatures fluctuate.
Where this goes sideways: Opening oxygen absorber packets hours before use. They begin absorbing moisture from the air immediately and can be exhausted before you seal them in your bag. Open them at the last possible second.
Storage Conditions: What “Cool, Dark, and Dry” Really Means
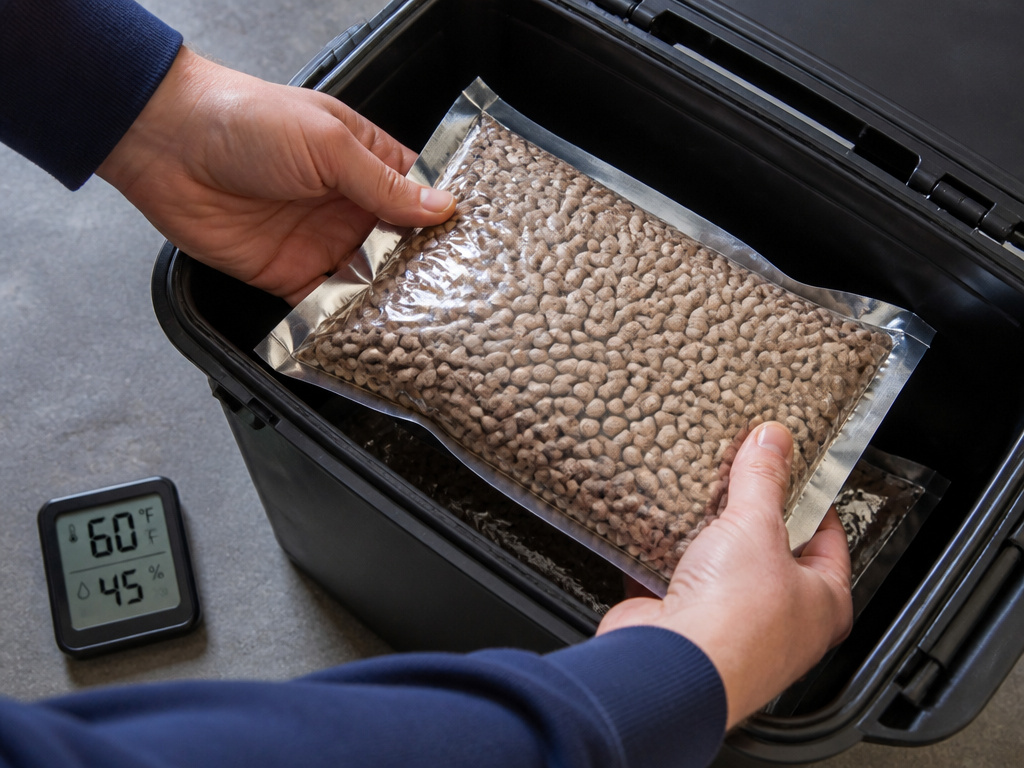 These terms have specific thresholds that determine if your storage is measured in years or decades.
Cool means 55-65°F if possible, and absolutely below 75°F. Data from the Pulse Advisor’s research tables shows the stark difference temperature makes. At 20°C (68°F), beans at 12% moisture have a safe storage window of about 40 weeks. At 5°C (41°F), that window stretches to 370 weeks—over seven years. Your storage location’s average temperature is the single biggest lever you have on longevity.
Dark means zero light exposure. Not “in a shaded room,” but inside an opaque container. The NDSU dry bean storage research on Pinto bean variety Maverick was clear: ultraviolet light caused dramatic darkening in two weeks. This is both a quality issue (dark beans look unappealing) and a potential indicator of accelerated nutrient degradation.
Dry means low ambient humidity and moisture-safe floors. The Standards Organisation of Nigeria code states stored beans should not be kept on bare concrete floors to avoid moisture migration. Your storage room should have stable humidity. A damp root cellar is a terrible place for dried beans, despite being “cool.”
| Storage Temp | Moisture Content | Safe Storage Window | What Happens After |
|---|---|---|---|
| 5°C (41°F) | 12% | ~370 weeks | Very slow quality loss, slight darkening. |
| 5°C (41°F) | 18% | ~39 weeks | Risk of mold increases, darkening. |
| 20°C (68°F) | 12% | ~40 weeks | Steady increase in “hard-to-cook” defect. |
| 20°C (68°F) | 18% | ~7 weeks | High probability of spoilage, insect activity. |
Common Mistakes and How to Avoid Them
 People don’t fail at storage because they forget a step. They fail because they don’t believe the steps matter until it’s too late.
Mistake 1: Assuming “Airtight” Means “Oxygen-Free.” Ziplock bags, plastic cereal containers, and even screw-top jars are airtight enough to keep bugs out but do nothing to remove oxygen. Without oxygen absorbers, the air inside is still actively degrading your beans. The rancidity develops slowly, so you might not notice until you cook a batch and wonder why the flavor is “off.”
Mistake 2: Storing Mixed Ages. Do not pour new beans on top of old beans in a storage container. You reset the clock to zero for the entire batch. The older beans may have already begun the hardening process, and mixing them contaminates the new stock. Always store in discrete, dated lots. This principle applies to all dry pantry staples.
Mistake 3: Ignoring Bean Hardiness During Handling. This is a pro-level edge case. The research document “Critical Food Safety and Quality Elements in the Dry Bean Supply Chain” warns that beans with moisture content below 10% are “particularly susceptible to mechanical seed coat damage.” Furthermore, beans should not be handled at temperatures below 20°F (-6.7°C) because the seed coat becomes brittle and shatters. If you’re moving buckets in and out of a freezing garage, you could be cracking every bean inside without realizing it.
Mistake 4: Using the Wrong Oxygen Absorber Size. An undersized absorber won’t scrub all the oxygen from the container headspace. A 500cc absorber is fine for a gallon jar but is overwhelmed by a 5-gallon bucket. Always size up. The math is based on container volume, not food weight.
How to Use Your Long-Term Stored Beans
After years in storage, beans behave differently. They’ve earned a little extra care.
First, assume they will need longer soaking and cooking times. The “hard-to-cook” defect is a real chemical change in the bean. Plan for an overnight soak and a simmer of 2-4 hours, not 60-90 minutes. Adding a pinch of baking soda (1/8 teaspoon per cup of beans) to the soaking water can help soften them by altering the pH.
Second, inspect them after soaking. Toss any that float (a sign of hollow insect damage) or look suspicious. Rinse them thoroughly before cooking.
Finally, integrate them into your rotation. The best long-term food storage plan is a rotating one. Use your oldest beans for the next batch of chili or soup, and replace that container with fresh, newly packaged beans. This “first-in, first-out” system ensures nothing ever reaches its absolute limit.
Frequently Asked Questions
Can you store dried beans in the original bag?
You can, but not for long-term storage. The plastic of a store bag is permeable to moisture and oxygen over time. For storage over one year, you must repackage them into an airtight, oxygen-free, light-blocking container like a Mylar bag in a bucket or a #10 can.
How do you know if dried beans have gone bad?
Look for signs of insect infestation (webbing, holes, live bugs), mold (fuzzy growth, clumping), or an off odor (musty, rancid, or sour). Beans that have simply aged too long may not show obvious signs but will remain impossibly hard even after prolonged cooking.
Do dried beans really last 30 years?
Under ideal conditions—8-9% moisture, oxygen removed, and stored at cool temperatures—yes. A BYU study cited by Utah State University found pinto beans stored for 30 years had over 80% acceptance by a taste panel for emergency use. They were edible and nutritious, though likely requiring longer cooking times.
Can you vacuum seal beans instead of using oxygen absorbers?
Vacuum sealer removes most of the air, but not all of the oxygen. The remaining oxygen molecules can still cause rancidity. For the longest possible shelf life, use oxygen absorbers inside your vacuum-sealed bags or jars. The absorbers will scavenge the last traces of oxygen that the vacuum missed.
What is the best bean for long-term storage?
All common dry beans (pinto, black, navy, kidney) store equally well under proper conditions. Pinto beans are often referenced in studies, but the principles apply to any variety. Choose beans you actually eat. A diverse stock of rice varieties and beans provides nutritional balance and meal variety.
Do you need to freeze beans before storage to kill bugs?
It’s an effective method. Placing beans in a freezer at 0°F for at least 4 days will kill any eggs or larvae. Let the beans return to room temperature in a sealed bag to avoid condensation before transferring them to your long-term storage containers. This is a good practice for beans from bulk bins.
The Bottom Line
Storing dried beans for the long term requires systematically eliminating the enemies of shelf life: moisture, oxygen, heat, and light, and hitting the moisture target of 8-12%.Scrub the oxygen with the right size absorber. Block the light with Mylar or metal. Find a cool, stable spot.
Do that, and your beans will outlast your mortgage. Skip a step, and they’ll remind you in the pot, simmering for hours and never softening. The method is simple, cheap, and proven. Your future self, making a pot of chili from your own stash, will thank you.
