
The Essential Guide on How to Store Water Long Term Safely
This post contains affiliate links. As an Amazon Associate, we earn from qualifying purchases.
To store water long term, you need to match three things: a food-grade container, a proper disinfection step (1/8 teaspoon of 4-6% sodium hypochlorite bleach per gallon), and a cool, dark storage location. Properly treated and sealed water can last indefinitely, but you should check it every 6-12 months for cloudiness or container integrity.
That “indefinite” shelf life is the part most guides skip. They tell you to rotate water every six months as a blanket rule, which creates unnecessary work and waste. The real limit isn’t time—it’s whether the water was clean when it went in and the container stayed sealed. The six-month check is for the container and your peace of mind, not because the water magically spoils.
What follows: how to pick containers that won’t leach or crack, the exact bleach math that university extensions actually publish, and where to put 250 pounds of water so it doesn’t ruin your floor. We’ll also cover what to do if your only option is the freezer or a scorching garage.
Key Takeaways
- Use only containers marked “food-grade” and made of HDPE (plastic #2). Milk jugs and thin plastic bottles will fail within months.
- Disinfect with unscented liquid chlorine bleach containing 4–6% sodium hypochlorite. The precise dose is 1/8 teaspoon (or 8 drops) per gallon of clear water.
- Store water in a cool, dark place away from gasoline, pesticides, and direct sunlight. Temperature extremes degrade plastic and promote bacterial growth.
- Label every container with the fill date. Check water every 6–12 months for cloudiness, algae, or container damage—replace if found.
- For large-scale storage, granular calcium hypochlorite is a more stable disinfectant than liquid bleach, which loses potency after six months.
The 3 Critical Factors for Safe Water Storage
Getting long-term water storage right isn’t about buying a special product. It’s about controlling three variables that every official guide agrees on: the container material, the initial water treatment, and the storage environment. Miss one, and your supply could be useless or harmful when you need it most.
Common mistake: Using any clean-looking plastic container. Containers not rated for food can leach chemicals into water over time, especially in heat. A container that held milk or juice leaves a residue that bacteria love.
The first factor is the vessel itself. Your container must be food-grade. In plastic, this means looking for the resin identification code—a triangle with a number—and choosing #2 HDPE (high-density polyethylene) or #4 LDPE. These plastics are inert and won’t transfer tastes or chemicals. The classic blue 5-gallon jugs are almost always HDPE. You can also use stainless steel or fiberglass drums if they are lined with a food-safe coating.
Glass is a poor choice for anything beyond a few gallons. It’s heavy, breakable, and dangerous if frozen. The NMSU Extension guide explicitly advises against glass due to breakage risk.
The second factor is starting with clean, disinfected water. If your tap water comes from a treated municipal supply, it’s already disinfected. Your job is to keep it that way by using a sanitized container. If your water is from a well, spring, or questionable source, you must disinfect it before storage.
The third factor is the storage location. This is where most DIY setups fail in slow motion. Plastic is slightly permeable to vapors. Storing water containers near gasoline, paint, or pesticides can taint your water. Sunlight and heat accelerate plastic degradation and can encourage algae growth even in treated water. A cool, dark basement closet beats a garage shelf next to the lawnmower every time.
Choosing Your Storage Containers
You have options, from small jugs to massive tanks. The right choice depends on how much you need to store, where you can put it, and how you’ll access it.
Small-Scale (1–30 Gallons): For most families starting out, stackable 5-gallon HDPE jugs are the default. Brands like Aqua-Tainer or Reliance Products make sturdy versions with built-in spigots. They’re manageable when full (about 40 lbs) and easy to rotate. This scale fits the CDC’s recommendation for a 3-day supply for a family of four.
Medium-Scale (30–55 Gallons): Here, you move into barrel territory. A 55-gallon food-grade poly drum holds a substantial supply but weighs over 450 pounds when full. You must plan its permanent location before filling. These are great for a dedicated storage room or garage corner placed on a reinforced platform.
Large-Scale (100+ Gallons): This is the realm of water storage tanks like IBC totes (Intermediate Bulk Containers) or permanent cisterns. These are investments and require careful planning for placement, support, and access. The WHO water tank cleaning guide becomes essential reading for maintaining systems this size.
| Container Type | Best For | Key Consideration |
|---|---|---|
| 5-Gallon HDPE Jug | Beginners, apartments, easy rotation | Ensure the spigot is lead-free and sealed before long-term storage. |
| 55-Gallon Food-Grade Drum | Dedicated storage spaces, large families | Must be placed on a reinforced stand; nearly immovable when full. |
| 30-Gallon Portable Tank | A balance between capacity and mobility | Often have wider openings for easier cleaning than barrels. |
| Stainless Steel Cistern | Permanent, whole-house backup systems | Professional installation recommended; requires periodic inspection. |
Whatever you choose, the principles from the CDC safe water storage principles apply: a tight-sealing lid, a material that won’t impart taste or chemicals, and a design that’s easy to clean.
Step-by-Step Cleaning & Disinfection
This is the non-negotiable ritual. Skipping it means storing whatever microbes were on the container’s surface along with your water. The process has two parts: cleaning (removing dirt) and sanitizing (killing microbes).
Step 1: Clean the Container. Wash the inside and out with hot, soapy water. Use a bottle brush for jugs or a long-handled brush for barrels. Rinse thoroughly until no soap residue remains. Any soap left behind can protect bacteria from the next step.
Step 2: Sanitize with Bleach Solution. Here’s the exact formula from the NMSU extension water storage publication: Mix 1 teaspoon of unscented household bleach (containing 4-6% sodium hypochlorite) with 1 quart of clean water. Pour this solution into your clean container, seal it, and shake vigorously so it coats every interior surface. Let it sit for at least 30 seconds, then pour it out. Do not rinse. The residual bleach will evaporate.
Step 3: Fill with Water. Use cold tap water if it’s from a treated municipal supply. If using well water or another untreated source, you must disinfect the water itself as you fill.
Step 4: Treat the Water (If Needed). For untreated water, or for an extra margin of safety with any water, add a disinfectant. The USU Extension water storage guide provides the gold-standard dosage: 1/8 teaspoon (or 8 drops) of unscented 4-6% sodium hypochlorite bleach per gallon of clear water. If the water is cloudy, double the dose.
Where this goes sideways: Using scented bleach, splash-less bleach, or bleach with added cleaners. These contain chemicals you don’t want to drink, even in tiny amounts. They can also leave a foul taste that makes the water unpalatable.
Step: 5: Seal and Label. Close the container tightly. Use a permanent marker to write the fill date directly on the container. “April 2025” is clear and simple.
The Right Way to Store Your Water Supply
Now you have clean water in a clean container. Where it sits for the next year matters more than you think. The ideal location is cool (50–70°F), dark, and dry. A basement interior closet checks all these boxes. A garage or shed is often the worst possible place—subject to temperature swings, sunlight, and chemical fumes.
Easy to miss: The floor material. Never store water containers directly on concrete. Concrete breathes moisture, which can rust metal containers and transfer a musty taste to plastic over years. Place containers on wooden pallets, a plywood sheet, or 2×4 runners.
If your only option is a space that freezes, that’s okay, but you must plan for it. Leave 2-3 inches of headspace at the top of each container to allow for expansion as water turns to ice. This prevents the container from splitting. Remember, a frozen solid 55-gallon drum is a 500-pound block you can’t use until it thaws.
For large tanks, building a sturdy support stand is non-optional. A 55-gallon drum needs a platform rated for at least 500 pounds. The stand should also elevate the tank high enough to fit a bucket under the spigot. Many pre-made water storage tanks come with integrated stands or steel cradles.
Your storage plan should also consider access. In an emergency, you don’t want to move a dozen full 5-gallon jugs. Place your emergency water supplies where you can easily reach them, and keep a clean siphon or pump with your gear.
How Much Water Do You Actually Need?
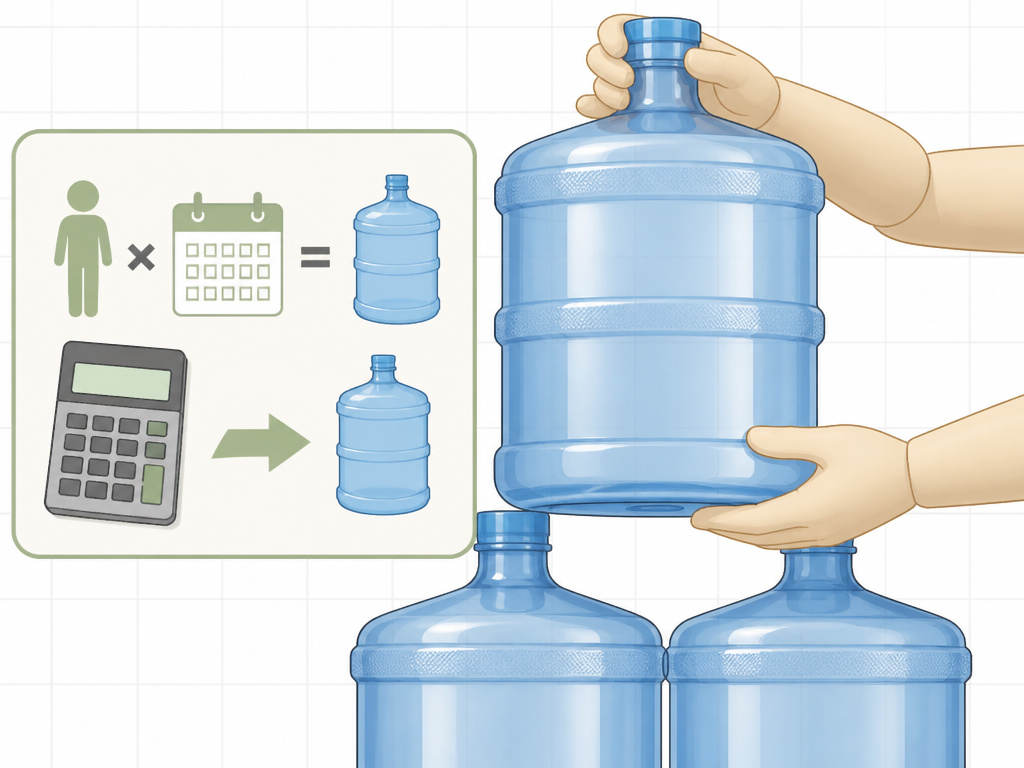 The standard advice is one gallon per person per day. That’s a bare minimum for drinking and a bit of food preparation. It assumes no washing, cleaning, or flushing. The Department of Defense, Office of Civil Defense states a quart per day will sustain life, but a gallon is needed for comfort, especially in warm weather.
For a more realistic and comfortable plan, the Sphere standards for emergency WASH recommend 7.5 to 15 liters (2 to 4 gallons) per person per day to cover drinking, cooking, and basic hygiene.
| Person | 3-Day Supply (Minimal) | 2-Week Supply (Comfortable) | Notes |
|---|---|---|---|
| 1 Adult | 3 Gallons | 28 Gallons | Increase by 50% in hot climates or for pregnant/nursing individuals. |
| Family of 4 | 12 Gallons | 112 Gallons | Equivalent to 22 standard 5-gallon jugs. Requires significant space planning. |
| Includes Pets | +0.5-1 Gal/day | +7-14 Gallons | A large dog needs nearly as much water as a person. |
These numbers can feel overwhelming. Start with a goal of a 3-day supply for everyone in your home, using stackable 5-gallon jugs. Then gradually expand to a 2-week supply as you find space and containers. This phased approach aligns with the fundamentals of long-term food storage—start small, build consistency.
Maintaining Your Water Supply
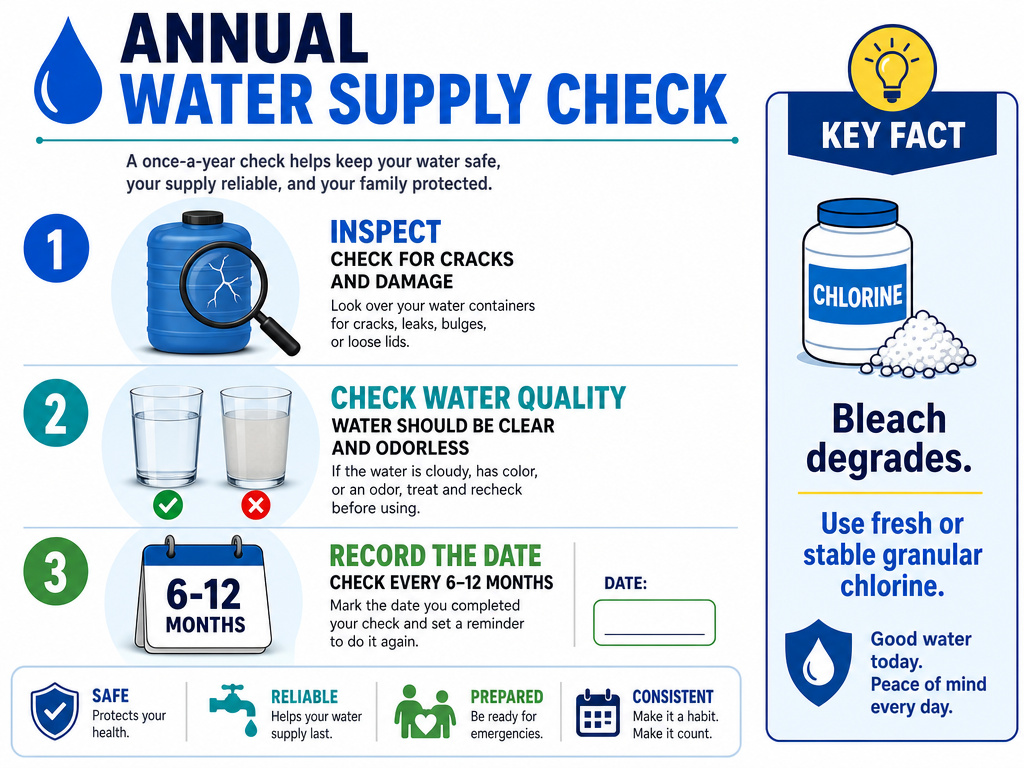 You’ve stored the water. Now you maintain it. This doesn’t mean pouring it out every six months. It means a scheduled check.
Every 6-12 months, do the following: 1. Visual Inspection: Look at the containers. Are any cracked, bulging, or leaking? Check the seals and spigots. 2. Water Check: Open one container per batch. Does the water look clear? Any sediment, algae, or cloudiness? Does it smell fresh? 3. Taste Test (Optional): If it passes the visual and smell test, taste a small sip. It should taste like… water. Any plastic, chemical, or off taste means you should replace it.
If the water is cloudy or has visible growth, discard it safely (water your garden, flush toilets). Thoroughly clean and sanitize the container, then refill and retreat.
The part nobody mentions: Liquid chlorine bleach degrades. The USU Extension water storage guide notes fresh bleach can lose half its strength after six months. If you’re using bleach from an old bottle to treat new water, you might be under-dosing. For long-term preparedness, granular calcium hypochlorite (pool shock) is more stable. A one-pound bag can treat thousands of gallons and lasts for years if kept dry.
This maintenance loop is why labeling with the date is critical. It removes the guesswork from your rotation schedule and ensures you’re always drinking from your oldest stock first.
Frequently Asked Questions
Does stored water go bad?
Water itself does not expire. Bacteria, algae, or chemicals from the container can contaminate it over time. Properly disinfected water in a sealed, food-grade container stored in a cool, dark place can remain safe to drink for years. The “6-month rotation” rule is a easy-to-remember guideline for checking the container’s integrity, not a hard shelf life.
Can I store water in used milk jugs?
No. This is one of the most common and worst ideas. Milk jugs are designed to biodegrade and are very thin. They will crack and leak within months. Furthermore, the milk residue is impossible to fully remove and will breed bacteria, turning your water foul quickly. Always use purpose-built, food-grade water storage containers.
How do I treat water with bleach?
For clear water, add 1/8 teaspoon (or 8 drops) of unscented liquid chlorine bleach (4-6% sodium hypochlorite) per gallon. Stir or shake. Wait 30 minutes. The water should have a slight chlorine smell. If it doesn’t, repeat the dose and wait 15 more minutes. This method is outlined in the treating and storing water PDF from New Mexico State University.
What’s the best container for freezing water?
If you must freeze water, use only HDPE plastic (#2) containers and leave 2-3 inches of headspace for expansion. Do not use glass, which will shatter, or thin PET plastic bottles, which can split. Remember, frozen water is inaccessible until it thaws, so don’t freeze your entire supply.
Is bottled water good for long-term storage?
Commercial bottled water is safe for storage and has a long shelf life due to its sealed, food-grade packaging. However, it is an expensive way to store large volumes. The plastic used is often PET (#1), which is more permeable to gases than HDPE over very long periods (5+ years). For a large, cost-effective supply, treating tap water in dedicated home water storage containers is more practical.
Before You Go
Long-term water storage is a simple physics and chemistry problem. Get a food-grade HDPE container. Clean and sanitize it with bleach. Fill it with treated water using the 1/8 teaspoon per gallon rule. Store it in a cool, dark place off the concrete. Check it every six months.
The goal isn’t to create a chore. It’s to build a pillar of resilience that you can forget about until you need it. Start with a 3-day supply in stackable 5-gallon jugs. That covers most local disruptions. Then, as space and budget allow, scale up to two weeks. Your future self will thank you for the foresight, not the hassle. The water will be waiting, clean and clear, exactly as you left it.
