
Refrigerator Can Organizer That Actually Fits Your Fridge
This post contains affiliate links. As an Amazon Associate, we earn from qualifying purchases.
A can organizer for your refrigerator is a sliding rack or dispenser that holds cans in a single file, pushing the next one forward as you remove the front can. The right one saves space, prevents items from getting lost in the back, and keeps your fridge looking tidy.
That forward-feed mechanism is the whole point. A simple bin that just holds cans doesn’t solve the digging problem. A true organizer sequences them.
What follows is a breakdown of the three main types, the measurements that decide whether an organizer fits your specific refrigerator, and the one installation mistake that makes even the best model useless within a month.
Key Takeaways
- Measure your refrigerator shelf depth and height before buying. An organizer that’s too deep blocks air vents or the door from closing.
- Wire rack organizers offer the best airflow but can snag plastic shelf liners. Sliding tray models need a perfectly level shelf to feed correctly.
- The cheapest plastic dispensers crack at the feed mechanism under the weight of full cans after about 50 cycles. Spend on thicker ABS plastic or metal.
- Integrate your can organizer with a system of clear bins and designated zones to prevent cross-contamination and spoilage.
- For a standard top-freezer fridge, a 12-can sliding organizer is the default pick. For a French door or side-by-side model, you need two shorter units.
What Does a Refrigerator Can Organizer Actually Do?
It forces first-in, first-out rotation. Without one, you stash new soda at the back of the shelf. The old cans get buried, go flat, and you waste money and product.
A proper organizer uses gravity or a spring-loaded pusher to line cans up and advance the queue. This isn’t just about neatness. It’s a direct counter to the single biggest cause of beverage waste in home fridges: out-of-sight, out-of-mind storage. The physical act of loading the organizer makes you check dates. The act of taking a can from the front ensures the oldest gets consumed first.
This forward-feed mechanism is tested under NSF/ANSI Standard 2 for food equipment, which includes requirements for materials and cleanability. A dispenser that meets this standard won’t harbor bacteria in its track.
The alternative is a jumbled shelf where cans roll, tip, and hide. That chaos costs you real shelf space and leads to those half-empty, forgotten cans that clutter every clean-out.
Types of Can Organizers
You have three paths, each with a different mechanical action and a different failure point.
Sliding Tray Dispensers
These are the most common. Cans rest on a sloped track or a flat tray with a spring-loaded pusher plate at the back. You pull the front can, and the pusher advances the next one. * Best for: Standard soda cans. They handle 12-ounce aluminum best. * Fails when: The spring weakens or the plastic track warps. A weak spring won’t push a full row of cans, leaving gaps. A warped track jams.
Gravity-Feed Wire Racks
Cans roll down a slanted wire rack, held in place by side rails. No moving parts. * Best for: Homes with hard water. No plastic parts to degrade with moisture. Also superior for airflow around cans. * Fails when: The rack isn’t slanted enough. If your refrigerator shelf isn’t perfectly level, the cans won’t roll. You’ll be pulling from the middle.
Simple Stacking Bins
These are just open-front bins. They hold cans in rows but don’t feed them. * Best for: Variable can sizes (soup, sparkling water, beer bottles) where a dispenser’s fixed width won’t work. * Fails when: You overfill them. Then you’re back to digging.
| Organizer Type | Mechanism | Best Use Case | Common Failure Mode |
|---|---|---|---|
| Sliding Tray Dispenser | Spring-loaded pusher | 12 oz soda cans, consistent size | Spring fatigue, track warping |
| Gravity-Feed Wire Rack | Slanted rolling track | Hard water areas, needs airflow | Shelf not level, cans stall |
| Simple Stacking Bin | Manual access | Mixed can & bottle sizes | Overfilling, no FIFO enforcement |
How to Choose the Right Can Organizer
The organizer that fits a 36-inch wide French door refrigerator won’t fit a 28-inch wide apartment fridge. This choice starts with a tape measure.
1. Measure Your Refrigerator Shelf
This is the non-negotiable first step. You need three numbers: * Shelf Depth: From the back wall to the front edge of the shelf. Don’t forget the door clearance. An organizer that fits depth-wise but blocks the gallon of milk on the door shelf is a failure. * Shelf Height: The vertical space from the shelf to the one above it. Remember, you need to lift cans out at an angle. * Shelf Width: The usable space between humps, guards, or the fridge walls.
Manufacturer specs are a good baseline, but your actual shelf might differ. For example, an LG French door refrigerator like the popular LHFS28XBS series has a shelf depth of about 29 inches without the door. Your organizer needs to be at least 3 inches shorter than that to allow for the curve of the door and items stored on it.
2. Match the Organizer to Your Fridge Type
- Top-Freezer Refrigerator: Standard width and depth. A classic 12-can sliding dispenser usually fits.
- French Door Refrigerator: Wider but shallower shelves. You’ll likely need two shorter organizers side-by-side instead of one long one. The bottom shelf often has more height clearance.
- Side-by-Side Refrigerator: Narrow shelves. Look for slim organizers designed for 2-3 cans across, not 4. The freezer side is irrelevant, but the fridge side is often tight.
- Bottom Freezer Refrigerator: Similar to French doors for the fridge compartment. The challenge is often the shorter door shelves.
3. Consider Your Can Mix
Are you only storing standard 12-ounce soda? Or do you have tall skinny energy drinks, short stout craft beer cans, and sparkling water bottles? A dispenser with fixed side rails will only work for one diameter. A wire rack with adjustable rails or an open bin is better for variety.
Where this goes sideways: Buying an organizer based on can count instead of shelf dimensions. A “24-can organizer” that’s 22 inches deep will not fit in a standard fridge. You’ll be returning it.
The 4 Tools That Replace a $200 Professional Organizer
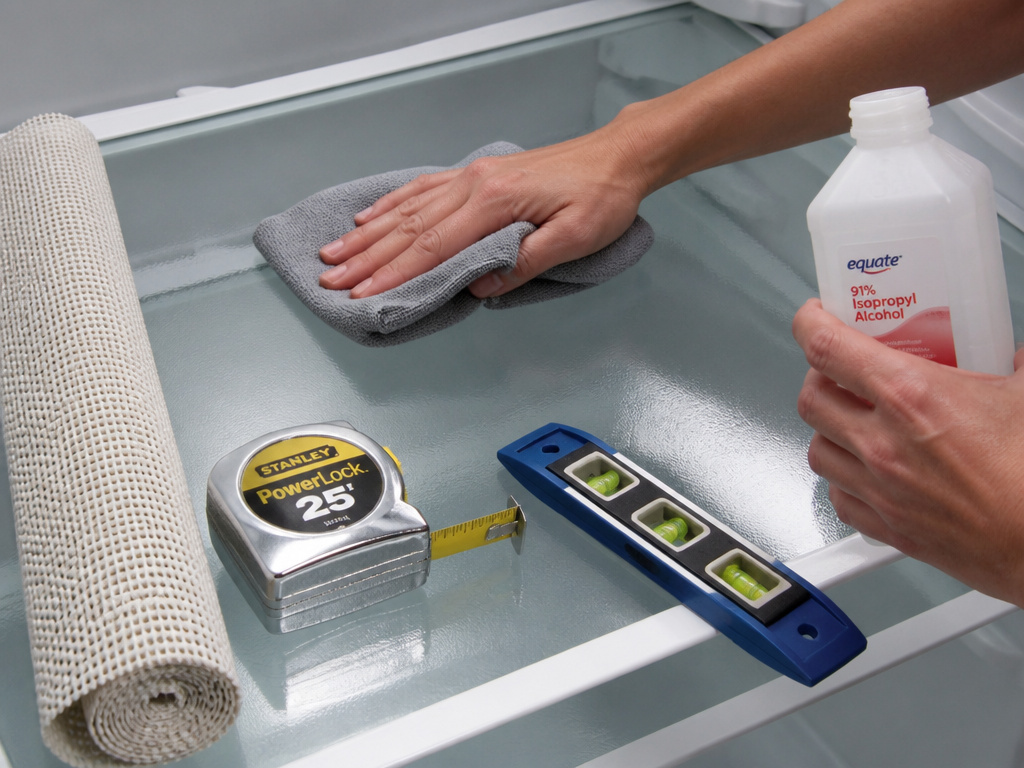
You don’t need a professional. You need these four items, which together cost less than a single service call.
- A Tape Measure. A basic 25-foot metal tape. Write down your shelf dimensions and take them shopping.
- A Small Level. A 6-inch torpedo level. Check your refrigerator shelf before installing a gravity-feed rack. The fridge might be level, but the shelf itself could tilt.
- Rubbing Alcohol & a Microfiber Cloth. Wipe the shelf down before placing any organizer. Residual sticky spots will make plastic organizers slide every time you pull a can.
- Non-Slip Shelf Liner (Optional). A thin, grippy mat cut to size. Place it under a wire rack or lightweight plastic bin to stop it from sliding. It also protects glass shelves from scratches.
Integrating a can organizer works best as part of a broader system. Using clear refrigerator drawers for produce and dedicated storage containers for leftovers creates zones. The can rack is just one component of a fridge where everything has a place and is visible.
Installing Your Can Organizer: A 7-Step Guide
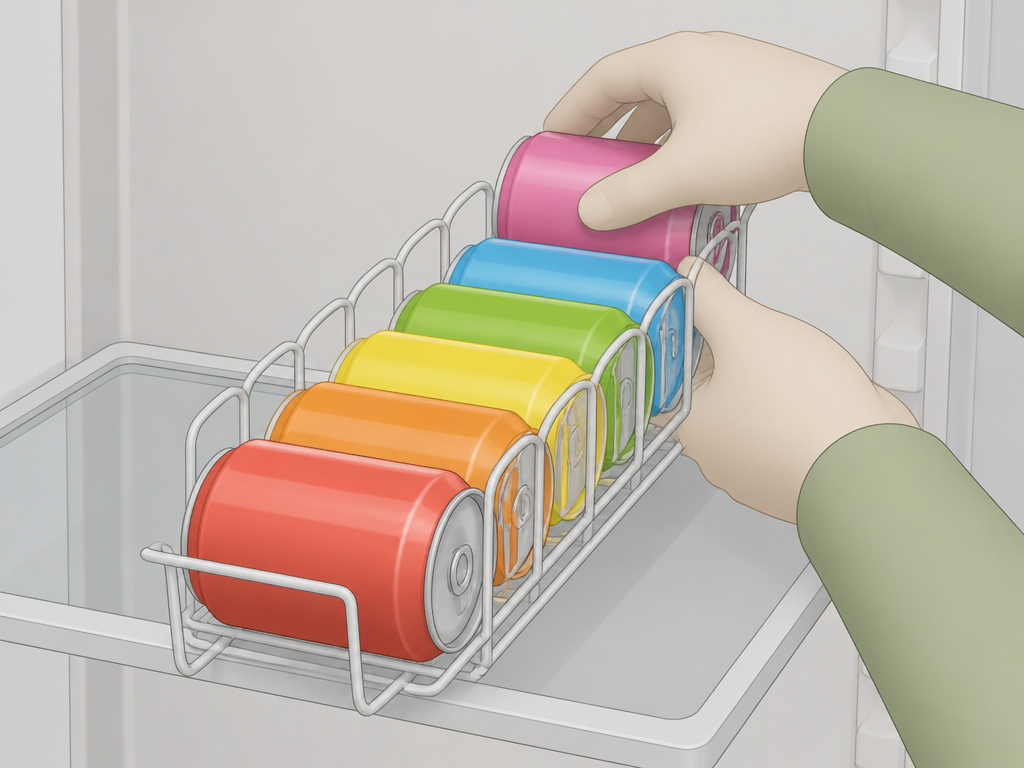
The process is simple, but one missed step causes the most common complaint: “It doesn’t feed right.”
Step 1: Empty and Clean the Shelf.
Remove everything. Wash the shelf with warm soapy water, dry thoroughly, then wipe with rubbing alcohol. A clean, dry, grease-free surface is critical for adhesion or stability. * Skip this, and any non-slip pad will peel up within a week, or your organizer will slide around.
Step 2: Check for Level.
Place your small level on the shelf. Note any front-to-back or side-to-side tilt. Gravity-feed racks need a slight backward tilt to work. If your shelf is flat or tilts forward, you need a different organizer type.
Step 3: Lay Down a Non-Slip Mat (If Using).
Cut a piece of grippy shelf liner to the exact footprint of your organizer. Press it firmly onto the clean shelf.
Step 4: Assemble the Organizer.
Follow the instructions. For sliding dispensers, this usually means attaching the pusher plate and spring. For wire racks, it’s often just unfolding and locking the legs. * Do this wrong, and the pusher will be misaligned, causing cans to jam diagonally.
Step 5: Load a Test Can.
Before filling it, place one can in the front position. Make sure it rolls or slides out smoothly without catching on any lip or edge.
Step 6: Fill the Organizer Back to Front.
Load new cans at the back of the organizer. This presses the existing cans forward. The oldest can should always be at the front. * This is the step nobody skips on purpose, but everyone gets wrong by accident when they’re in a hurry. Loading from the front defeats the entire system.
Step 7: Do a Full-Cycle Test.
Remove the front can. Verify the next can moves cleanly into position. If it sticks, check for shelf level, spring tension, or track obstructions.
Common Problems and How to Fix Them
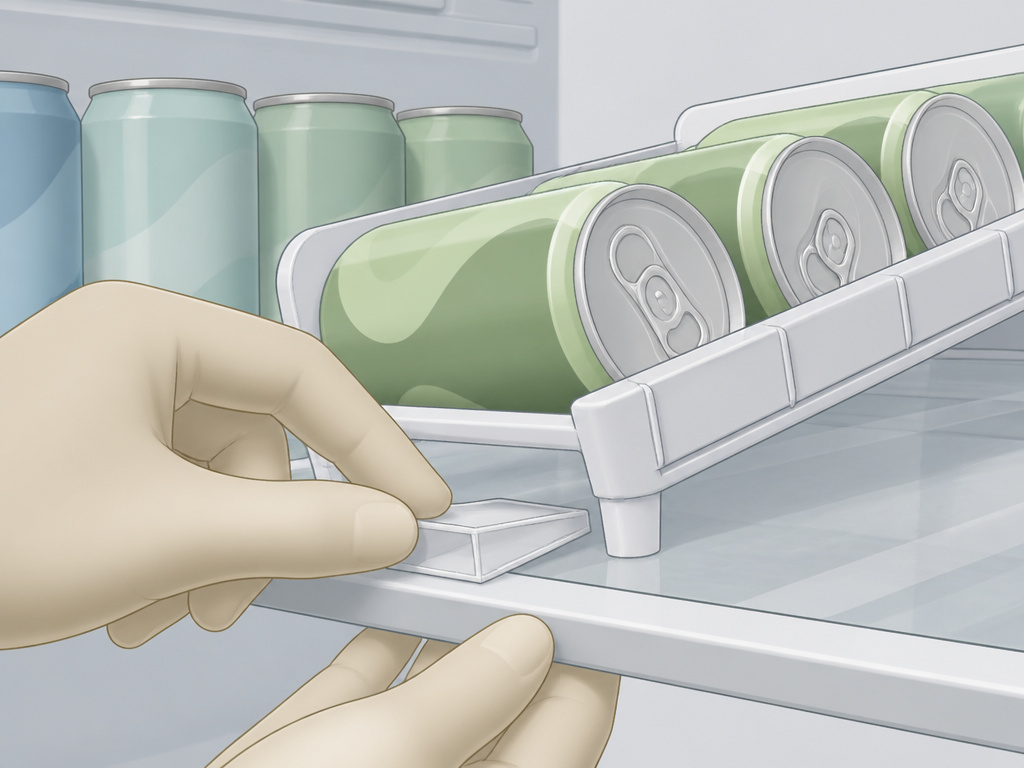
Problem: Cans won’t roll down the gravity rack.
Likely Cause: The shelf is level or tilted forward.
Fix: Use shims under the front feet of the rack. Plastic furniture pads or folded cardstock can add the slight angle needed. If that doesn’t work, switch to a spring-loaded dispenser.
Problem: The pusher plate sticks and doesn’t advance cans.
Likely Cause: Debris in the track or a warped plastic rail.
Fix: Empty the organizer. Inspect the track for crumbs or sticky residue. Clean it with a damp cloth. If the plastic is warped from heat (like being left in a hot car), it’s likely a manufacturing defect. Return it.
Problem: The organizer slides every time I pull a can.
Likely Cause: Not enough friction between the organizer base and the shelf.
Fix: Ensure the shelf is clean and dry. Apply a non-slip mat underneath. For wire racks, rubber-tipped feet often wear smooth; add small dots of hot glue or silicone to the feet to create new grippers.
Problem: It doesn’t fit all my can sizes.
Likely Cause: You bought a fixed-width dispenser for variable-sized cans.
Fix: Use a simple open bin for your mixed inventory. Or, dedicate one dispenser to soda and use a separate bin for energy drinks and sparkling water.
Integrating with Your Overall Refrigerator System
A can organizer shouldn’t live in isolation. Its placement affects airflow and safety.
Airflow is Non-Negotiable.
Refrigerators cool by circulating air. The back wall is usually cold, with vents near the top or bottom. An organizer shoved flush against the back wall can block these vents, leading to warm spots and spoiled food. Leave a 1-2 inch gap between the back of any organizer and the refrigerator wall. This is especially critical in models that use a Multi-Flow or Fan Cooling system, like many LG and Samsung units. Blocking the vents makes the compressor work harder, increasing energy use and wear.
Prevent Cross-Contamination.
Never place a can organizer on the same shelf where you store raw meat or fish, even if they’re packaged. A leaking package can drip onto cans, transferring bacteria. The safest place for beverages is often the top shelf or a dedicated door bin. Use the lower shelves for raw items, with raw meat placement always on the bottom shelf to contain any leaks.
Synergy with Other Organizers.
Pair your can rack with clear, stackable bins for yogurt cups, cheese sticks, or snack packs. Use a refrigerator thermometer to monitor the temperature in different zones, ensuring your drinks are in a consistently cool spot. A well-organized fridge with proper refrigerator drawers for produce and clear zones for different food types makes the can organizer just one part of a efficient, low-waste kitchen.
Frequently Asked Questions
How many cans fit in a typical refrigerator organizer?
Most standard sliding dispensers hold 10-12 standard 12-ounce cans. Larger models for pantry use can hold 24 or more, but those are often too deep for standard refrigerator shelves. Always check the depth measurement against your shelf.
Can I use a can organizer in a refrigerator door shelf?
Usually not. Door shelves are typically too shallow and have a raised lip that would prevent cans from dispensing. The constant motion of the door also makes gravity-feed racks unreliable. Door shelves are better for condiments and smaller bottles.
Are metal or plastic can organizers better?
Metal wire racks excel in durability and airflow. They won’t warp and are easy to clean. Plastic organizers can crack in cold temperatures if they’re cheap, but high-quality ABS plastic is fine and often includes the spring mechanisms that metal racks lack. Choose metal for a permanent, no-moving-parts solution; choose a sturdy plastic model if you want the automatic feed mechanism.
Do can organizers work for soup cans or other non-drink cans?
Yes, but you must match the diameter. Most are designed for standard 2.6-inch diameter soda cans. Soup cans are often a similar diameter but taller. Check the organizer’s height clearance. For shorter, wider cans (like some tuna cans), you’ll need an adjustable rack or a simple bin.
How do I clean a can organizer?
Empty it. For wire racks, wash in warm soapy water or run through the dishwasher if it fits. For plastic dispensers, wipe down with a damp cloth and mild detergent. Avoid submerging spring mechanisms. Dry thoroughly before reloading to prevent mold or mildew in the track.
The Bottom Line
A can organizer solves a specific, annoying problem: lost drinks and wasted money. The right one fits your shelf dimensions first and your can types second. For most people with a standard fridge, a 12-can sliding plastic dispenser from a reputable brand is the default answer. If you have a French door or side-by-side model, buy two shorter units instead of forcing one long one.
Measure your shelf. Check the level. Load from the back. Those three actions prevent 90 percent of the complaints. Pair it with a system of clear bins and proper refrigerator organizers for other items, and you’ll stop digging for a soda for good.
