
Can Mold Grow in the Freezer | The 0°C Germination Point
This post contains affiliate links. As an Amazon Associate, we earn from qualifying purchases.
Yes, mold can grow in your freezer. It doesn’t thrive there, but cold-tolerant species like Cladosporium and Penicillium can germinate at temperatures as low as 0°C (32°F) when moisture is present. Your freezer doesn’t kill mold spores; it puts them into suspended animation. A power outage, a faulty seal, or a spill provides the liquid water and food source they need to wake up.
That 0°C threshold is the critical detail most guides gloss over. It’s not about your freezer being “warm.” It’s about microscopic pockets where conditions briefly cross that line, letting dormant spores kickstart a colony. This happens in the frost layer, on a damp seal, or in a puddle of thawed juice.
What follows is a breakdown of the cold-loving molds you’re actually up against, the three specific conditions that let them grow, and the cleaning protocol that works when vinegar doesn’t. We’ll also cover what to do if your freezer won’t be used for months, a manufacturer tip that prevents a different kind of disaster.
Key Takeaways
- Mold spores survive indefinitely at freezer temperatures; cold only forces dormancy.
- Species like Cladosporium germinate at 0°C, making the frost layer a potential breeding ground.
- The three requirements are: mold spores (always present), organic food (a spill), and liquid water (from condensation or thawing).
- A baking soda solution (2 tbsp per quart of water) is more effective and safer for freezer plastics than vinegar or bleach.
- If storing an empty freezer long-term, prop the door open a crack to prevent mold growth inside the sealed cavity.
What Freezer Mold Actually Looks Like (And Smells Like)
You won’t see fuzzy green bread mold. Freezer mold is subtler, adapted to the cold and dry.
Look for scattered specks or small, flat patches. Colors range from white and grey to black or blue-green. They often appear on the rubber door gasket, in the corners of shelves, or on the back wall where frost accumulates. A more obvious sign is icing over a discolored patch, the mold is growing underneath the frost layer. You might also find it on forgotten food, especially fruit or bread, where it looks like a fine dust.
The smell is a sharper warning. A functioning freezer should smell like nothing. A musty, sour, or vaguely chemical odor means microbial volatile organic compounds (MVOCs) are present. These are waste gases released by active mold colonies, even tiny ones you can’t see yet. If you sniff that when you open the door, start inspecting the seals and the drip tray.
Where this goes sideways: Assuming no fuzz means no mold. The most common freezer molds (Penicillium, Cladosporium) often grow as a slimy film or tiny dots under frost. You’ll smell them long before you see a classic fuzzy patch.
The Species That Survive the Cold
Not all molds are created equal. The ones in your freezer are specialists. * Cladosporium: This is the most common cold-room mold. It appears as olive-green to black spots and is a known trigger for allergies and asthma. Research from mold remediation specialists notes Cladosporium can germinate at 0°C. * Penicillium: Often blue or green, it’s the same genus used to make antibiotics, but the wild strains in your freezer can produce mycotoxins. It’s also a cold-tolerant germinator. * Psychrophilic Molds: This is the technical term for cold-loving fungi. They have evolved enzymes that work at near-freezing temperatures, allowing for extremely slow growth when the right conditions align.
These spores are everywhere. They enter your freezer on food, through the air when the door opens, or on your hands. The freezer doesn’t eliminate them; it presses pause.
The 0°C Germination Point: How Mold Wins in the Cold
The standard advice is “mold needs warmth.” That’s incomplete. It needs liquid water. The freezing point of water, 0°C, is the magic number.
Inside a properly set freezer, the air is far below 0°C, and any water is solid ice. Mold spores are inert. But the environment inside a freezer is not uniform. Several common events create micro-environments where the temperature briefly kisses 0°C and liquid water appears.
- The Defrost Cycle: Even manual-defrost freezers have warmer spots near the door or on the upper shelves. An auto-defrost cycle actively warms the coils, causing frost to melt. That water, before it refreezes or drains, is liquid.
- Door Openings: Every time you open the door, warm, moist kitchen air rushes in. It hits the cold walls and shelves and condenses instantly. This is why the upper front area and door seals are mold hotspots.
- Power Failure/Overcrowding: If the temperature rises above 0°C for an extended period, like during a multi-hour outage, ice melts into water. Overcrowding the freezer blocks air flow and can cause warm spots above freezing.
Common mistake: Believing a freezer set to -18°C is uniformly that cold. A UK Food Standards Agency study of 745 home freezers found an average temperature of -20.3°C, but individual units showed massive variation, with some areas much warmer. Spores in those warmer pockets get their chance.
The equation is simple: Spores + Organic Matter + Liquid Water = Growth. The organic matter is any food residue, a berry juice drip, a breadcrumb, a smear of gravy. You provide the food and moisture; the spores are already there waiting.
Your Freezer’s Two Biggest Mold Vulnerabilities
While spills contribute, two design-related issues are the primary culprits for persistent mold problems.
The Door Gasket: That rubber seal is the freezer’s weakest link. Its job is to keep warm, humid air out. If it’s cracked, torn, or just caked with grime, it fails. Moisture infiltrates constantly, condensing on the cold side of the seal. Mold thrives in the crevices of the gasket material itself. Cleaning it is essential, but a damaged seal must be replaced, cleaning won’t fix the physical breach.
The Drainage System (in auto-defrost models): This system is designed to handle the water from the defrost cycle. A small drain at the back of the interior leads to a drip pan underneath or at the back of the unit. If this drain line clogs with food debris or mold itself, water backs up. It pools inside the freezer, creating a stagnant pond, or overflows the pan underneath. This hidden, damp area is a major mold factory and often the source of persistent odors.
| Vulnerability | How It Causes Mold | The Fix |
|---|---|---|
| Faulty Door Seal | Lets in warm, wet air; condensation forms on seal itself. | Clean monthly; replace if cracked or stiff. |
| Clogged Drain Line | Traps defrost water inside unit or in pan. | Flush yearly with warm water and a pipe cleaner. |
| Frequent, Long Openings | Massive condensation event on all interior surfaces. | Organize to minimize open time; know what you need before opening. |
| Uncleaned Spills | Provides direct food source for spores. | Wipe up immediately, even if it’s frozen. |
A proactive check of these two areas solves most mystery mold issues. The USDA food safety and refrigeration guide emphasizes temperature stability as key to safety, and these vulnerabilities directly undermine it.
The Step-by-Step Cleanup (Skip the Vinegar)
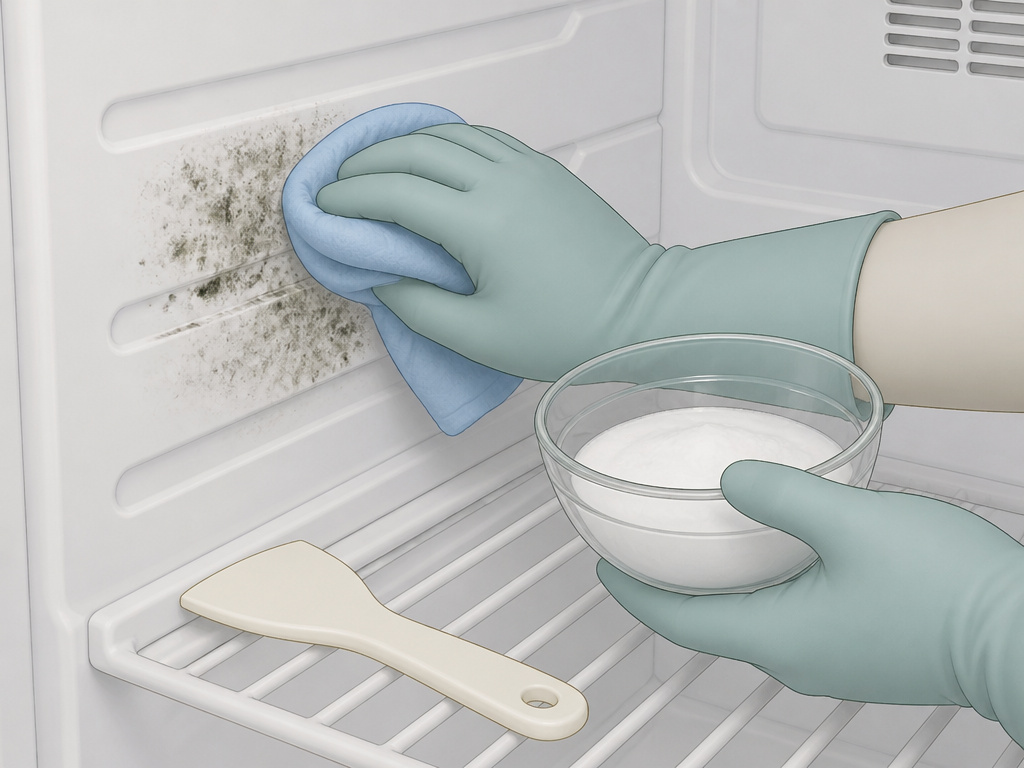 When you find mold, you need to remove it, kill the remaining spores, and eliminate the moisture that allowed it. Bleach is too harsh for freezer plastics and can damage seals. Vinegar’s acidity isn’t always effective against all mold types and its smell lingers. The go-to is a baking soda solution.
What You’ll Need:
- Cooler or boxes (for food)
- Plastic scraper
- Soft cloths or sponges
- Baking soda
- Warm water
- Vacuum (with hose attachment)
- Gloves (optional)
Step 1: Empty and Unplug.
Remove all food, placing frozen items in a cooler with ice packs. Unplug the freezer. This is non-negotiable for safety. If you have an auto-defrost model, now is the time to check the drain line.
Step 2: Speed-Defrost.
Place towels on the floor and pots of hot water inside the freezer to accelerate melting. Never use sharp tools or heat guns to chip ice, you’ll puncture the cooling lines. Use a plastic scraper gently once ice is soft.
Step 3: Dry Vacuum.
Before anything is wet, use the vacuum hose to suck up loose spores, dirt, and debris from shelves, walls, and the floor. This prevents you from just spreading them around during cleaning.
Step 4: Scrub with Baking Soda Solution.
Mix 2 tablespoons of baking soda into 1 quart of warm water. Dip a cloth, wring it well, and scrub every surface, walls, shelves, gasket, and door liners. Baking soda is a mild abrasive, deodorizer, and fungicide. Pay extra attention to the door gasket folds and any visible spots.
The part nobody mentions: Get the cloth damp, not soaking. Excess water will seep into insulation or under liner seams, creating a new moisture problem. Wring it out thoroughly.
Step 5: Rinse and Dry Completely.
Wipe all surfaces with a clean water-dampened cloth to remove baking soda residue. Then, dry everything aggressively with dry towels. Leave the door propped open for several hours with a fan blowing inside to evaporate all residual moisture. Any dampness left behind is an invitation for round two.
Step 6: Restore and Restart.
Once bone-dry, replace shelves and food. Plug the unit back in. It will take several hours to return to a safe freezing temperature. Avoid adding new unfrozen food during this time.
For severe, recurrent, or black mold (like Stachybotrys), this DIY approach may not be enough. Professional remediation is the next step, as spores may be deep in the insulation or ventilation system.
Prevention: It’s About Moisture Management
Stopping mold is easier than removing it. The goal is to attack the three factors it needs, focusing relentlessly on moisture.
1. Seal the Food, Seal the Door.
Use airtight containers or heavy-duty freezer bags. This prevents food from becoming a source of organic debris and also reduces moisture loss that leads to freezer burn. Regularly check the door gasket. Clean it with the baking soda solution and ensure it’s still pliable and sealing tightly.
2. Defrost on Schedule.
For manual-defrost freezers, don’t let frost build beyond 1/4 inch. That frost is a porous layer that traps moisture and spores against the wall, creating a perfect incubation zone above 0°C during temperature swings. Regular defrosting removes this substrate.
3. Master the Power-Outage Protocol.
If the power fails, keep the door closed. A full freezer holds food frozen for about 48 hours. If an outage is forecast, turn your freezer temperature down to its coldest setting beforehand to build a “cold bank.” Know that thawed food, even if refrozen, has released juices, inspect and clean the area after such an event.
4. The Long-Term Storage Rule.
If you’re emptying your freezer for a season (like a vacation home), the manual has a specific instruction most people miss. After cleaning and drying it thoroughly, prop the door open an inch. Block it with a towel. This prevents musty air from being trapped inside a sealed, dark, and potentially damp box, which is how mold takes over an empty appliance. The Electrolux Freezer manual explicitly states this prevents odor and mold growth.
Frequently Asked Questions
Does freezing kill mold spores?
No. Freezing puts mold spores into a dormant state. They remain viable indefinitely. Once the temperature rises and moisture is present, they can germinate and grow. This is why a power outage can lead to mold on food that was previously fine.
Can mold in the freezer make you sick?
Yes. Inhaling airborne spores from freezer mold can trigger allergic reactions, asthma attacks, or respiratory irritation. Eating food that has mold growing on it is risky and can cause food poisoning or fungal infections. Some molds produce toxic compounds called mycotoxins.
What’s the difference between freezer burn and mold?
Freezer burn is dehydration and oxidation of food surfaces, causing dry, greyish-brown leathery patches. It’s a quality issue, not a safety one. Mold is a biological growth, often colored, that can appear on the food or the freezer surfaces themselves. Mold is a safety hazard.
Is it safe to clean freezer mold with bleach?
It’s not recommended. Bleach can corrode the metal and plastic inside your freezer, and its fumes are dangerous in an enclosed space. It’s also less effective on porous surfaces like rubber gaskets. A baking soda solution is safer for the appliance and just as effective for the mold you encounter in a home freezer.
How often should I clean my freezer to prevent mold?
Deep clean, including defrosting, wiping all surfaces, and checking the seal, should happen at least once a year. For manual-defrost models, defrost whenever frost reaches 1/4 inch thick. Wipe up spills immediately, anytime they occur.
The Bottom Line
Your freezer is a preservation tool, not a sterilization chamber. Mold spores are resilient passengers. They win when you give them liquid water and a food source. The battle is fought at the door seal and the drip pan. Clean with baking soda, dry with fanatical thoroughness, and never let a damp surface slide. Remember the 0°C rule: it’s not about overall warmth, it’s about those fleeting, wet moments that wake the spores up. Keep things sealed, keep things dry, and your frozen food will stay safe from fuzzy invaders.
