
How to Organize Pantry | The Stakes That Change Everything
This post contains affiliate links. As an Amazon Associate, we earn from qualifying purchases.
**Organize your pantry by tackling five non-negotiable factors: temperature, humidity, zoning, container choices, and stock rotation.The goal is a system that stops waste, prevents infestations, and saves money by keeping staples edible weeks or months longer.
Most organizing guides talk about bins and labels. They ignore the environment your food lives in. A pantry is a climate zone first and a storage unit second. Get the climate wrong, and your perfect labels won’t save the flour from clumping or the crackers from softening. The system that lasts starts with specs from the extension services: a temperature range of 50-70°F and humidity below 60%. Everything else builds from there.
What follows: the exact tools that work, the sequence that prevents overwhelm, and the data-backed rules for which foods need airtight defense and which will suffocate in it.
Key Takeaways
- A pantry’s temperature must sit between 50-70°F (per Texas A&M AgriLife) to prevent rapid spoilage and loss of food quality.
- Humidity above 60% (per Oregon State University Extension) clumps powders, softens crackers, and invites mold and insects, store away from dishwashers, sinks, and hot water pipes.
- Zone by how often you use an item, not by food type; place high-turnover items at eye level and low-turnover goods higher up.
- Airtight containers are essential for flour, sugar, and dried goods, but root vegetables (potatoes, onions) and winter squash need airflow to prevent rot.
- Use a physical “First In, First Out” (FIFO) rotation system, moving older products to the front, and check dates monthly.
Why Pantry Temperature Is the Whole Game
Most people think organization is about bins and labels. It is about thermodynamics. Food quality degrades on a curve, and temperature controls the slope of that curve.
Canned fruits, juices, tomatoes, and pickles last 12-18 months at 65-70°F (Clemson University HGIC). At 85°F, that timeline collapses. For every 10 degrees above that ideal range, the rate of chemical reactions in food, think vitamins breaking down, fats going rancid, colors fading, roughly doubles.
Your first move is to take a thermometer to your pantry. The target zone is 50-70°F, as outlined by both the Texas A&M AgriLife Extension and Oregon State University Extension.If your pantry reads 75°F or higher, you’ve already lost. The area near the oven, the space above the refrigerator, or the cupboard sharing a wall with hot water pipes are death zones for pantry stability.
Where this goes sideways: Storing potatoes or onions under the sink. That spot traps heat and moisture from pipes. The Texas A&M guide explicitly warns against it. Potatoes need a cool, dry, dark place; under-sink storage guarantees sprouting and soft rot within a week.
The fight for a stable pantry starts with relocation. If your only storage is next to the stove, you need a different cabinet. Period. No container system compensates for a bad location.
Humidity and Insect Defense: The Invisible Enemy
Heat damages food. Humidity destroys it. It’s a two-part assault: moisture ruins texture and creates the perfect breeding ground for pantry pests.
The Oregon State University Extension publication sets the line at 60% relative humidity. Cross it, and you’re in trouble. Powders like cornmeal, flour, and powdered sugar absorb that moisture and clump. Crackers and cereal lose their snap. Worse, that damp environment is a welcome mat for insects like Indian meal moths and grain beetles.
The part nobody mentions: Insect infestation isn’t a sign of a dirty home. It’s a sign of accessible food. Susceptible items include cereals, flour, seeds, baking mixes, spices, candy, dried fruits, and dry pet foods. A single opened box of crackers left in a humid corner is an invitation.
The defense is three-fold: dry containers, dry air, and vigilance. 1. Dry containers means glass, metal, or rigid plastic with airtight seals. A flour sack folded over does not count. Weevils can chew through paper and thin plastic. The Clemson University fact sheet recommends these materials specifically to reduce infestation chances. 2. Dry air means keeping your pantry away from moisture sources. That means the sink and also the dishwasher, which pumps out steam during its cycle. Vigilance is a monthly check-in.Look for tiny holes in packaging, fine webbing in the corners of boxes, or small moths flying near the shelves. If you find it, discard the infected item immediately and clean the entire shelf with soap and water.
You can sometimes rescue moisture-damaged food. The Oregon State guide notes that powdery items that have clumped or crackers that have lost crispness can be revived by spreading them on a cookie sheet and heating them in a 425°F oven for a few minutes. This is a last resort for salvage, not a storage plan.
Zoning: Stop Organizing by Food Type
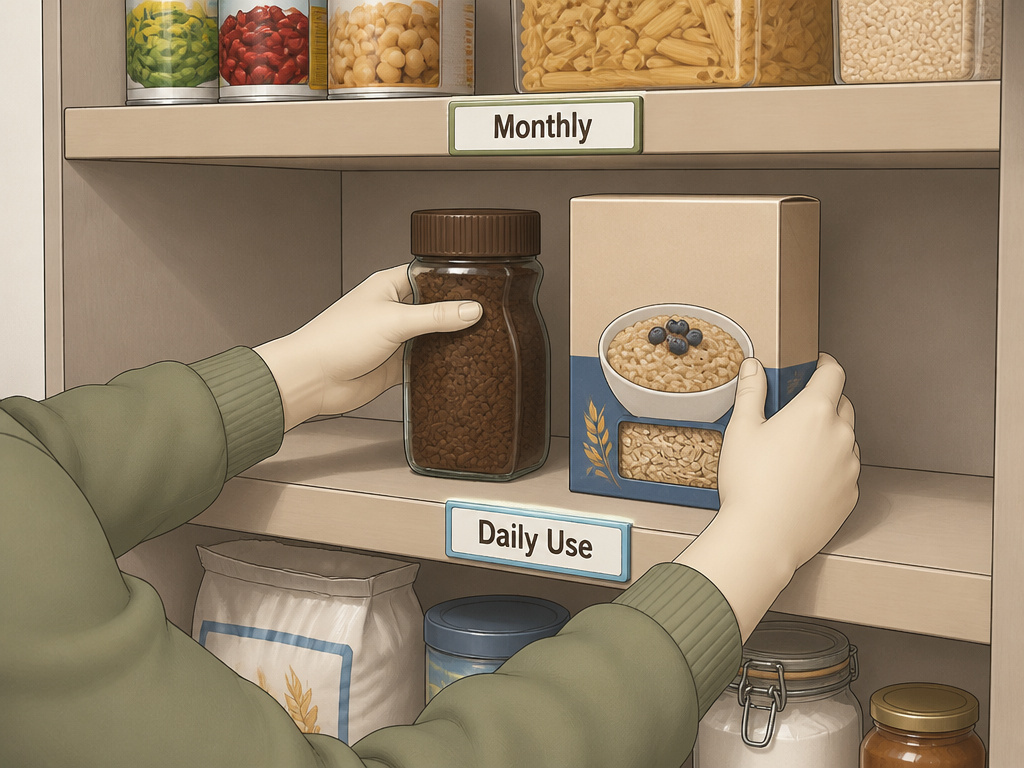
The classic advice is to put all the baking supplies together, all the canned goods together, all the snacks together. It makes for a nice photo. It’s a terrible way to actually cook.
Zone by frequency of use, not category. The items you grab daily, coffee, oatmeal, kids’ snacks, belong at prime real estate: eye level and front-and-center. The quarterly purchases, a bag of specialty flour, a jar of fancy cherries, the backup vinegar, go up high or down low. The Texas A&M safe storage guide emphasizes keeping a manageable, visible inventory to reduce waste, which this zoning enables.
| Zone | Ideal For | Example Items | Risk If Misplaced |
|---|---|---|---|
| Prime (Eye Level) | Daily / Weekly Use | Coffee, cereal, cooking oils, pasta, go-to snacks | Buys duplicate items, cluttering the space. |
| Secondary (Above/Below Eye Level) | Monthly Use | Canned beans, rice, baking soda, vinegar, broth | Items get forgotten and expire. |
| Archive (Top/Bottom Shelves) | Seasonal / Backup | Holiday baking supplies, bulk grains, extra condiments | No risk if forgotten; that’s the point. |
This system works whether you have a walk-in pantry or are organizing a small pantry with just a few cabinets. In a compact space, your “archive” might be a single designated bin on the highest shelf.
I used to keep all my spices together. The ones I used nightly were buried behind the jar of star anise I’d touched twice. Now the salt, pepper, garlic powder, and cumin live on a turntable right by the stove. The rest are in a drawer. My cooking time dropped because I stopped searching.
The goal is to reduce decision fatigue and physical steps. Your zoning should reflect your actual cooking rhythm, not a Pinterest board.
The 5-Step Plan to Organize a Pantry (That Actually Lasts)
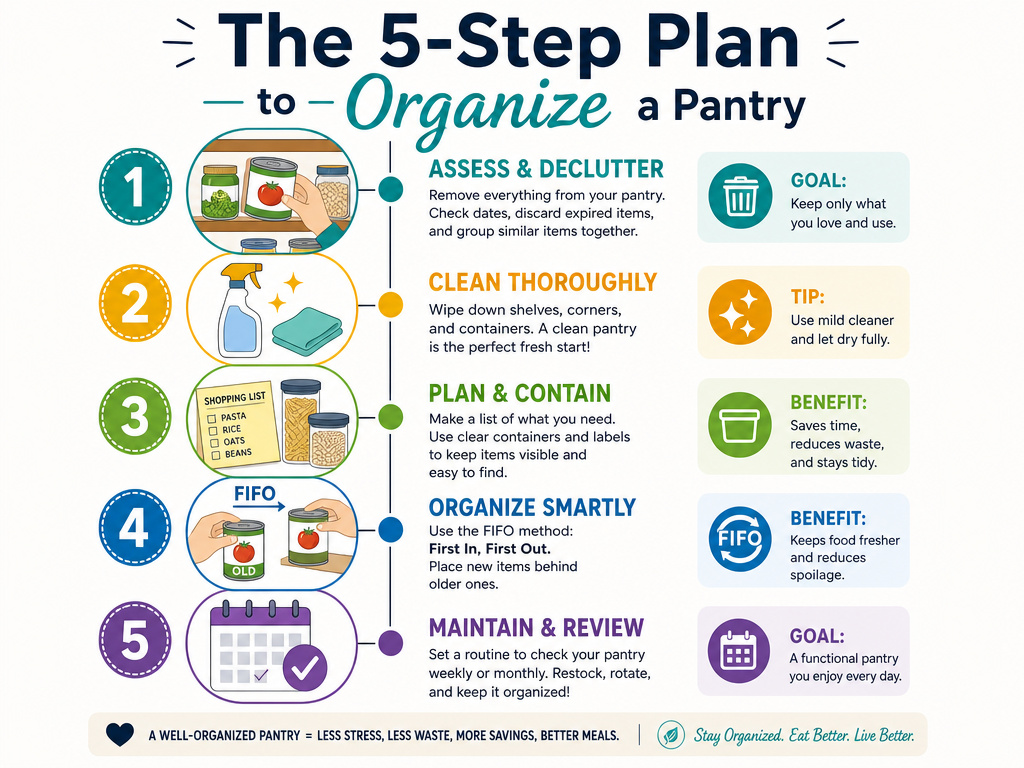
This is the actionable sequence. Don’t buy a single container until you’ve completed Step 1.
Before you start: You’re handling glass, heavy cans, and potentially expired food. Clear a large workspace (like a kitchen table) to sort items onto. Have a trash bag handy for discards and a recycling bin for containers. Wear gloves if you’re dealing with sticky spills or old flour.
Step 1: The Full Unload and Audit
Empty every shelf completely. Yes, every single item. As you pull things out, group them loosely: baking, canned goods, grains, etc. This is the only time you’ll categorize by food type, it’s for the audit. Check every expiration and “best by” date. For infant formula and baby food, the North Dakota State University guide is absolute: do not use after the “use-by” date”. For other items, trust your senses. Bulging cans, rust, off smells, or insect signs mean immediate disposal. This step reveals what you actually own.
Step 2: Deep Clean and Assess the Space
With the shelves bare, vacuum or wipe them down. Now assess the physical space. Are your deep shelves causing a black hole where items disappear? Do you need better pantry shelving to add more levels? This is the moment to note those needs, but don’t install anything yet. Just clean.
Step 3: Plan Your Zones and Container Needs
Look at your sorted piles from Step 1. Which items are truly daily drivers? Those go in the Prime Zone. Now, identify what needs to be decanted from flimsy packaging into sturdy containers. The rule: any opened dry good (flour, sugar, rice, pasta, cereal) is a candidate for an airtight container. Make a shopping list for storage containers based on this, not on a guess.
Step 4: Implement with FIFO and Labels
Start reloading the shelves according to your new zones. As you place items, practice First In, First Out (FIFO): put the newer product behind the older one. Use a marker to write the purchase or opening date on the container lid or package. For best pantry storage, consistency is key. Every can, every box, every jar should have a visible date.
Step 5: Establish a Maintenance Ritual
The system dies without upkeep. Every time you buy groceries, spend five minutes integrating new items: date them, place them behind older stock, and wipe the shelf. Do a full, quick visual scan once a month to catch any early signs of pests or expired goods. This ritual is what turns a one-day project into a lasting kitchen pantry asset.
Choosing the Right Pantry Storage Containers
Not all containers are created equal, and using the wrong one can ruin your food faster than leaving it in the bag.
Airtight is mandatory for dryness, not for everything. The primary job of an airtight container is to create a moisture barrier. This is non-negotiable for flour, sugar, coffee, and any grain-based product. Weevils and moisture can’t penetrate a true seal.
Glass containers are excellent for visibility and won’t absorb stains or odors. A set of glass pantry containers is perfect for flours, sugars, and legumes you use frequently. They’re also easy to clean. The downside is weight and cost.
Plastic containers are lighter and less expensive. Look for food-grade, BPA-free plastic with a silicone gasket in the lid for a true seal. They’re ideal for lighter items like pasta, cereal, and snacks. OXO Pop Containers are a common benchmark because of their one-handed push-button seal.
When to skip the container: Some foods need to breathe. Potatoes and onions stored in a sealed plastic bin will sweat and rot. Store them in a well-ventilated basket or a paper bag in your cool, dark pantry. Hard-rind winter squash also needs airflow.
The best approach is a hybrid system. Use clear, uniform containers for pantry staples like rice and beans. Use baskets or bins for odd-shaped items like potato chips or granola bars. The goal is to reduce packaging clutter while matching the container to the food’s physical needs.
How to Handle Specialty and Bulk Items
Buying in bulk saves money but can wreck a pantry system if not handled correctly.
The decant rule: Never store bulk goods in the giant bag they came in. As soon as you get home, decant what you’ll use in the next month into your main dry food containers. Immediately portion and freeze the rest. Flour, nuts, and whole grains are especially prone to rancidity at room temperature over long periods.
Create a “Bulk Station”: Designate one shelf or a large bin as your bulk overflow area. Store the factory-sealed bags or your pre-portioned freezer bags here. Label them clearly with contents and date. This keeps the giant bags out of your daily cooking zone but ensures you know what you have in reserve.
Specialty flours and meals (like almond flour, cornmeal) have high fat content and go rancid quickly. They are prime candidates for the refrigerator or freezer, even after opening. Store them in their original bags inside a larger sealed plastic bag or in a dedicated container for freshness.
Frequently Asked Questions
How often should I completely reorganize my pantry?
You shouldn’t need a full “empty everything” reorganization more than once or twice a year if you maintain the FIFO system and monthly check-ins. The deep clean is for when the system feels chaotic or after a pest scare. Regular maintenance prevents the need for total overhauls.
Are clear containers really necessary?
Yes, for your core staples. Visibility is a core principle of the Oregon State storage publication. If you can’t see that you’re running low on rice or that your flour is developing weevils, the system has failed. Opaque bins are fine for archived or non-perishable backups, but not for active ingredients.
What’s the biggest mistake people make when organizing?
Focusing solely on aesthetics, matching colors, perfect labels, while ignoring environmental factors like temperature and humidity. A beautiful pantry next to the dishwasher is a wasteful pantry. The Clemson pantry storage factsheet and other extension resources stress the science of storage first; the pretty part comes after.
Is it worth investing in a full pantry organization system?
For a large, frequently used pantry, yes. A complete organization system with pull-out shelves, uniform containers, and proper lighting can transform usability. For a standard cupboard, a few good containers, some risers, and a commitment to zoning will deliver 90% of the benefit for 10% of the cost.
How do I prevent things from getting messy again?
The ritual beats the project. The five-minute integration after shopping and the monthly scan are non-negotiable. They are the habit that keeps the system alive. Without them, entropy wins in about six weeks.
Before You Go
Forget perfection. Aim for a pantry that works. Start with the thermometer. Relocate anything stored next to a heat source. Decant your opened dry goods into airtight containers today, not tomorrow. Zone one cabinet by frequency of use and see how much faster dinner prep becomes.
The payoff is food that tastes as it should, a grocery bill that shrinks, and one less source of daily frustration in the kitchen. The right system is about having the most effective containers.It’s about knowing exactly where your three-year-old jar of molasses is, and knowing it’s still good to use.
