
How to Dry and Store Herbs: Avoid 5 Common Flavor Mistakes
This post contains affiliate links. As an Amazon Associate, we earn from qualifying purchases.
To dry and store herbs, keep the temperature below 115°F, match the method to the herb’s water content, and seal them in an airtight container away from light and heat. High heat vaporizes the essential oils, and moisture invites mold within days. Properly dried herbs keep their flavor for up to a year.
That temperature cap isn’t a suggestion. It’s the line between capturing aroma and cooking it off. Go over 125°F, even in a humid climate, and you’re left with hay.
What follows: the five specs that decide whether your basil tastes like summer or dust. We’ll walk through dehydrator settings, the air-drying math for humid regions, why your fridge is a trap, and the one storage container that actually works.
Key Takeaways
- Keep drying temperatures between 95°F and 115°F. Higher heat destroys the volatile oils that carry flavor.
- Tender herbs (basil, mint, cilantro) have high water content and mold fast. Use a dehydrator or the paper-bag hanging method.
- Woody herbs (rosemary, thyme, sage) dry well in bundles, but only in areas with humidity under 60%.
- Store dried herbs in opaque, airtight containers in a pantry cupboard. The refrigerator causes condensation that rehydrates and spoils them.
- For best flavor, use home-dried herbs within six months. They lose potency after a year even in perfect storage.
The Right Temperature Range (and What Happens If You Miss It)
The numbers are printed in the manuals. The National Center for Home Food Preservation and Oregon State University Extension both set the range at 95 to 115 degrees Fahrenheit. That’s the sweet spot.
Dehydrator temperature settings between 95°F and 115°F preserve the volatile essential oils in herb leaves. Exceeding 125°F causes rapid oil evaporation and flavor loss, leaving a bland, hay-like product.
Why such a low heat? Herbs aren’t jerky. Their flavor and aroma come from delicate essential oils stored in tiny surface glands. Heat those oils past their boiling point and they vanish into the air your dehydrator exhausts. What’s left is chlorophyll and fiber. It looks green, but it smells like grass clippings.
The Oregon State guide notes that in high-humidity areas, you might need to push to 125°F to drive moisture out. That’s the exception, not the target. If your summer humidity stays above 60%, you’re in that exception zone. Otherwise, start at 95°F.
| Herb Type | Ideal Dehydrator Temp | Max Safe Temp | Risk If Exceeded |
|---|---|---|---|
| Tender (basil, mint) | 95–100°F | 115°F | Leaves blacken, oils cook off in < 2 hours |
| Woody (rosemary, sage) | 100–115°F | 125°F | Stems dry brittle but leaves lose aroma |
| Seeds (coriander, dill) | 115°F | 125°F | Seeds can scorch, reducing germination viability |
Check your dehydrator’s thermostat with an oven thermometer. The dial isn’t always right. A five-degree drift over a four-hour dry changes the outcome.
Tender vs. Woody: Why Water Content Changes Everything
Not all herbs dry at the same speed. Basil and lemon balm are about 85% water. Sage and thyme are closer to 70%. That 15% gap is the difference between a crisp leaf and a moldy clump.
Tender herbs need fast moisture removal. Air-drying a basil bunch in a humid kitchen takes a week, and mold spots appear by day three. The OSU Extension herb drying guide says a dehydrator is the only reliable method for these. One to three hours at 100°F, in a single layer on the tray.
Woody herbs can handle slower methods. You can tie rosemary or thyme into small bundles and hang them. But “can” depends on your air. If your average summer humidity is over 60%, as it is in western Washington and Indiana, hanging bundles will go limp, not dry. The Washington State University paper calls this a regional limitation, not a technique failure.
Common mistake: Treating basil like rosemary. The high water content in tender herbs demands a dehydrator’s controlled airflow. Hanging them guarantees a loss.
Here’s the fix for humid climates: the paper bag method. Tie your tender herbs in a small bunch, slip them into a brown paper bag with holes punched in the sides, and hang that. The bag catches falling leaves and buffers humidity swings. It adds a day or two, but it prevents mold.
Your Five Method Options, Ranked by Flavor
You have more choices than the internet admits. Most of them are bad for flavor. Let’s sort them.
1. Dehydrator. This is the default for a reason. You control temperature and airflow. Drying times run 1 to 4 hours. It works for every herb type. The Nesco FD-75A or the Cosori Food Dehydrator hold steady at 95°F. Use the fine mesh screens that come with them to catch tiny leaves.
2. Air-Drying (Hanging Bundles). Only for woody herbs in dry climates. Tie stems with twine, not rubber bands, they contract as stems shrink and cut circulation. Hang them in a dark, warm spot with a breeze. An attic or a pantry with a vent works. Takes 5 to 10 days. Skip this for basil.
3. Air-Drying (Tray Method). Spread stems on a paper-towel-lined tray. This dries leaves flat, which is good for bay leaves you want whole. Turn leaves daily. Also takes 5 to 10 days. This is a solid method for drying flowers too, if you’re processing petals alongside herbs.
4. Microwave. A last resort for tiny batches. The Purdue University guide warns that ovens over 1000 watts heat too fast and can ignite the paper towels. If you must, do 1 cup maximum between paper towels, microwave on high for 1 minute, stir every 30 seconds after. It works for parsley, chives, celery leaves. It does not work for oily herbs like oregano.
5. Oven. Just don’t. Even at its lowest setting (often 170–180°F), an oven cooks. The Purdue extension is blunt: “oven drying destroys much of the flavor, oils, and color.” The door-open trick might work for jerky, but it’s a flavor-killer for herbs.
The Storage Rules That Actually Prevent Dust
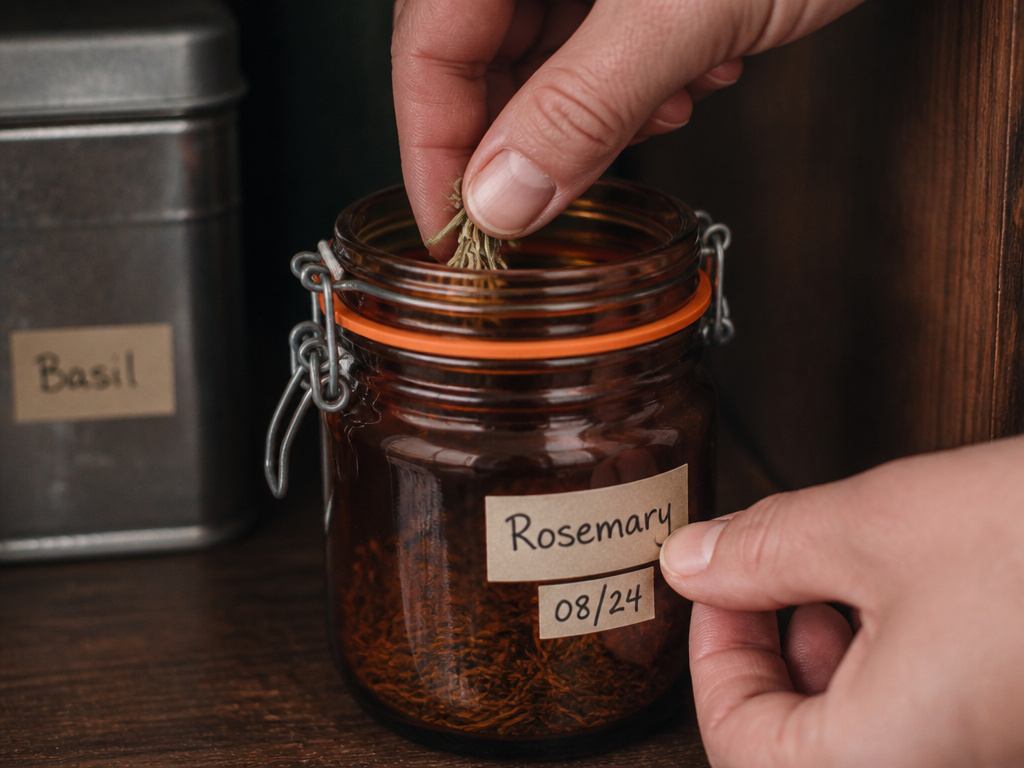
Drying is half the job. Storage is where most people waste their work.
Your enemy is a quartet: light, heat, air, and moisture. Light bleaches color and degrades oils. Heat speeds that up. Air carries moisture and off-flavors. Moisture itself is mold’s invitation.
Where this goes sideways: Storing dried herbs in the refrigerator. When you pull a jar from the cold into a warm kitchen, condensation forms on the inside. The dried herbs absorb that moisture, rehydrate just enough, and spoil within two weeks. The Purdue guide calls this a predictable problem.
The right container is opaque and airtight. A tinted glass jar with a rubber-sealed lid. A metal tin with a tight snap. A mason jar stored inside a cupboard. The Texas A&M AgriLife Extension storage guide says to avoid places above the dishwasher, stove, or fridge, those spots are warmer than you think.
| Storage Factor | Ideal Condition | Common Bad Location | Consequence & Timeline |
|---|---|---|---|
| Light | Total darkness | Glass jar on windowsill | Color fades, flavor weakens in 2–3 months |
| Heat | Cool room temp (<70°F) | Cabinet above oven | Oils degrade, aroma dulls in 1 month |
| Air | Airtight seal | Plastic bag with twist-tie | Herbs absorb kitchen odors in days, go stale |
| Moisture | Dry environment (<55% RH) | Under the kitchen sink | Mold appears on leaves within 2 weeks |
Label and date every jar. Whole leaves keep longer than crushed. Crush or grind what you need right before use. The UC Master Gardener herb drying page notes that checking for condensation inside the jar after the first week is a mandatory step. If you see fog, spread the herbs out to dry further.
This is the same principle behind long-term ginger root storage, keeping the environment stable and sealed. Herbs are just more delicate.
How to Use Home-Dried Herbs (The Math for Substitution)
Home-dried herbs are more potent than store-bought. Commercial stuff sits on a shelf for who-knows-how-long. Your basil dried last week.
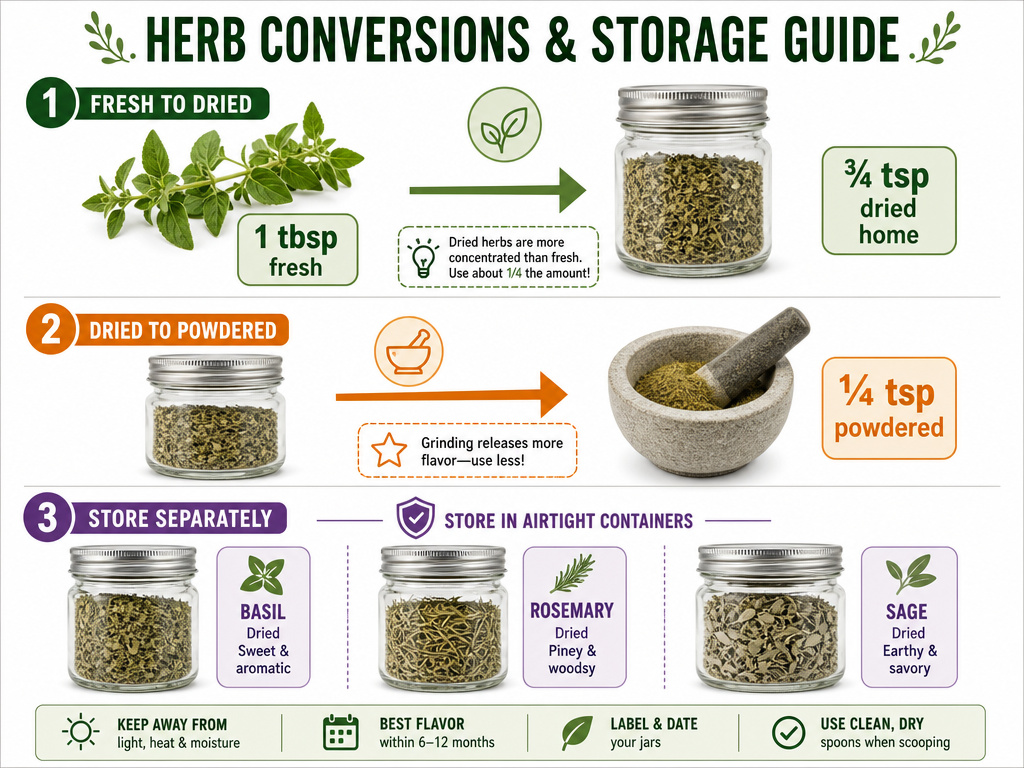
The standard conversion: 1 tablespoon of fresh chopped herb equals 1 teaspoon of dried. That’s a 3:1 ratio. Because your herbs are fresher, start with ¾ teaspoon dried per tablespoon fresh. Taste, then add.
For powdered herbs (you grind them in a spice mill), use ¼ teaspoon. Powdering exposes maximum surface area, so the flavor hits fast and fades fast in the pot. Add powdered herbs in the last five minutes of cooking.
The part nobody mentions: Dried herb flavor infuses into fats and liquids. Add dried rosemary to roasting potatoes 20 minutes before they’re done. Add dried basil to tomato sauce after it simmers, not before. Heat still breaks down the oils, just slower than fresh.
Store your dried parsley separately from your dried sage. Their flavors will migrate through the air in a shared container, especially if one is strong like rosemary. Use dedicated storage containers for each major herb type.
This granularity matters. It’s the difference between a sauce that tastes like the garden and one that tastes like the pantry shelf.
Frequently Asked Questions
Can I dry herbs in the sun?
No. Sun drying bleaches color and cooks flavor with uncontrolled heat. Even in arid climates, the UV damage outweighs the speed. Every university extension guide we cite recommends against it.
How long do dried herbs last?
For peak flavor, use them within six months. They remain safe to eat for up to a year if stored correctly in an airtight container in a dark pantry. After a year, they’re seasoning dust, little aroma, weak flavor.
Is it necessary to wash herbs before drying?
Yes, but do it carefully. Rinse under cool water, shake off excess, and pat dry with a towel. Wet spots breed mold during the drying process. Harvest in the morning after dew dries to minimize washing needed.
Why did my dried herbs turn brown?
Heat or light. Temperatures above 115°F cause chlorophyll to break down, browning the leaves. Storing in a clear jar on the counter does the same thing via light exposure. They’re still usable but less vibrant.
Can I store different dried herbs together?
Not if you value their distinct flavors. Strong herbs like oregano or thyme will overpower delicate ones like parsley or chervil through odor migration in the jar. Keep them separate.
What’s the best way to dry cilantro?
Cilantro is tender and fragile. Use a dehydrator at 95°F for 2–3 hours. Hanging it often results in a limp, faded product. For keeping it fresh before drying, review methods for store cilantro.
The Bottom Line
Drying herbs is about patience, not speed. Match the method to the leaf’s water content, guard the temperature, and seal the finished product against its four enemies. A dehydrator at 100°F beats an oven at 170°F every time. A dark jar in the pantry beats the fridge every time.
Your goal isn’t just shelf-stable herbs. It’s herbs that taste like the day you picked them, months later. That only happens when you treat the oils as the precious thing they are. Now go check your pantry, those clear jars on the windowsill have work to do.
