
Best Practices for Storing Dehydrated Vegetables Long-Term
This post contains affiliate links. As an Amazon Associate, we earn from qualifying purchases.
Store dehydrated vegetables in a cool, dark, and dry place inside an airtight, moisture-proof container. Aim for a storage temperature at or below 60°F (15°C) to maximize shelf life. Properly dried vegetables with a moisture content under 15% will remain safe for a year at 60°F, but quality, flavor, color, and rehydration ability, begins a noticeable decline after that point.
That 15% moisture figure is the threshold where water activity drops low enough to stop microbial growth, pulled directly from extension service research. Get the moisture right, and safety is guaranteed.The rest of the game is about preserving everything that makes those vegetables worth eating, the color, the nutrients, the texture when you toss them into soup.
What follows: the three non-negotiable storage pillars, the exact steps to pack without inviting condensation, the shelf-life math that changes with your pantry’s temperature, and the one mistake that turns a year’s supply into a mushy, flavorless batch in months.
Key Takeaways
- Temperature dictates shelf life. For every 18°F (10°C) drop in storage temperature, shelf life multiplies by 2–3 times. A jar at 80°F lasts 6 months; the same jar at 60°F lasts a year.
- Airtight does not mean foolproof. Sealing warm, just-dried vegetables in a glass jar traps evaporating water vapor. It condenses on the cool jar walls and drips back, re-wetting your batch and risking mold.
- “Safe” and “good” have different timelines. Vegetables are safe indefinitely if dried to under 15% moisture. But after one year at 60°F, nutrient loss accelerates and a type of browning degrades flavor and rehydration power.
- Your container must block light and moisture vapor. Glass jars with tight lids work, but opaque Mylar bags with oxygen absorbers inside a bucket provide superior long-term protection.
- Condition before sealing. Let dried vegetables cool completely to room temperature in an open bowl for an hour. This stops residual evaporation and prevents the condensation trap.
The Three Pillars of Storage: Temperature, Container, Place
Head design changes the entire process. Look at the business end of your trimmer.
Properly stored, dried products can last for 6 months at 70 °F or 1 year at 60 °F. This finding from the University of Kentucky Cooperative Extension Service provides a baseline for planning. It assumes your vegetables hit the critical moisture content target.
The relationship isn’t linear. The Waring Commercial dehydrator manual states a clear rule: every 18°F drop in temperature, the shelf life increases 2 to 3 times. This turns a pantry upgrade into your most effective preservation tool.
| Storage Temperature | Expected Shelf Life for Vegetables | Primary Risk at This Temp |
|---|---|---|
| 80°F (27°C) | 4–6 months | Rapid nutrient loss, flavor fading |
| 70°F (21°C) | 6–8 months | Slow browning, increased brittleness |
| 60°F (15°C) | 12 months | Optimal for quality retention |
| 40°F (4°C) / Freezer | 2+ years | Virtually paused deterioration |
Cool is your first defense. Heat accelerates every chemical reaction that degrades food, enzymatic browning, oxidation, nutrient breakdown. A basement corner beats a shelf above the oven.
Dark is non-negotiable. Light, especially sunlight, bleaches color and destroys vitamins like thiamine and riboflavin. Use opaque containers or store clear jars inside a cupboard or a closed box.
Dry means low ambient humidity. The FAO hygienic practice code for dehydrated foods singles out humidity control as “of primary importance.” High humidity lets dried products absorb atmospheric moisture, raising their water activity back into the danger zone. A bathroom or laundry room is a hard no.
Why Moisture Content and Water Activity Are Everything
You can follow every temperature rule and still lose a batch. The failure happens at the molecular level before the jar is ever sealed.
Moisture content is the weight of water in the food. The UKY dehydrating guide for home use specifies a general safety threshold: produce dried to a moisture content of less than 15% wb moisture content is safe and stable. Different vegetables have different targets. Dried carrots sit around 20%, while potatoes, raisins, and prunes aim for 11-12%.
Water activity (aw) is more critical. It measures how much of that water is available for microbes to use. It ranges from 0 to 1. The target for shelf-stable dried fruits and vegetables is ≤ 0.6. At that level, bacteria, yeasts, and molds cannot grow. It’s the difference between a technically safe product and one that will actually stay unchanged.
Where this goes sideways: Storing in hot conditions in an airtight container. Water vapor from the product condenses on the container walls. That liquid drips back, locally raising moisture content and water activity. One wet spot can mold and spread.
The two concepts lock together. A low moisture content typically means a low water activity. But the only way to be sure is to dry thoroughly and test. The snap-and-crack test is a decent kitchen check for doneness, a piece should crack, not bend. For true confidence, especially with low-acid vegetables, a dehydrated food storage plan starts with a properly finished product.
Step-by-Step: Cooling, Conditioning, and Packing
This is the physical bridge between the dehydrator and the shelf. Rush it, and you build a moisture trap.
- Cool Completely. Turn off the dehydrator and spread the vegetables in a single layer on a baking sheet or a large, clean towel. Let them sit for at least one hour at room temperature. This equalizes residual heat and stops the last internal moisture from migrating.
- Condition (Optional but Recommended). For vegetables prone to uneven drying (thick carrot coins, broccoli florets), place the cooled pieces into a large glass jar or food-safe plastic container. Seal it loosely and shake it daily for 4-7 days. This allows moisture from wetter pieces to equilibrate with drier ones. If condensation appears on the jar walls, return everything to the dehydrator for another hour.
- Choose Your Container. Your choice dictates the next layer of protection.
- Glass Jars (Mason, Kilner): Excellent barrier, but clear. You must store them in the dark. Ensure the seal is intact and the lid is spotless.
- Mylar Bags: The gold standard for long-term food preservation. They block light, moisture vapor, and oxygen. Used with oxygen absorbers and heat-sealed, they are the closest thing to a time capsule.
- Food-Grade Plastic Buckets with Gamma Seal Lids: Great for bulk storage. Line them with a Mylar bag for a double barrier against moisture and pests.
- Vacuum Sealer Bags: Good for freezer storage or shorter-term pantry. Not as light-proof as Mylar, and the plastic can become brittle over years.
- Pack and Seal. Fill your chosen container, leaving minimal headspace. For jars, tighten the lid. For Mylar bags, add an appropriately sized oxygen absorber (300cc for a gallon bag), squeeze out excess air, and heat-seal the top. Label with contents and date.
Common mistake: Packing while still warm. The trapped water vapor has nowhere to go. It condenses on the cool inner surface of the container and rains back down. Your perfectly dried zucchini turns chewy in a week.
If you’re using a vacuum sealer for bags, ensure the vegetables are completely cool and crisp. Any residual moisture will be pulled out during sealing, potentially fogging the bag from the inside, a sign you needed more drying time.
The Shelf-Life Timeline: Safe vs. Good Quality
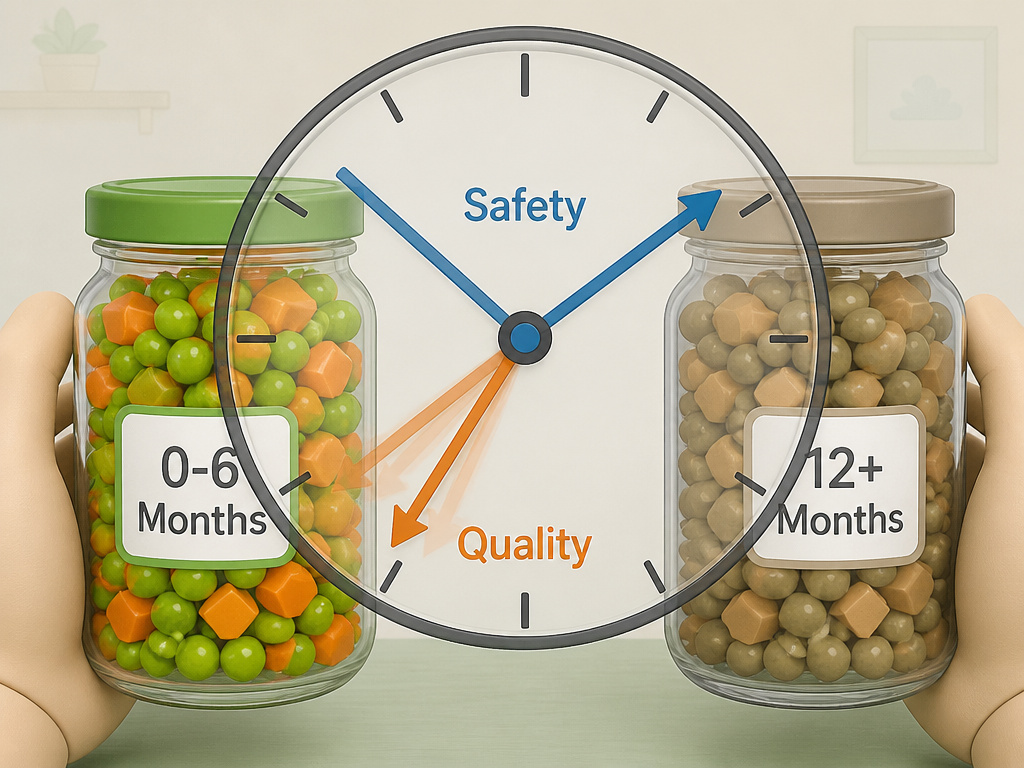 Most guides conflate safety and quality. They are separate clocks, and the quality clock ticks faster.
The OSU Extension safety tips make the distinction clear: “properly dehydrated foods will be safe indefinitely; Quality changes will occur over time that may make them undesirable, unpleasant or unusable.”
The Safety Clock (Very Long): If your vegetables are dried to a water activity ≤ 0.6, pathogenic bacteria cannot grow. They will not make you sick after a year, or even five. This is the “indefinitely” people cite when talking about storing dehydrated fruit or vegetables.
The Quality Clock (Much Shorter): This is what you actually care about. * 0-6 Months: Peak quality. Vibrant color, full flavor, quick rehydration. * 6-12 Months: Noticeable decline. Colors fade to dull tan or brown. Flavors mute and can develop a flat, “cardboard” note. Rehydration takes longer and the texture may be tougher. * 12+ Months: The University of Kentucky extension publication notes that after a year, “nutrient loss speeds up, a type of browning begins to occur that can cause flavor changes and rehydration to be less efficient.”
Your goal is to eat them while they’re still good. This timeline is why the temperature pillar matters so much, cool storage slows the quality clock dramatically.
Special Cases and Problem Solvers
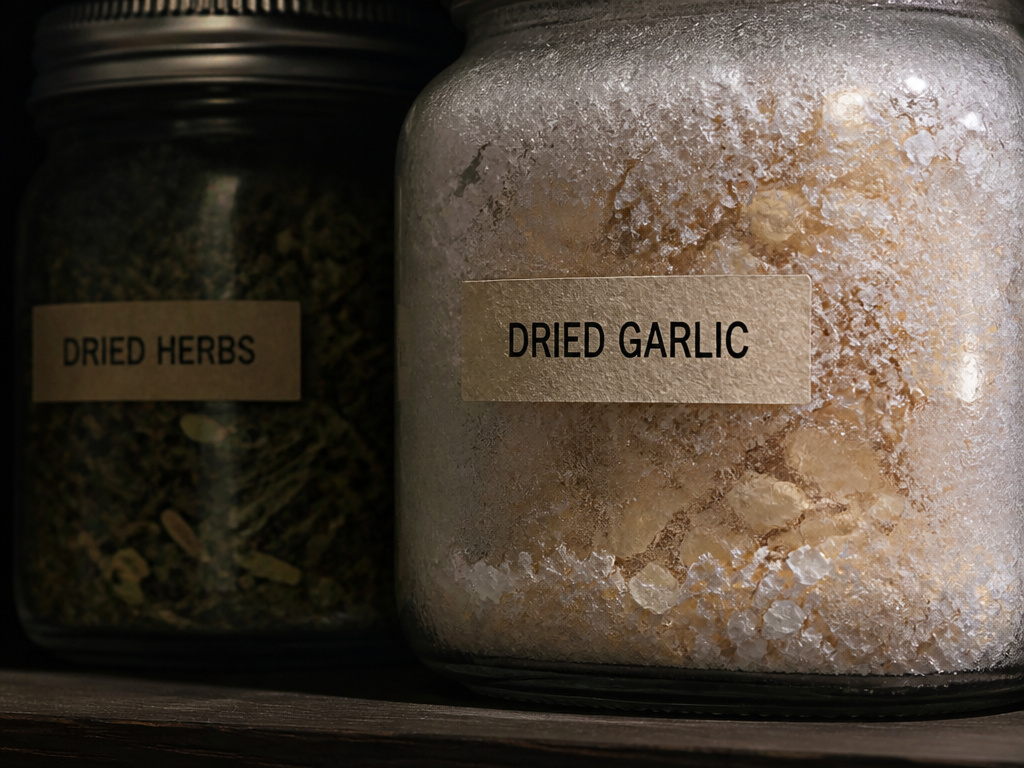 Not all vegetables store the same. High-oil items and alliums need extra attention.
Herbs, Garlic, and Onions: These are lower moisture to begin with but carry volatile oils and strong flavors. Light and heat are their enemies. Store dried herbs in the darkest, coolest spot you have. For garlic storage and preserving onions, consider the freezer to completely lock in flavor and prevent any residual enzymatic activity.
Jerky and Other Low-Acid Foods: Meats and fish are low-acid and high-protein, a higher-risk category. Safety depends on reaching a sufficiently low water activity during drying. Even then, for long-term storage, the freezer is the recommended place. Never store jerky at room temperature for more than a few weeks.
The “My Vegetables Turned Tough or Chewy” Problem: This is usually a case of over-drying, not a storage fault. Vegetables dried past their ideal moisture content become hard and rehydrate poorly. It’s a texture loss, not a safety issue. Next batch, shorten the drying time slightly and test more frequently.
Insect Infestation: The FAO recommended hygienic code acknowledges this risk for bulk storage. Before sealing, ensure your products are clean and cool. For pantry storage, inspect jars periodically. At the first sign of bugs, freeze the entire container for at least 72 hours to kill eggs and larvae, then repack.
Container Showdown: Jars, Bags, and Buckets
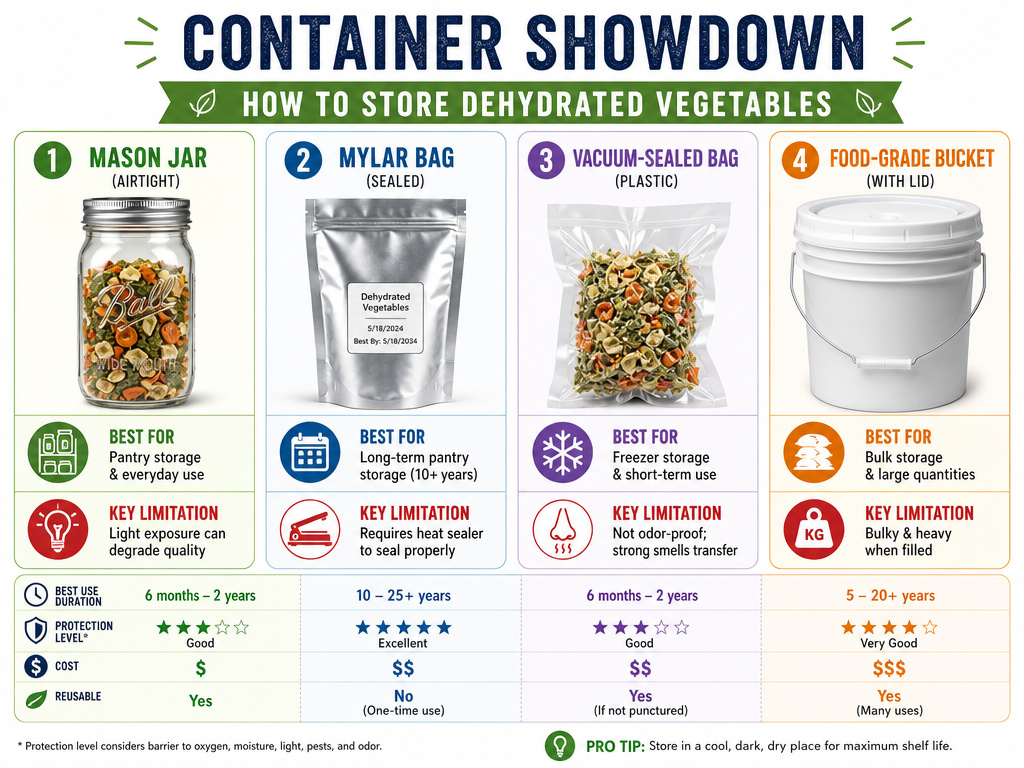 You have options. Each has a best-use case.
| Container Type | Best For | Key Limitation |
|---|---|---|
| Glass Mason Jar | Short-term pantry, frequent access | Clear glass admits light; requires dark storage |
| Mylar Bag + O2 Absorber | Long-term storage (2+ years), bulk amounts | Requires heat sealer; not reusable for food |
| Vacuum Sealer Bag | Freezer storage, medium-term pantry | Plastic can permeate odors over time |
| Food-Grade Bucket | Bulk storage, combining multiple Mylar bags | Heavy, bulky; not suitable for small batches |
The Verdict: For most home preservers putting up a garden harvest, the combination of Mylar bags inside a sealed bucket is the most robust, space-efficient method. It solves for light, moisture, oxygen, and pests in one system. For smaller batches you’ll use within the year, dark-colored glass jars stored in a cupboard are perfect.
If you use jars, mastering vacuum sealing mason jars with a food saver attachment can extend quality by removing oxygen, but it doesn’t replace the need for cool, dark storage.
Frequently Asked Questions
Can I store dehydrated vegetables in the freezer?
Yes, and it’s highly recommended for long-term quality preservation. Freezing virtually pauses all chemical degradation. Use moisture-vapor-proof freezer bags or vacuum-sealed bags to prevent freezer burn. Thaw in the refrigerator before use.
How can I tell if my dehydrated vegetables have gone bad?
Look for visible mold (fuzzy spots of white, green, or blue), an off or rancid smell, or signs of insect infestation. If the vegetables feel damp or clump together, moisture has re-entered and they should be composted. “Cardboard” flavor is a quality issue, not a safety one.
Do I need to use oxygen absorbers?
For storage beyond one year, yes. Oxygen accelerates oxidation, which degrades color, flavor, and nutrients. For shorter-term storage in a cool pantry, the air in a tightly sealed jar is acceptable, though not ideal. An oxygen absorber in a Mylar bag is the professional standard for all long-term vegetable storage methods.
What is the best way to rehydrate them?
Simmering in soups and stews is easiest, the boiling water rehydrates and cooks them simultaneously. For standalone use, pour boiling water over them and let soak for 10-20 minutes until plump. The boiling water also addresses any potential surface microbial concerns, per the OSU Extension guide.
Can I mix different dehydrated vegetables in one container?
You can, but it’s not optimal. Different vegetables have different final moisture contents and drying times. Storing them together can allow moisture to migrate from a slightly wetter piece (like a tomato) to a drier piece (like a kale chip), potentially raising the water activity of the drier item. Store like with like for best results.
Before You Go
Storage is the guarantee. Get the moisture out, then keep the heat, light, and outside humidity away.
The numbers from the extension services are your anchors: 15% moisture content, 60°F, one year for quality. Hit those, and your carrots, peppers, and zucchini will wait for you, ready to turn a winter soup into something from the garden.
For everything else, herbs, onions, potatoes, the same principles apply, just with their own quirks. Check our guides on storing potatoes and preserving vegetables for those specifics. Now go label those jars.
