
How to Preserve Tomato Seeds for Future Planting Seasons
This post contains affiliate links. As an Amazon Associate, we earn from qualifying purchases.
To preserve tomato seeds, you must ferment, clean, dry, and store them correctly. Fermentation removes the germination-inhibiting gel and pathogens, but the liquid temperature must stay below 80°F (21°C). Temperatures in the high 80s can destroy 50% of germination in just 48 hours. Properly dried seeds stored in airtight containers in a cool, dark place remain viable for 4–5 years.
That 80°F threshold is the line between a successful seed bank and a batch of duds. The gel around the seed isn’t just messy; it’s a biological timer. Ferment too hot, and you cook the embryo. Ferment too long, and the seeds can sprout in the jar. The goal is to break down the gel without damaging the living seed inside.
What follows is the breakdown of that temperature-controlled process, the science behind each drying spec, and the storage choices that determine whether your seeds last one season or five.
Key Takeaways
- Keep fermentation liquid below 80°F (21°C). At 85-90°F, you lose half your seeds’ viability in two days.
- Target a seed moisture content of 6% before storage. This is achievable by drying seeds in shade when outdoor humidity is around 30%.
- Store dried seeds in an airtight container with a desiccant. The ideal place is a refrigerator at 32-41°F, which is considered medium-term storage.
- Always label seeds with the variety and date. Tomato seeds are considered “long-lived,” but viability begins a noticeable decline after 4–5 years.
- Only save seeds from open-pollinated (heirloom) varieties. Seeds from hybrid plants (labeled F1) will not grow true to type.
Why Fermentation Is Non-Negotiable (And Where It Goes Wrong)
The pulp around a tomato seed isn’t just inconvenient. It’s a package of sugars and proteins designed to inhibit germination until the seed is far from the parent plant. In nature, this gel rots away. In your kitchen, you speed up the process.
Common mistake: Letting fermentation run in a warm kitchen. The Saving Our Seeds tomato production guide documents that a fermentation temperature in the high 80s°F causes a 50% loss of germination in 48 hours.
The mechanism is straightforward. Heat accelerates microbial activity. The bacteria and fungi that break down the gel multiply too fast, and their metabolic byproducts—acids and alcohols—swamp the seed. The embryo essentially pickles before it ever sees soil. You might still get a few sprouts, but your germination rate plummets.
Your target is a steady 70-75°F. This temperature range allows complete fermentation in 48 to 72 hours. You’ll see a layer of white or gray mold form on the surface. That’s the signal. If your house is warmer, use a basement or a cool closet. Never place the jar in direct sun.
Open-Pollinated vs. Hybrid: The Genetic Rule
This entire process is wasted on hybrid seeds. Plants from seeds labeled “F1” are a first-generation cross between two distinct parent lines. Their seeds will not produce plants identical to the tomato you saved. They revert to a genetic mix, often with disappointing results.
You must start with open-pollinated or heirloom varieties. These plants breed true, meaning the seeds will produce tomatoes nearly identical to the parent. This is the foundation of all long-term seed storage. Saving hybrid seeds is like trying to photocopy a scrambled document.
The 4-Step Process for Saving Tomato Seeds
Follow this sequence. Skipping a step or changing the order compromises your results.
Step 1: Select and Extract
Choose “dead-ripe” tomatoes from your healthiest, most productive plant. The fruit should be fully colored and slightly soft. Some guides mention using fruit at the “breaker stage” (first blush of color). Seeds from immature fruit can germinate, but the Saving Our Seeds tomato production guide notes they lose viability faster in storage. For longevity, use fully mature fruit.
Cut the tomato across its equator. Squeeze or scoop the seed pulp and gel into a clean glass jar or bowl. For cherry tomatoes, a good squeeze does the trick. Add a splash of water—just enough to make stirring easier.
Step 2: Ferment with Temperature Control
This is the critical phase. Cover the container loosely with a cloth or plastic wrap to keep fruit flies out but let gases escape. Do not seal it tightly.
Place the jar in a spot where you can monitor the temperature. An interior pantry or basement floor is often cooler than a countertop. Stir the mixture once a day.
| Fermentation Condition | Target | Risk If Ignored |
|---|---|---|
| Temperature | 70–75°F (21–24°C) | Above 80°F: rapid germination loss. Below 65°F: process stalls, risking mold on seeds. |
| Duration | 48–72 hours | Beyond 96 hours: seeds can begin to sprout in the jar, ruining them for storage. |
| Visual Cue | Layer of mold on surface, liquid clears | No mold may mean temperature is too low; thick, foul-smelling mold means too hot. |
Fermentation is complete when the mold layer is well-formed, the mixture smells tangy (like vinegar), and most of the seeds have sunk to the bottom. The viable, dense seeds sink. Hollow or non-viable seeds often float.
Step 3: Clean and Rinse
Carefully pour off the mold, liquid, and any floating debris. The good seeds will remain at the bottom. Add clean water to the jar, swirl, and pour off again. Repeat this rinse cycle 3-4 times until the water runs nearly clear and only clean seeds remain.
Pour the seeds into a fine-mesh strainer. Rinse them under a gentle stream of water, using your fingers to separate any last bits of pulp. Shake the strainer to remove excess water.
Step 4: Dry Thoroughly to 6% Moisture
This step is where impatience ruins everything. Wet seeds clump together, mold, or even germinate on the drying surface. They must be dried quickly and evenly.
Spread the seeds in a single layer on a non-stick surface. A glass plate, ceramic tile, or coffee filter works best. Paper towels can work, but the seeds sometimes stick when fully dry.
Where this goes sideways: Drying seeds in direct sunlight or in an oven. High heat damages the embryo. The ECPGR Solanaceae seed protocol states temperatures should never exceed room temperature. Dry in a shaded, well-ventilated area.
Use a fan to circulate air over the seeds. This is the single best thing you can do to speed drying without heat. In dry climates (around 30% relative humidity), drying outside in the shade can achieve the target 6% moisture content. Seeds are dry when they are hard and brittle, not flexible. They should not stick to each other. This can take 3-7 days.
Storing Seeds for the Long Haul
Drying is only half the battle. Storage defends against the two enemies of seed viability: moisture and temperature fluctuation. The WSU Extension seed saving guide identifies these fluctuations as the primary cause of seed death.
The Container and Desiccant Combo
Forget paper envelopes in a drawer. That’s short-term thinking. For preservation lasting years, you need an airtight barrier.
- Place fully dried seeds into a small paper envelope or packet. Label it with the variety and date.
- Add a desiccant to the storage container. Silica gel packets are ideal. A second-best option is a cloth bag filled with 1/2 cup of fresh powdered milk.
- Put the seed packet and desiccant into an airtight container. A glass mason jar with a sealing lid, a metal tin, or a quality plastic tub works.
- Seal it.
This system creates a stable microclimate. The desiccant scavenges any residual moisture, protecting the seeds from the slow creep of humidity that leads to mold or premature aging.
Temperature Tiers: From the Fridge to the Freezer
Where you put that sealed container determines your storage timeline.
| Storage Tier | Temperature Range | Expected Viability | Best For |
|---|---|---|---|
| Medium-Term | 32–41°F (0–5°C) – Refrigerator | 4–5 years | Active gardeners who cycle through seeds within a few seasons. |
| Long-Term | -4 to 0°F (-20 to -18°C) – Freezer | 10+ years | Preserving rare heirlooms or building a multi-year seed bank. |
| Room Temperature | 65–75°F (18–24°C) | 1–3 years | Only if seeds are impeccably dried and stored with a desiccant; not ideal. |
The refrigerator is the practical choice for most gardeners. It aligns with the OSU Extension seed collection guide, which classifies tomato seeds as “long-lived” with a 4–5 year life. For true long-term archiving, a freezer is used by seed banks, but seeds must be bone-dry (6% moisture) to avoid ice crystal damage.
This principle of stable, cool, dry storage is the same one used for long-term food storage of dry goods like beans and grains.
Advanced Techniques and Troubleshooting
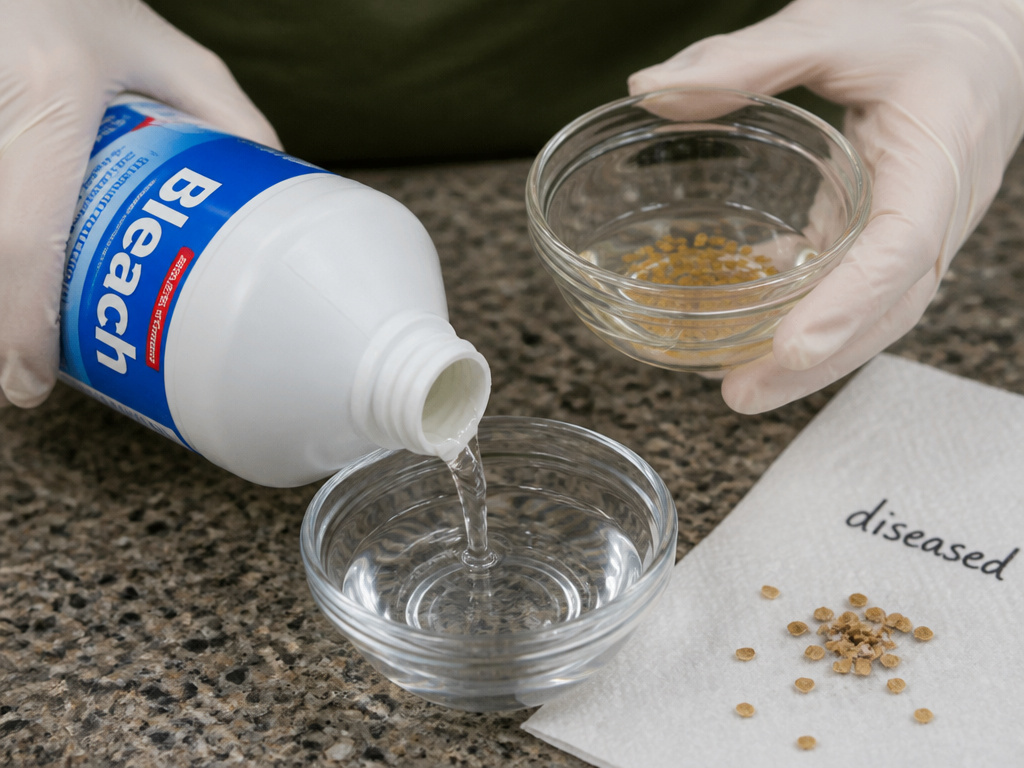
To Bleach or Not to Bleach?
Fermentation destroys many seed-borne diseases like bacterial canker. If you are saving seeds from diseased plants, a bleach treatment is an option. The standard is a 10% bleach solution (1 part household bleach to 9 parts water) soak for 10 minutes, followed by thorough rinsing.
Worth knowing before you start: The tomato production guide notes this treatment “may have a small adverse effect on germination.” Use it only if disease is a confirmed concern, and always label treated seeds. Federal seed law requires labeling of any treated seed.
The Vacuum-Sealing Question
A vacuum sealer can be excellent for long-term storage, but with a major caveat: seeds must be absolutely, completely dry. Any residual moisture will be locked in, creating a mold paradise. If you are confident in your drying process, vacuum-sealing seed packets before placing them in a jar with desiccant adds an extra layer of protection. It’s overkill for fridge storage but useful for freezer storage.
Germination Testing Old Seeds
Don’t guess if your 5-year-old seeds are still good. Perform a germination test. 1. Place 10-20 seeds on a damp paper towel. 2. Roll it up, place it in a plastic bag, and keep it warm (70-80°F). 3. Check in 5-7 days. Count the number that have sprouted.
A 70% germination rate is still good for planting; just sow a little thicker. Below 50%, it’s time to replace those seeds. This test is far more reliable than the float test, which only identifies hollow seeds.
Frequently Asked Questions
Can I skip fermentation and just wash the seeds?
You can, but you shouldn’t. Washing removes the gel mechanically, but fermentation does two critical things: it destroys common tomato pathogens on the seed coat, and it thoroughly breaks down the germination inhibitor. Washed seeds often have lower germination rates and can carry disease into next season’s garden.
How do I know if my seeds are dry enough for storage?
The snap test. Try to bend a seed with your fingernails. If it snaps cleanly in half, it’s dry. If it bends or feels leathery, it needs more drying time. Clumping is another clear sign of residual moisture.
Can I save seeds from store-bought tomatoes?
It’s possible, but risky. Most commercial tomatoes are hybrid varieties (F1). Even if they are heirloom, they are often picked so immature that the seeds have not fully developed, leading to poor viability. The fruit may also have been treated with sprout inhibitors. For reliable results, start with known open-pollinated varieties from your own or a trusted garden.
What’s the best container for seed packets inside the jar?
Small paper envelopes are classic because they allow any last traces of moisture to wick away from the seeds. You can also use tiny zipper bags if you are certain the seeds are dry. Avoid putting seeds loose in a jar; packets keep varieties organized and make it easy to remove what you need without exposing the entire batch to humidity.
Is it worth saving seeds from cherry tomatoes?
Absolutely. The process is identical, and many cherry tomato varieties are prolific heirloom plants. In fact, preserving cherry tomatoes from your garden for eating and seed saving is a fantastic way to reduce waste and become self-sufficient in your favorite varieties.
The Bottom Line
Preserving tomato seeds boils down to controlling biology with temperature and moisture. Ferment below 80°F. Dry to 6% moisture with air flow, not heat. Lock those dry seeds away with a desiccant in an airtight container in the fridge. This isn’t just about next year’s plants. It’s about holding onto the genetic line of a tomato that thrives in your specific garden. That’s a resource no store can sell you.
Start with your best heirloom tomato. Follow the temperature rules during fermentation. Your reward is a steady supply of seeds that cost nothing and carry the full story of your garden in every packet.
