
How to Preserve Potatoes at Home: Proven Methods That Work
This post contains affiliate links. As an Amazon Associate, we earn from qualifying purchases.
To preserve potatoes at home, you have three safe, long-term options: pressure canning cubed potatoes, freezing after blanching, or dehydrating slices. Pressure canning is the only safe canning method, requiring 40 minutes at 10-11 PSI. Freezing requires a 3-5 minute water blanch first. Dehydrating works best at 140°F for 6-10 hours. Never can mashed potatoes or store raw potatoes in the refrigerator if you plan to fry them.
That 40-minute processing time isn’t a suggestion. It’s the barrier between a stable pantry staple and a botulism risk. The pressure inside the canner has to reach and hold a specific temperature that a boiling-water bath cannot achieve, which is why every university extension guide mandates a pressure canner for low-acid vegetables like potatoes.
What follows is the breakdown of each method, pulled directly from extension service publications. You’ll get the exact times, temperatures, and the one mistake that ruins a whole batch.
Key Takeaways
- Pressure canning is mandatory for home-canned potatoes. A boiling-water bath cannot reach the temperature needed to destroy botulism spores.
- Never can mashed or pureed potatoes. The density prevents heat from penetrating evenly, making it impossible to guarantee safety.
- Blanch before freezing. A 3-5 minute boil stops enzyme action that causes off-flavors and texture loss in the freezer.
- Cold storage darkens fry color. Storing potatoes below 45°F converts starch to sugar, leading to overly browned or burnt fries.
- Keep potatoes away from onions. Onions emit ethylene gas that accelerates sprouting and can impart an off-flavor.
The Only Safe Method for Canning Potatoes
You need a pressure canner. This is not negotiable. The South Dakota State guide specifies processing cubed potatoes for 40 minutes at 11 PSI in a dial-gauge canner or 10 PSI in a weighted-gauge canner. Altitude changes these numbers.
Common mistake: Using a boiling-water canner for potatoes. Botulism spores survive at 212°F. A pressure canner reaches 240°F, which is the only temperature proven to destroy them.
The process is precise for a reason. Cube potatoes uniformly to about half an inch. Smaller pieces pack too tightly, blocking heat penetration. Larger pieces might not process fully in the center. Boil the cubes for two minutes before packing them into jars, this is called a hot pack, and it helps remove air from the tissues and improves jar fill.
Follow the headspace rule. Leave one inch of space at the top of each jar before adding your boiling water and securing the lid. This space allows for food expansion and vacuum formation during processing.
| Canner Type | Pressure (PSI) | Processing Time | Critical Altitude Adjustment |
|---|---|---|---|
| Weighted-Gauge | 10 | 40 minutes | Increase to 15 PSI above 1,000 feet |
| Dial-Gauge | 11 | 40 minutes | Increase to 12 PSI above 2,000 feet |
Skipping the altitude adjustment is how jars fail to seal or, worse, spoil. The boiling point of water drops as elevation increases, so you must increase pressure to compensate. If your dial-gauge canner reads 11 PSI at sea level, it needs to read 12 PSI at 2,001 feet to achieve the same temperature.
The short version: Cube, hot pack, pressure can at the right PSI for your elevation. That’s the sequence.
Why You Cannot Can Mashed Potatoes
The density is the problem. Mashed or pureed potatoes create a thick, viscous product that heat struggles to penetrate evenly. Even with extended processing time, cold spots in the center of the jar are likely. Those cold spots are where Clostridium botulinum spores can survive and later produce toxin in the anaerobic jar environment.
No reputable source, including the National Center for Home Food Preservation, provides a tested recipe for canning mashed potatoes. Anyone who says they do it is gambling. Your safe alternatives are freezing mashed potatoes or dehydrating cooked potato flakes.
This is a clear line in food preservation. Some methods have been tested and validated for safety; others have not. Mashed potatoes fall into the latter category.
Freezing Potatoes for Future Use
Freezing is excellent for fries, hash browns, or stew chunks. The mandatory step is blanching. Drop your cut potatoes into boiling water for three to five minutes, depending on cube size. Then plunge them immediately into an ice water bath for the same duration.
Blanching does two things. It deactivates the enzymes that cause loss of flavor, color, and texture in the freezer. It also kills surface microorganisms that would otherwise continue to act. Skipping it gives you grainy, off-tasting potatoes after thawing.
Dry the blanched potatoes thoroughly before spreading them in a single layer on a baking sheet for the initial freeze. This “flash freezing” step prevents the pieces from clumping into a solid brick. Once they’re frozen solid, transfer them to airtight freezer bags or containers.
Where this goes sideways: Freezing raw, un-blanched potatoes. The texture turns gritty and watery upon thawing, usable only for mash where texture doesn’t matter.
Freezing is a core method to preserve vegetables without specialized equipment. It works for green beans, carrots, and corn with the same blanching principle.
Dehydrating Potatoes into Shelf-Stable Slices
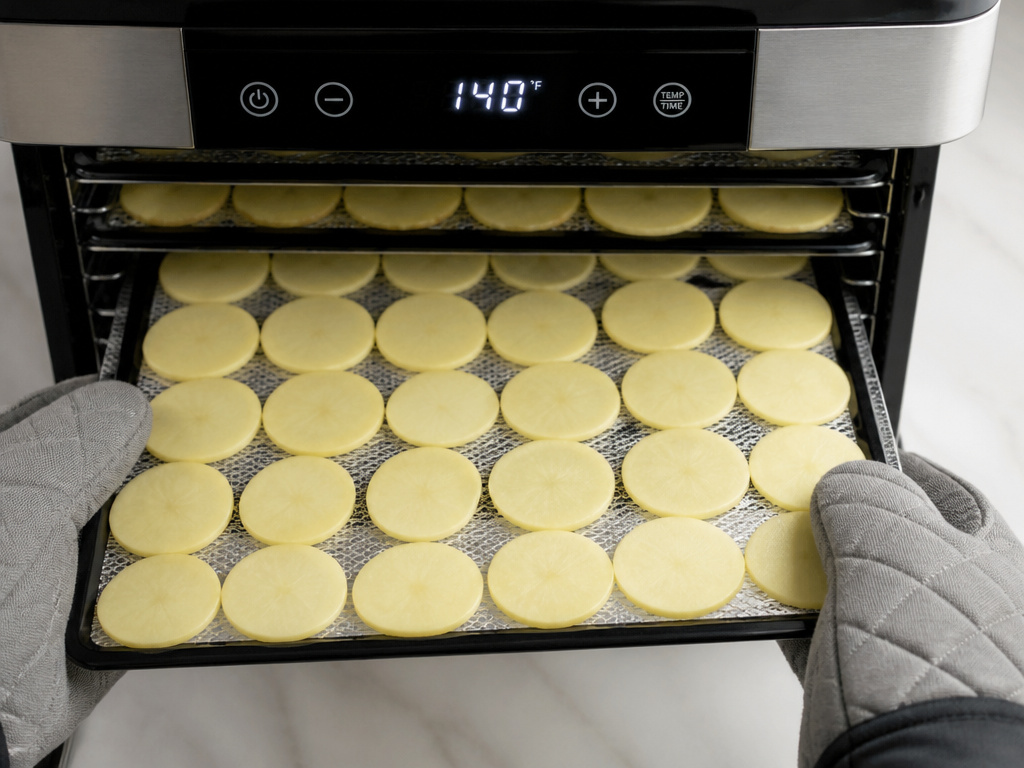 A dehydrator turns potatoes into lightweight, long-lasting ingredients for soups, stews, or homemade scalloped potatoes. Slice or strip potatoes uniformly, about 1/8 to 1/4 inch thick. Blanch these slices for seven minutes, longer than for freezing, to ensure enzyme deactivation throughout the thicker piece.
After blanching and cooling, arrange the slices in a single layer on dehydrator trays. Set the temperature to 140°F. They will need 6 to 10 hours to become brittle and snap when bent. Storage is simple: keep them in airtight containers in a dark pantry.
| Potato Form | Blanch Time | Dehydrator Temp | Done-When Test |
|---|---|---|---|
| Slices (1/8″) | 7 minutes | 140°F | Brittle, no moisture when snapped |
| Strips (1/4″) | 7 minutes | 140°F | Leathery but tough, no visible moisture |
Dehydrating is one of the most space-efficient principles of long-term food storage. It removes the water that microbes need to grow, creating a stable product without refrigeration.
The Science of Fresh Potato Storage First
 Before you preserve potatoes, you need to start with firm, healthy tubers. The principles of optimal potato storage are grounded in plant physiology. Potatoes are about 80% water and continue to respire after harvest.
The University of Idaho storage guide details a student experiment that compared home storage locations. Potatoes stored in a perforated plastic bag in a cool spot lost only 0.9% of their weight in five weeks. The same potatoes stored loose in a bowl in a warm cabinet lost 2.9%.
Potatoes stored in a bag had higher humidity and less weight loss when compared with potatoes stored in the same location without a bag.
The ideal fresh storage triangle is cool (45-50°F), dark, and humid (90-95% RH). A basement, cool garage, or a refrigerator drawer set to a higher temperature can work. The bag is critical, a perforated plastic bag elevates humidity around the potato, slowing dehydration and wrinkling.
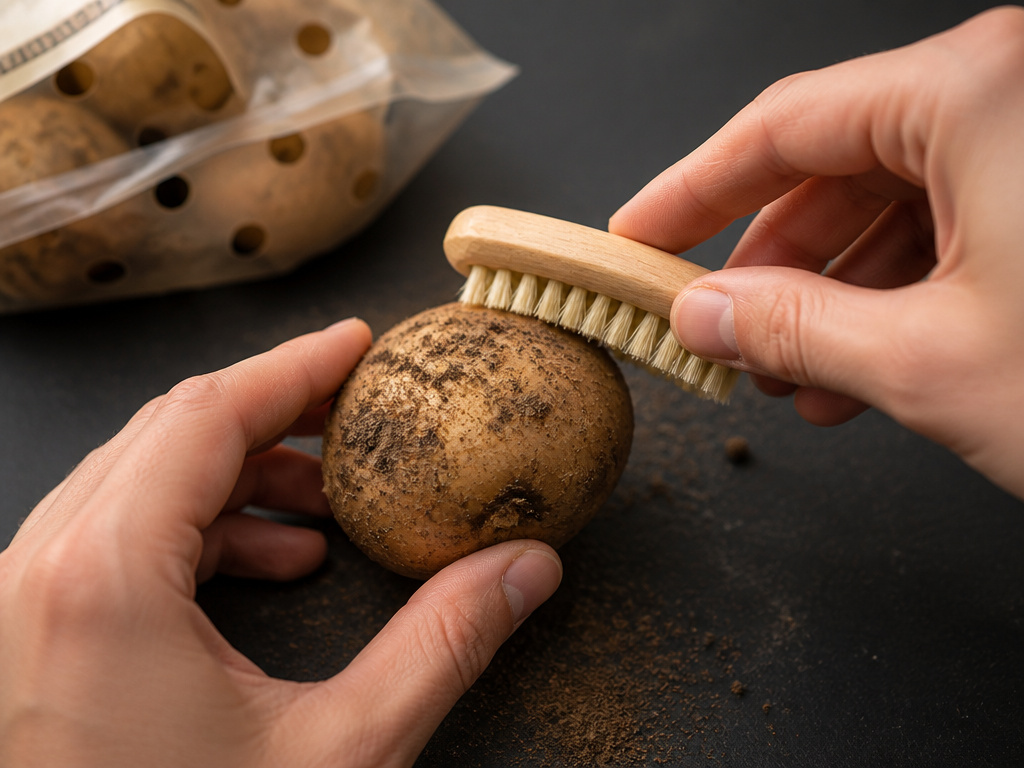
Do not wash potatoes before storage. Brush off dirt, but leave the skin dry. Introducing moisture invites rot and mold, shortening the shelf life you’re trying to extend. This is the same first step for storing carrots and other root crops.
The Fry-Color Trade-Off and the Onion Rule
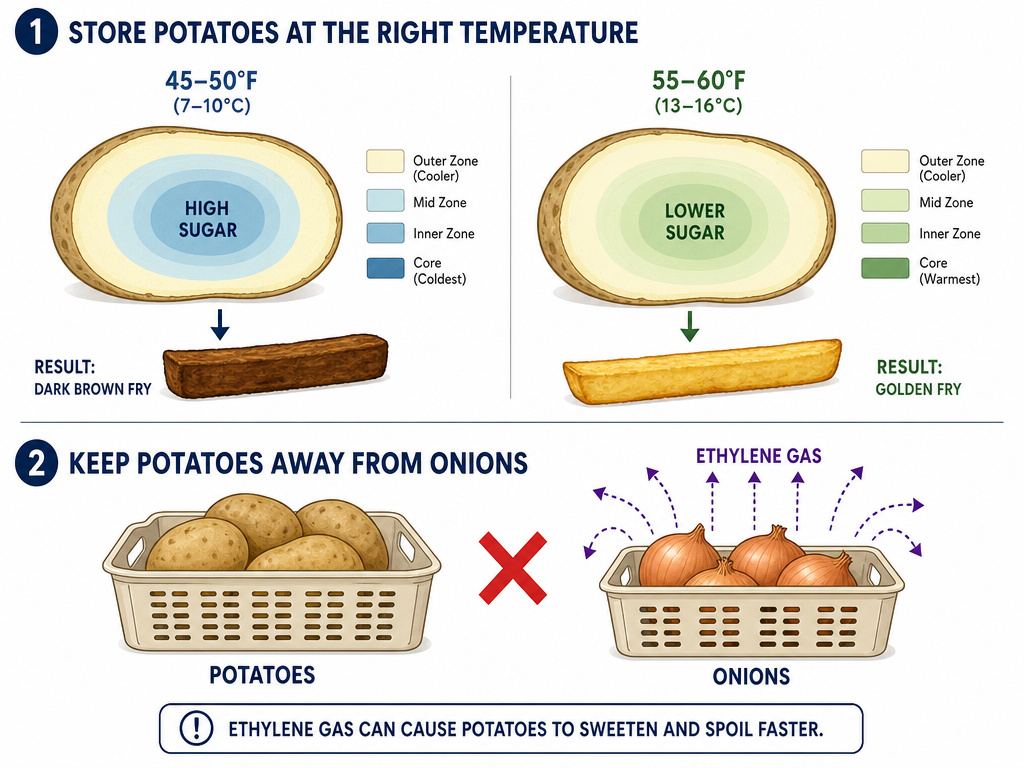 Here’s the conflict: the ideal storage temperature for long shelf life (45-50°F) is also the temperature that causes sugar accumulation in potatoes. Those sugars caramelize quickly in hot oil, leading to fries that are dark brown or burnt on the outside while still raw inside.
If you’re storing potatoes specifically for frying, use the “fryer rule.” Keep them in a slightly warmer spot (55-60°F) for just a week or two before use. This lets some of the accumulated sugars revert to starch, producing a golden fry. It’s a short-term compromise for a specific culinary goal.
Then there’s the onion rule. Never store potatoes and onions together. Onions (and apples) release ethylene gas, a plant hormone that triggers sprouting in potatoes. A study cited by Serious Eats even found potatoes stored next to onions picked up an unpleasant, acrid flavor that came through after frying. The best practice for storing onions and potatoes is to give them separate, ventilated containers in the same cool space.
Choosing a Method: Which One When?
Your goal decides the tool. Each preservation method serves a different kitchen need.
Pressure canning is for pantry independence. You want shelf-stable potatoes ready to drain and add to soups, stews, or potato salad without thawing or rehydrating. It requires the biggest upfront investment in equipment but offers the most convenient end product.
Freezing is for texture preservation. It’s the best method for maintaining a potato’s structural integrity for dishes like roasted potatoes or home fries. It’s simple but demands freezer space.
Dehydrating is for space and weight savings. It’s ideal for camping, backpacking, or creating your own instant potato slices. It requires the most active time for slicing and blanching but yields a product that stores in a jar for over a year.
Think about how you cook. If you make a lot of soups, canning makes sense. If you roast vegetables weekly, freeze them. This decision-making framework applies to all vegetable preservation.
Frequently Asked Questions
Can I store potatoes in the refrigerator?
You can, but with a major caveat. Temperatures below 40°F convert potato starch to sugar. This leads to an overly sweet taste and, if you fry them, excessively dark and bitter results. If you only plan to boil or mash them, the fridge is okay short-term. For general storage, aim for 45-50°F.
How long do home-canned potatoes last?
Properly canned potatoes are safe indefinitely if the seal remains intact. However, for best quality, texture, color, and flavor, consume them within 12 to 18 months. Always inspect jars before use: discard any with broken seals, cloudiness, spurting liquid, or off odors.
Do I need to peel potatoes before preserving?
For canning and dehydrating, yes. Peeling removes the tougher skin, ensuring even heat penetration during canning and consistent drying. For freezing, you can leave the skin on if you prefer, especially for varieties like Yukon Golds with thin skins. Just scrub them well.
What’s the best potato variety for long-term storage?
Russet potatoes generally have the longest shelf life, lasting three to five months in ideal fresh storage due to their thick skin and low moisture content. Yukon Golds last two to three months. Waxy varieties like red potatoes or fingerlings have higher moisture and spoil faster.
Is it safe to can potatoes with their skin on?
No. Canning recipes require peeling. The skin can harbor more soil bacteria, and its texture impedes the transfer of heat into the center of the potato piece, creating a safety risk. Always peel potatoes before canning.
The Bottom Line
Preserving potatoes locks in a staple. Pressure canning delivers shelf-stable convenience, freezing keeps texture intact, and dehydrating saves space. Each method hinges on a non-negotiable step: the right pressure, a hot blanch, or a long, dry heat.
Start with the right fresh storage, cool, dark, and humid in a perforated bag. Keep them away from onions. Choose your preservation path based on whether you need a pantry jar, a freezer bag, or a backpacker’s kit. The Michigan Fresh potato guide and other extension publications give you the numbers. Your job is to follow them.
