
Does Vacuum Sealing Stop Freezer Burn? Truths & Techniques
This post contains affiliate links. As an Amazon Associate, we earn from qualifying purchases.
Vacuum sealing prevents freezer burn by removing the air that causes it, but only if your freezer is cold enough and your food is dry enough before it goes in. The seal stops oxygen and moisture from escaping, which are the two things that create those dry, grayish-white ice crystals. It’s not a magic bullet, you still need to freeze food quickly at -18°C (0°F) or below, and some foods need special prep.
That air removal is the whole game. Freezer burn happens when air inside the package pulls moisture out of the food’s surface, leaving it dehydrated and oxidized. A proper vacuum seal eliminates that air pocket. But if your freezer fluctuates above -18°C or if you seal wet food, you’re just locking in the conditions for frost inside the bag. The seal has to be perfect, and the environment has to be stable.
What follows: the exact mechanism of freezer burn, the two critical safety rules most guides skip, a walkthrough of the moisture settings on pro-grade sealers, and which common freezer items vacuum sealing actually makes worse.
Key Takeaways
- Vacuum sealing is highly effective against freezer burn but is not a method of food preservation by itself, sealed food must still be refrigerated or frozen.
- Always thaw vacuum-sealed fish outside the bag due to the risk of botulism spores thriving in the anaerobic, thawing environment.
- For vegetables like broccoli or beans, you must blanch them before sealing to deactivate enzymes; skipping this step results in off-flavors and textures within a month.
- Use your sealer’s “moist” or “gentle” setting for soft fruits and wet meats; the “dry” setting won’t pull a full vacuum on liquid and can break the seal.
- Vacuum sealing can damage delicate items like bread, soft berries, and raw shellfish, the pressure crushes cell walls, turning them to mush upon thawing.
How Vacuum Sealing Actually Prevents Freezer Burn
Freezer burn is a two-part process: sublimation and oxidation. Sublimation is when frozen water molecules at the food’s surface skip the liquid phase and go straight to vapor, drying out the tissue. Oxidation is the chemical reaction that turns fats rancid and bleaches color. Both require air.
A vacuum sealer removes up to 99% of the air from the package, according to the Gaggenau Vacuum-sealing drawer manual. That creates a Reduced Oxygen Package (ROP). With little to no oxygen left inside, oxidation slows to a crawl. With no air pocket to hold moisture, sublimation can’t pull water from the food into the void. The food stays in stasis.
But the seal is only half the equation. Your freezer’s temperature is the other. The University of Maine food safety guide states vacuum-sealed food “must still be properly stored” in the freezer. If your freezer isn’t consistently at or below -18°C (0°F), the food cells will still degrade, just more slowly. Vacuum sealing optimizes the package, but it doesn’t replace the need for a cold, stable freezer.
The part nobody mentions: A perfect seal on a -15°C freezer is a waste of a bag. The ice crystals still form, they just do it slower. You need both the vacuum and the deep cold.
Where Vacuum Sealing Fails (And What To Do Instead)
Not every food survives the process. The suction pressure that makes a seal can also destroy delicate textures.
Soft fruits like raspberries or sliced peaches collapse. Bread flattens. Raw oysters or clams are crushed. The Fisher & Paykel Vacuum Seal Drawer manual explicitly lists a “Level 0 – sealing only” setting for fragile items like crisps and salad, where vacuuming isn’t recommended. For home units without that setting, you’re better off using a freezer storage container with a tight lid.
Wet surfaces are the other failure point. Moisture on the food or inside the bag prevents the heat strip from bonding the plastic layers. You get a weak seal that fails within weeks, letting air back in. Pat meat dry with a paper towel before sealing. For soups or stews, freeze them solid in a container first, then pop the frozen block into a bag for sealing.
| Food Type | Vacuum Seal Success? | Why It Fails |
|---|---|---|
| Berries (whole) | No | Pressure crushes cell walls, creating juice and mush upon thawing. |
| Bread (sliced) | No | Compresses the air pockets, turning it dense and soggy. |
| Liquid Soups | Yes, with a freeze-first step | Liquid gets sucked into the sealer’s chamber, ruining the motor and breaking the seal. |
| Fresh Herbs | No | Delicate leaves are crushed; they do better frozen in oil or butter in an ice cube tray. |
| Blanched Vegetables | Yes, on “Dry” setting | Must be cooled and dried completely, or residual steam breaks the seal. |
The Two Safety Rules Every Manual Buried on Page 17
Vacuum sealing is a storage tool, not a preservation method. This is the line the K-State Research and Extension publication draws clearly: “vacuum sealing alone is not a method of food preservation.” It creates an anaerobic environment, perfect for the dangerous bacterium Clostridium botulinum, which causes botulism.
Rule one: never thaw vacuum-sealed fish in the bag. Botulism spores are common in marine environments and thrive without oxygen. Thawing in the sealed bag creates the ideal warm, anaerobic conditions for toxin production. Always remove frozen fish from its vacuum packaging before thawing in the fridge.
Rule two is the “two-barrier” principle from food safety codes. To be safe, a Reduced Oxygen Package must have at least two barriers against pathogen growth. For frozen food, the barriers are the vacuum (barrier one) and the freezing temperature itself (barrier two). If your freezer fails and the food thaws, you’ve lost a barrier. That’s why even vacuum-sealed items have a finite freezer life.
Before you start: The heat-sealing bar on a vacuum sealer reaches temperatures that can cause serious burns. Always let the machine cool completely before wiping it down. Never touch the sealing strip during or immediately after a cycle, use the machine’s bag clamp to position the bag instead of your fingers.
How to Use a Vacuum Sealer the Right Way
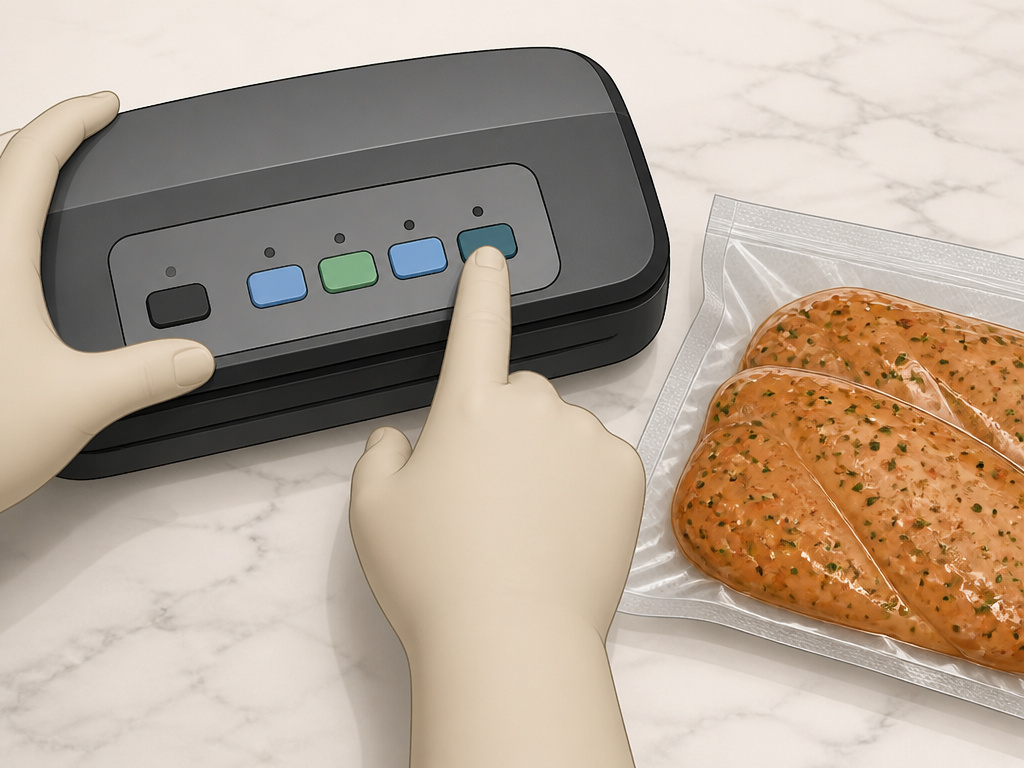 If you’re using a bag, you need to match the food’s moisture level to the machine’s setting. Most home models have a “Dry” and a “Moist” or “Gentle” setting. The moist setting runs a slower vacuum to avoid pulling liquids into the sealer’s chamber, which can damage the pump.
Dry setting is for breads, crackers, nuts, dried fruits, or raw meats that have been patted dry. Moist setting is for marinated meats, soups you’ve frozen solid first, or juicy fruits. Using the wrong setting is how you end up with a broken seal or a dead motor.
For containers or specialty jobs, the process changes. The Gaggenau drawer has specific vacuum levels for bottles (50–90%) versus bags (80–99%). You can’t just guess.
- Cut the bag 2–3 inches longer than your item.
- Seal one end using the manual seal function to create a pouch.
- Insert the food, keeping the open end clean and dry.
- Place the open end in the sealer channel, close the lid firmly.
- Select the correct setting (Dry/Moist/Gentle) for your food.
- Initiate the vacuum and seal cycle, then label with contents and date.
Labeling is non-negotiable. “Chicken” becomes “Chicken thighs 2025-03” in two months when you can’t tell pork from beef through the frosted plastic.
The 5-Step Process for Freezing Anything
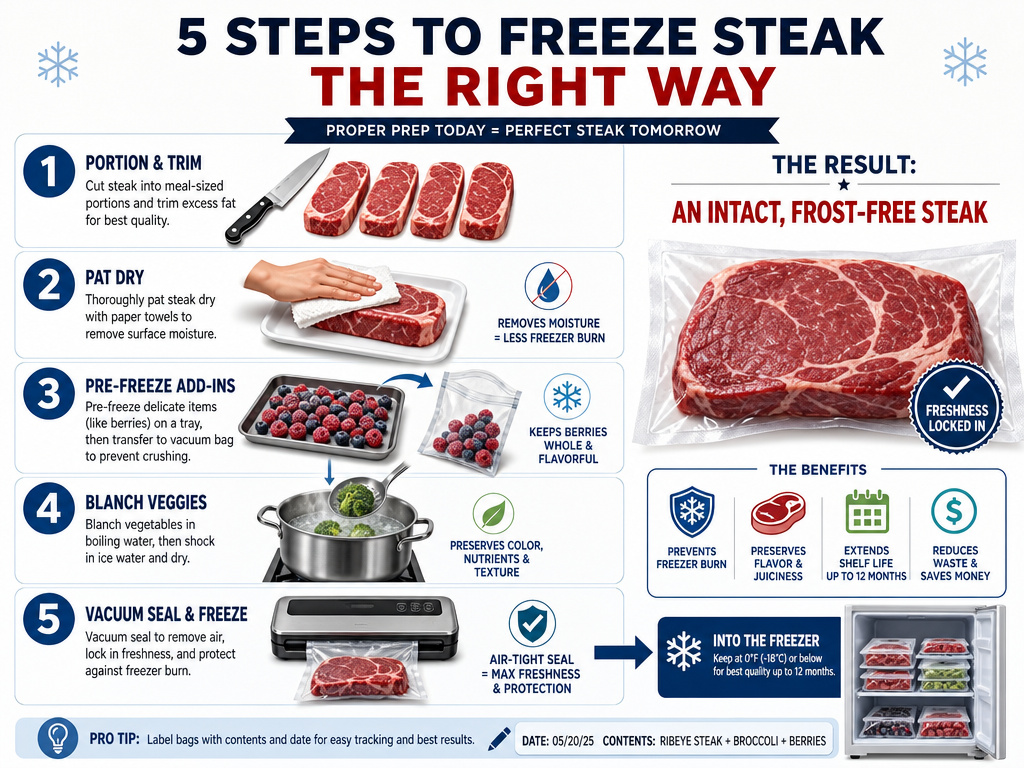 This isn’t just bag and seal. The prep decides whether your food survives the freezer with texture intact.
1. Portion. Freeze in meal-sized amounts. Thawing and refreezing is the fastest way to ruin texture and invite freezer burn.
2. Dry. Pat raw meat, fish, or poultry dry with paper towels. Any surface moisture turns to ice inside the bag and can compromise the seal. For stews or cooked meals, chill them in the fridge first to solidify fats and reduce condensation.
3. Pre-freeze (for liquids and soft items). Spread berries or dumplings on a parchment-lined sheet pan. Freeze solid, then transfer to the bag. This prevents them from sticking together in a solid block. For soups, freeze in a rigid container, then vacuum-seal the frozen block.
4. Blanch (for vegetables). This is the step that stops enzymes. Drop vegetables like broccoli, green beans, or Brussels sprouts in boiling water for 1–3 minutes, then plunge into an ice bath. Drain thoroughly and dry completely before sealing. Skipping blanching is why your vegetables taste off after a month.
5. Seal and Freeze Fast. Use your vacuum sealer techniques correctly. Immediately place sealed packages flat in the coldest part of your freezer, usually the back or bottom. A fast freeze creates smaller ice crystals, which do less damage to cell walls.
What You Need for Reliable Results
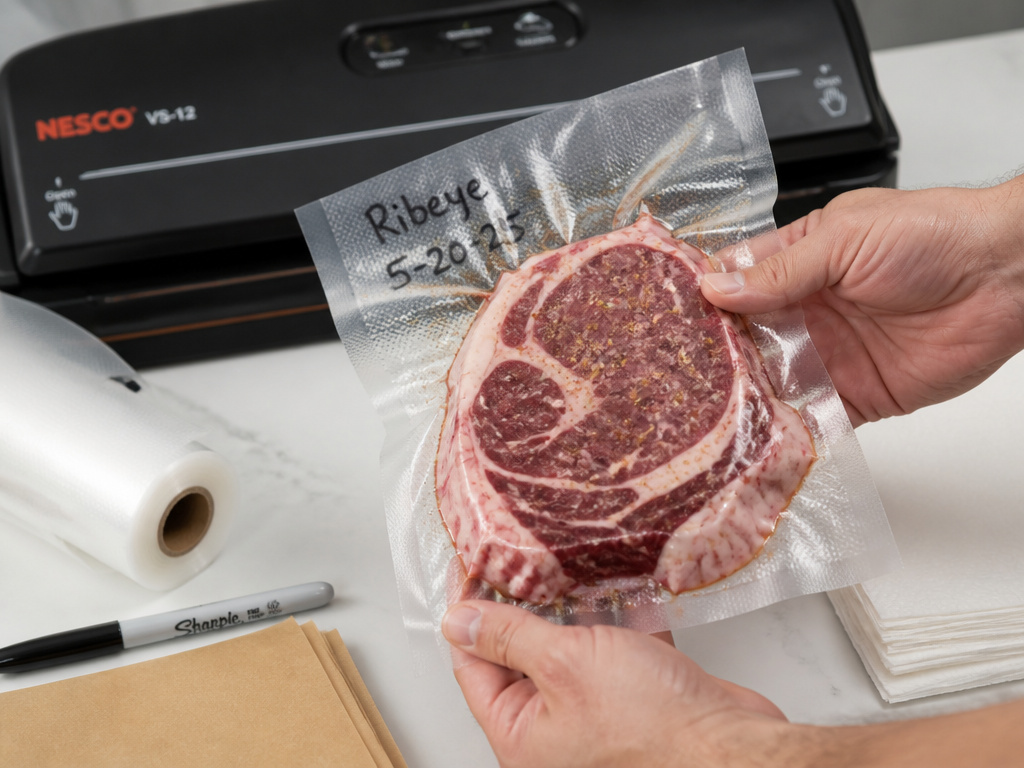 A basic $50 plastic sealer will handle dry goods. For meat, fish, and moist foods, you need a sealer with a moisture sensor or a manual moist/dry toggle. The Nesco VS-12 or FoodSaver V4840 are two common models that have it.
The bags matter more than the machine. Cheap bags are often thinner and can develop pinhole leaks under pressure. Look for bags marketed as “multi-ply” or “commercial grade.” For long-term storage, quality vacuum bags are a better investment than a more expensive sealer.
You’ll also need: * Permanent marker for labeling (grease pencil works on frosted bags). * Paper towels for drying. * Parchment paper for pre-freezing sticky items. * A baking sheet for that pre-freeze step.
For sous vide cooking, you need bags rated for higher temperatures. Not all are.
Vacuum Sealer vs. Freezer Bag vs. Container
Vacuum sealing isn’t the only option. It’s the best for preventing moisture loss and oxidation, but it’s also the most expensive per use.
Freezer bags with a zip closure are the everyday workhorse. You can push out most air by submerging the bag in water before zipping it shut (the water displacement method). They’re fine for items you’ll eat within a month or two. For anything longer, the plastic is more permeable to air, and freezer burn is likely.
Rigid containers are best for liquids, pre-frozen blocks, and anything that might be crushed. They take up more space but are reusable. Look for containers designed for freezer storage, they won’t crack at low temperatures.
The choice often comes down to the food. Vacuum seal steaks you’re aging for 6 months. Use a freezer bag for a batch of chili you’ll eat next week. Use a container for soup.
Frequently Asked Questions
Does vacuum sealing make food last forever?
No. It dramatically extends quality in the freezer by preventing freezer burn, but it does not stop all degradation. Fat can still go rancy over many months, and texture will degrade over time. For quality, most vacuum-sealed meats are best within 6-12 months.
Can you vacuum seal liquids?
Yes, but not directly. You must freeze the liquid solid in a container first, then vacuum-seal the frozen block. Attempting to vacuum seal liquid will pull it into the sealer’s chamber, damaging the machine and ruining the seal.
Is it safe to vacuum seal cooked rice or pasta?
It is not recommended for long-term storage. Cooked rice and pasta can harbor Bacillus cereus spores, which survive cooking and can multiply in an anaerobic environment. If you do seal them, freeze immediately and consume within a week.
Do I need special bags for my vacuum sealer?
Yes. You must use bags designed for your specific sealer brand or universal bags compatible with its heat seal strip. Using bags that are too thick or too thin will result in a failed seal. Reusable vacuum bags are an option for some models, but they require thorough drying between uses.
Can I reuse vacuum sealer bags?
Not for raw meat, fish, or poultry due to cross-contamination risk. For dry, shelf-stable items like nuts or crackers, you can cut the sealed end off, wash the bag thoroughly, and dry it completely before reusing. It’s often more hassle than it’s worth.
Before You Go
Vacuum sealing is a powerful tool against freezer burn because it removes the air that causes it. But it’s just a tool. You still need a cold freezer, dry food, and the right settings on your machine. It won’t save poorly prepared food, and it introduces its own safety rules, especially for fish.
For long-term storage of prime cuts, leftovers you won’t touch for months, or bulk buys, a vacuum sealer for freezing is worth the investment. For everything else, a good quality freezer bag and the water displacement method will get you 90% of the way there.
