
How to Organize a Chest Freezer With a Layered System (58 chars)
This post contains affiliate links. As an Amazon Associate, we earn from qualifying purchases.
To organize a chest freezer, implement a layer system using sturdy bins or crates. Group food by category, place those groups into containers, and stack them in logical layers, top for frequent use, bottom for long-term storage. This method replaces random digging with a visible, accessible inventory that prevents food loss and saves energy.
The layer system works because it acknowledges the chest freezer’s shape. It’s a deep, open box. Without vertical dividers, everything sinks to the bottom. Your goal isn’t just tidiness; it’s creating artificial shelves where none exist.
What follows: a four-step process to build those shelves, the specific manufacturer specs that dictate your container sizes, and the two maintenance habits that keep the system from collapsing within a month.
Key Takeaways
- Use the 1kg per 25L freezing capacity rule from Fisher & Paykel‘s manual to avoid overloading your freezer during big shopping trips.
- Defrost when frost exceeds 6mm thick, a spec from the same manual; thicker ice wastes energy and steals storage space.
- Implement a top-layer, middle-layer, bottom-layer bin system, with everyday items in the hanging basket or top bin.
- Maintain a written or digital inventory taped to the lid; you can’t manage what you can’t see or remember.
- Choose flexible plastic bins over rigid or cardboard; extreme cold makes brittle plastic crack and cardboard disintegrate.
Why Chest Freezers Become Black Holes
A chest freezer has no shelves. Gravity pulls every package toward the bottom. The first items you load in are the last ones you’ll see, buried under weeks or months of subsequent shopping. This isn’t a minor inconvenience, it’s a design flaw that directly causes food waste.
You buy a five-pound bag of peas. You use a cup. The rest sinks. Three months later, you find freezer-burned peas at the bottom, stuck to the coil plate. You throw them out. The cycle repeats with ground beef, chicken breasts, frozen berries. The financial loss adds up quietly.
The Fisher & Paykel user guide states you should not try to freeze more than 1kg of food per 25L of freezer volume at any one time. Overloading slows the freezing process, creating large ice crystals that rupture cell walls in meat and vegetables. The food thaws mushy.
Organization fixes this. It inserts logic into the chaos. A good system lets you see what you have, access what you need, and use food before its quality degrades. It turns a cold pit into a strategic food reserve.
The 4-Step Layer System for Chest Freezer Organization
This method requires bins, labels, and an hour of your time. The payoff is permanent.
Step 1: Empty and Audit.
Pull everything out onto a table or into coolers. Toss anything unidentifiable, freezer-burned, or past its safe date. Check our chart for guidelines, but when in doubt, throw it out. This is the only way to start fresh. Wipe the interior with a mix of warm water and mild detergent while it’s empty.
Step 2: Group by Category.
Sort the keepers into logical groups. Common categories are: – Ground Meats – Poultry & Whole Cuts – Seafood – Frozen Vegetables – Frozen Fruits – Prepared Meals & Leftovers – Breads & Baked Goods – Broths & Soups
Your categories should match your cooking habits. If you bake, a “Butter & Pastry” group makes sense. If you don’t eat pork, skip that category.
Step 3: Select and Label Bins.
Choose containers that fit your freezer’s dimensions. Measure the interior length, width, and depth before you shop. Flexible plastic storage bins are ideal; rigid bins can crack in the cold, and cardboard boxes fall apart from moisture.
Common mistake: Using bins that are too tall. You need clearance to lift a full bin out without spilling its contents. Leave at least two inches of space between the top of your tallest bin and the freezer lid.
Label each bin clearly. Use a waterproof marker on masking tape or invest in a label maker. “Chicken” is better than “Poultry.” “Mixed Veg” is better than “Greens.”
Step 4: Establish the Layers.
This is the core of the system. Think of your freezer in three vertical zones.
| Layer | Contents | Access |
|---|---|---|
| Top Layer | Hanging basket (if equipped) or a single shallow bin. | Daily / weekly items: frozen peas, bacon, ice cream, ready-made meals. |
| Middle Layer | 2-3 bins for high-rotation categories. | Monthly items: ground beef, chicken breasts, frozen broccoli, your most-used veggies. |
| Bottom Layer | 1-2 bins for bulk, long-term storage. | Seasonal or sale items: whole turkey, large roasts, bulk berries from summer, holiday baking supplies. |
The rule is simple: you only lift one layer to get to the next. To reach the bottom beef roasts, you lift out the middle-layer vegetable bin. This takes ten seconds and prevents the classic “dig-and-dump” that destroys order.
Chest Freezer Specs That Change Your Plan
Your freezer’s manual isn’t optional reading. It contains numbers that dictate how much you can freeze, when to defrost, and where to place the appliance. Ignoring them costs you money in wasted food and electricity.
Freezing Capacity is Not Storage Capacity.
Your 10-cubic-foot freezer can hold hundreds of pounds of frozen food. But its freezing capacity, how much fresh, warm food it can freeze solid in 24 hours, is much lower. The Fisher & Paykel guide specifies 1kg of food per 25L of freezer volume.
For a typical 7 cubic foot freezer (about 200L), that’s roughly 8kg (17.6 lbs) of fresh food you can add at one time. Dump in 30 pounds of warm meat, and the freezer motor runs non-stop. The existing frozen food begins to thaw, and the new food freezes slowly, damaging its texture.
Climate Class Dictates Location.
Found on the rating plate or in the Bosch manual, this code tells you the ambient temperature range your freezer is built for.
| Climate Class | Permissible Room Temperature | Typical Location |
|---|---|---|
| SN (Subnormal) | +10°C to +32°C (50°F to 90°F) | Unheated basement, garage in mild climates. |
| N (Normal) | +16°C to +32°C (61°F to 90°F) | Heated basement, utility room. |
| ST (Subtropical) | +16°C to +38°C (61°F to 100°F) | Garage in most US climates. |
| T (Tropical) | +16°C to +43°C (61°F to 109°F) | Garage in hot, southern climates. |
Running an N-class freezer in a garage that hits 100°F forces the compressor to work overtime. Power consumption can double, and the unit may fail prematurely. Check your manual before you decide on a spot.
Defrost Trigger: The 6mm Rule.
Most chest freezers are manual defrost. The Fisher & Paykel guide says to defrost when frost buildup is greater than 6mm thick (about a quarter-inch). A thin coat of frost is normal insulation. Beyond 6mm, the ice acts as a barrier, making the compressor run longer to maintain temperature. This is a scheduled task, not an emergency. Plan your defrost a freezer day around the weather forecast.
Tools and Containers That Actually Work
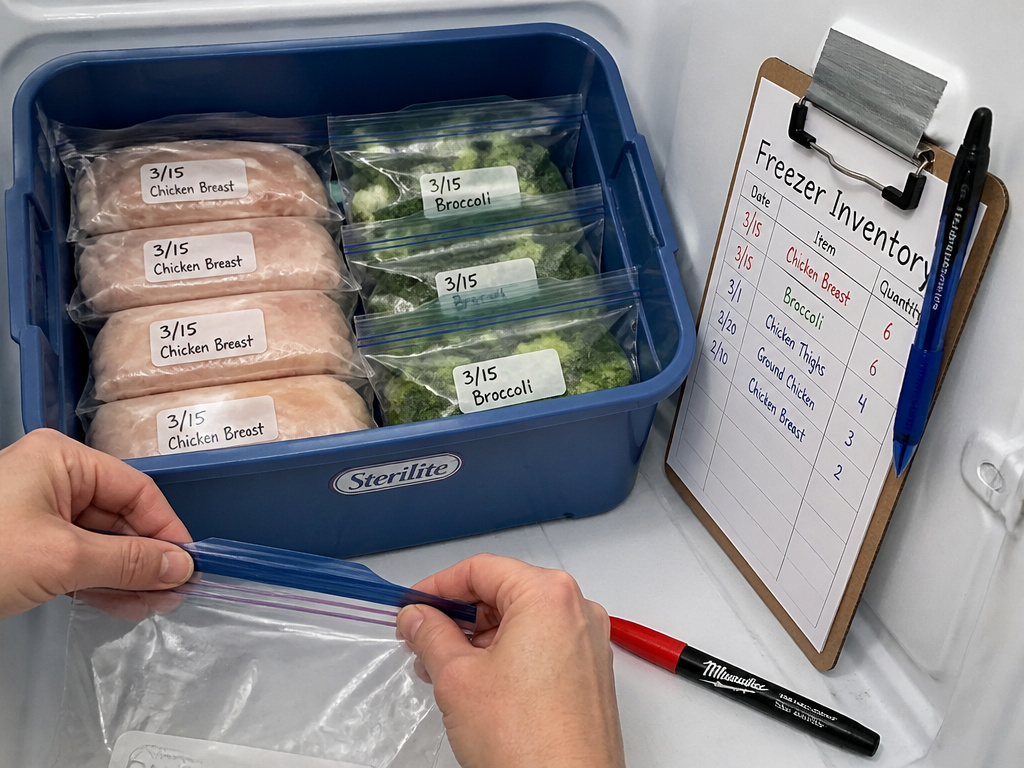 The right container does half the organizational work for you. The wrong one creates a mess.
Bins and Crates: The Foundation.
You need containers that are cold-tolerant, strong, and sized correctly. Milk crates are a classic, inexpensive choice, they stack, they’re strong, and air flows through them. For a cleaner look, flexible plastic bins like the Sterilite Ultra Latch work well.
Avoid dollar-store bins. The plastic turns brittle below freezing and cracks when you flex it. Also, skip fabric bags for the main storage layers; they collapse and make it impossible to lift a layer without disturbing everything below.
The Role of Freezer Bags and Containers.
Before food goes into a bin, it should be properly packaged. This is where freezer bags and freezer safe containers are non-negotiable. Use bags for irregularly shaped items like chicken pieces or broccoli florets. Squeeze out excess air before sealing to prevent freezer burn. Use rigid, airtight containers for liquids like soup or broth, and for fragile items like berries.
Label every package with the contents and date. “Ground Beef” and “Mar 2025” written in permanent marker saves you from future guesswork.
The Inventory List: Your Memory.
Tape a clipboard with an inventory sheet to the side of the freezer or use a dry-erase board on the wall next to it. Every time you add or remove something, update the list. Simple columns for Item, Quantity, and Date Added are enough. This single habit prevents overbuying and hidden spoilage.
Maintaining the System (The Hard Part)
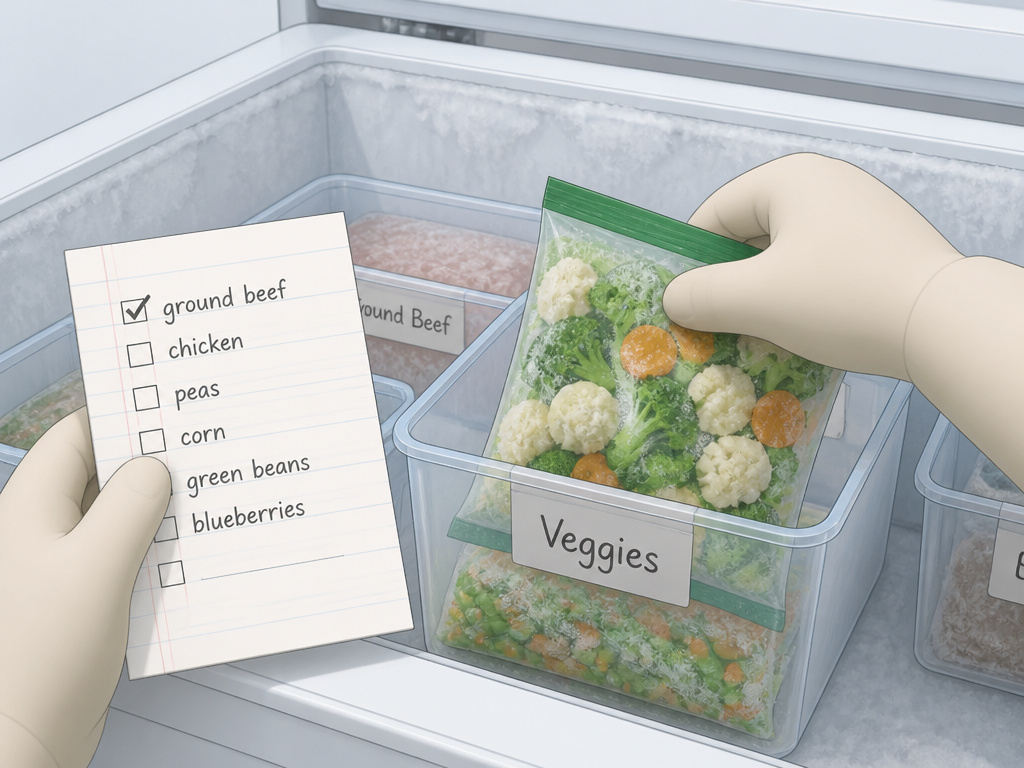 Setup is a weekend project. Maintenance is a two-minute habit after every grocery trip.
When you add new frozen food, don’t just drop it in. Check your inventory list first. Is there already ground beef? Maybe you need to use that older package first. Then, place the new item in its correct category bin. Update the list.
Every three months, do a quick visual audit. Open each bin, check for packages shifting to the bottom, and rearrange if needed. This is also the time to look for frost buildup. If you see ice approaching that 6mm mark on the walls, schedule your next deep freezer cleaning session.
Where this goes sideways: Putting a “just this once” item directly into the freezer without binning it. One un-bagged pizza box becomes two, then three. Within a month, your layers are buried under a loose-item avalanche. Discipline is the price of order.
The system only fails if you stop participating. The bins make it easy, but they don’t put the food away for you.
Frequently Asked Questions
What is the best way to organize a small chest freezer?
The layer system scales down perfectly. For small chest freezers under 5 cubic feet, use two layers instead of three. Use the included hanging basket or a single shallow bin for everyday items. Use one larger bin on the bottom for everything else. The key is still categorization, don’t mix vegetables and meat in the same bin.
How often should I defrost my chest freezer?
Defrost when frost on the interior walls exceeds 6mm (1/4 inch) in thickness. For most households, this happens once or twice a year. High humidity or frequent lid openings will accelerate frost growth. The process is part of a full cleaning your freezer routine.
Can I use cardboard boxes to organize my freezer?
No. Cardboard absorbs moisture from the frozen air and will eventually sag, tear, and disintegrate. It also insulates items from the cold, potentially creating warm spots. Use only plastic bins designed for cold temperatures or sturdy milk crates.
Is a full freezer more efficient?
Yes. A full freezer retains cold better than an empty one because the frozen mass acts as a thermal buffer. When you open the lid, less warm air enters the densely packed space. If your freezer is under-full, you can fill plastic jugs with water and freeze them to take up space and improve efficiency.
What size chest freezer do I need?
Match the size to your household and shopping habits. A 5 cubic foot freezers model suits 1-2 people or supplemental storage. A family of four might need a 7 cubic foot freezers unit. For bulk meat purchases or large families, consider 10 cubic foot freezers. Always measure your available space first.
The Bottom Line
Organizing a chest freezer isn’t about aesthetics. It’s a functional defense against waste. The layer system with bins creates visibility in a blind space. Pair it with the manufacturer’s specs on freezing capacity and defrosting, and you move from reactive digging to proactive management.
Start with the audit. Be ruthless with what you toss. Invest in a few good bins. Your back will thank you the next time you need a pack of bacon without a five-minute archaeological dig. Your wallet will thank you in reduced food waste. And your freezer will run more efficiently, lasting longer. That’s the real goal, a tool that works for you, not against you.
