
Guide to Freezing Glass Containers Safely: Can You Do It?
This post contains affiliate links. As an Amazon Associate, we earn from qualifying purchases.
You can put glass containers in the freezer, but you must follow three rules: leave at least one inch of headspace for expansion, cool food completely before freezing, and use glass labeled as freezer-safe, preferably borosilicate or tempered. Ignoring any one of these invites thermal stress, the main reason glass cracks within hours or after just a few freeze-thaw cycles. Water-based foods expand by about 9% when frozen; a container filled to the rim has nowhere for that pressure to go but outward against the sidewall.
That expansion figure isn’t a guess. It’s the mechanical reason a jar of soup can split overnight at -18°C. The rest of this guide walks through the physics, the container shapes that fail first, and the specific steps that keep your glass, and your food, intact.
What follows: the three non-negotiable rules, the two glass types that can handle the job, the container shapes to avoid, and the thawing mistake that turns a frozen block into a cleanup hazard.
Key Takeaways
- Headspace is non-negotiable. Leave at least one inch (2.5 cm) at the top. Water expands 9% when frozen; a full container will crack.
- Cool food to room temperature first. Placing hot food directly into a freezer-safe glass container creates a temperature differential that can cause immediate stress cracks.
- Container shape matters more than you think. Straight-sided jars handle expansion pressure evenly; jars with curved shoulders or narrow necks are stress concentrators and fail faster.
- Thaw slowly in the fridge. Taking a frozen glass container straight from the freezer to a hot oven or microwave is a recipe for thermal shock and breakage.
- Not all “glass” is freezer glass. Look for “borosilicate” or “tempered” on the label. Standard soda-lime glass, common in many jars, is far more prone to cracking from temperature changes.
The Three Rules for Freezing Glass Safely
The difference between a container that survives for years and one that cracks on its first freeze comes down to physics, not luck. You’re managing pressure and temperature differentials.
Before you start: Glass under thermal stress doesn’t bend; it cracks or shatters. A hairline fracture can form within hours if you skip the cooling step, and a container filled too full can fail overnight. Wear cut-resistant gloves if you handle a container you suspect is compromised.
Rule 1: Leave an inch for expansion. When water freezes, its molecules form a crystalline structure that takes up more space. For most foods, this means a volume increase of roughly 9%. If your container has no room to accommodate that, the pressure pushes outward against the glass walls until something gives.
| Fill Level | Result After Freezing | Timeline to Failure |
|---|---|---|
| To the rim | Extreme outward pressure on sidewalls and lid seal | Can fail within hours at -18°C |
| 3/4 full (1 inch headspace) | Pressure dissipates upward into empty space | Safe for long-term storage |
| Half full | Minimal stress; safest for liquids | Virtually no risk |
The “one inch” rule is a practical translation of that 9% expansion. For a typical 32-ounce (1 liter) jar, that’s about leaving the top 10% empty.
Rule 2: Cool food completely before sealing. This is where most people rush and pay the price. Thermal stress occurs when different parts of the glass cool at drastically different rates. – If you pour a hot stew into a jar and put it directly in the freezer, the outer wall chills rapidly while the inner mass and the glass touching it stay hot. – The outer glass contracts quickly; the inner glass is still expanded. That differential strain is what creates a hairline crack, often within the first few hours.
Let the food sit on the counter until it’s no longer steaming, then refrigerate it until it’s fully chilled. Only then move it to the freezer. The extra hour prevents a week’s worth of meal prep from ending up in the trash.
Rule 3: Use the right glass. “Glass container” is a category, not a guarantee. You need to match the material to the task.
Borosilicate glass containers are conventional oven safe to 450°F/232°C and are engineered for thermal shock resistance. Their low coefficient of thermal expansion means they contract and expand less with temperature swings, making them the default choice for freezing and reheating cycles.
Tempered glass is another good option, strengthened by a controlled heating and cooling process. The glass you should be skeptical of is common soda-lime glass, the type used in many mason jars and decorative bottles. It’s more brittle under thermal stress and isn’t always labeled for freezer use. When in doubt, check the manufacturer’s care instructions.
Why Container Geometry Is a Make-or-Break Detail
You can follow all three rules and still have a jar fail if its shape works against you. The pressure from expansion needs a clear, unobstructed path.
Straight-sided jars win. A cylindrical container with vertical walls and a wide mouth allows frozen food to expand upward in a uniform column. The pressure distributes evenly across a broad surface area. This is why dedicated glass freezer containers are almost always straight-sided.
Jars with shoulders are riskier. The curved shoulder where the jar narrows toward the neck is a natural stress concentrator. As food freezes and expands upward, it hits this bottleneck. The force that was spread across the entire diameter of the jar is now focused on a small ring of glass. This is why a narrow-neck glass bottle is a notoriously bad vessel for freezing liquids.
The YouTube demo got it right: “I want to show you how to freeze glass jars without breaking them… You’re going to want to use the one that is straight.” That’s a visual lesson in stress mechanics, not just a tip.
Other shape pitfalls:
- Embossed logos or decorative ridges: These create localized thin spots and stress risers in the glass.
- Attached handles or spouts: The joint where the handle meets the body is a common failure point under uneven pressure.
- Thick-bottom, thin-wall designs: The different thicknesses cool and contract at different rates, promoting cracks.
When you’re selecting glass food containers for the freezer, simplicity is strength. A plain, uniformly thick, straight-sided design will outlast a fancy embossed one every time.
The Thawing Process: Where Good Intentions Go Wrong
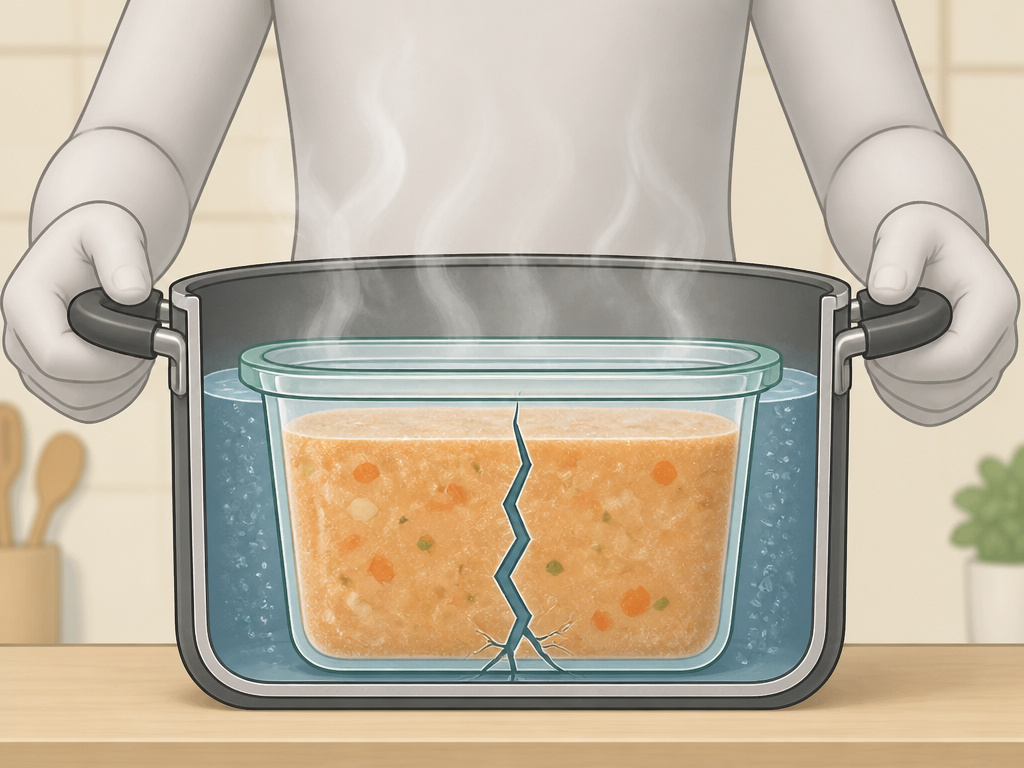
You navigated the freezing perfectly. The thaw is where you can lose everything to a single impatient move. Thermal shock works both ways.
Never go from freezer to heat. Placing a frozen glass container directly into a hot oven, onto a stovetop, or under a broiler is the single fastest way to shatter it. The outside layer of glass heats and expands rapidly while the core, and the still-frozen food inside, remains extremely cold and contracted. The resulting stress can cause an explosive failure.
The safe path: slow and steady. The goal is to minimize the temperature gradient across the glass. 1. Transfer to the refrigerator. This is the gold-standard method. Let the container thaw gradually over 12-24 hours. The fridge’s consistent, cool temperature brings the whole mass up evenly. 2. Use the microwave defrost setting. If you’re short on time, use the dedicated defrost function, which uses lower power. Crucially, remove the lid first and open any vents. Trapped steam from uneven heating can create a pressure bomb. 3. For oven reheating, thaw completely first. If the final destination is the oven, the food must be fully thawed in the fridge first. Only then should you transfer it to an oven-safe dish or place the (lid-off) glass container into a preheated oven.
Where this goes sideways: Putting a container of frozen soup directly into a pot of warm water to “speed up” thawing. The bottom of the jar heats quickly while the top remains frozen, often resulting in a vertical crack up the side.
This patience pays off not just in container safety but in food quality. Slow thawing in the fridge helps retain moisture and texture, especially for soups and stews.
Choosing Your Glass: Borosilicate vs. Tempered vs. The Rest
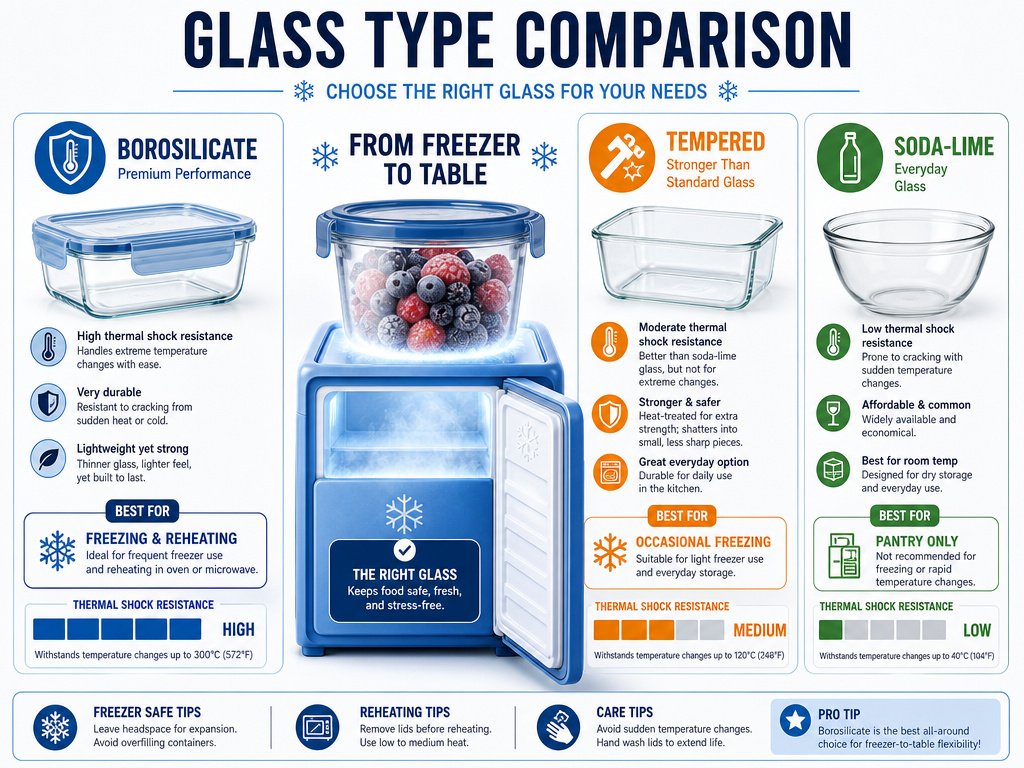
Not all glass is created equal for freezer duty. Your choice determines how many freeze-thaw cycles your container will survive.
Borosilicate glass is the benchmark. This is the material used in laboratory beakers and high-end bakeware for a reason. Its chemical composition includes boron trioxide, which gives it a much lower thermal expansion coefficient than standard glass. It can handle a sudden temperature change of over 300°F (165°C) without stress. For a kitchen container that will move from freezer to microwave or oven, borosilicate glass containers are the most reliable investment. Brands like Pyrex (the original formula) and many European manufacturers use it.
Tempered glass is a strong contender. Also known as toughened glass, it’s processed through controlled thermal or chemical treatments to increase its strength. It’s more impact-resistant than regular glass and handles thermal stress better than soda-lime glass. However, if it does fail, tempered glass shatters into small, blunt chunks rather than sharp shards. Many modern glass storage containers use tempered soda-lime glass.
Soda-lime glass: proceed with caution. This is the most common, inexpensive glass. It’s fine for dry storage, cold beverages, or the fridge. Its higher thermal expansion rate makes it vulnerable to sudden temperature changes. A jar might survive one careful freeze, but repeated cycling will likely cause microfractures and eventual failure. Never assume a mason jar or pretty bottle is freezer-safe unless it’s explicitly labeled as such.
| Glass Type | Best For | Thermal Shock Resistance | Failure Mode |
|---|---|---|---|
| Borosilicate | Freezing, reheating, oven use | Excellent | May crack but rarely shatters |
| Tempered | Freezing, fridge storage, microwave | Good | Shatters into small, granular pieces |
| Soda-Lime | Pantry storage, cold liquids only | Poor | Cracks into large, sharp shards |
Your decision point: if you regularly freeze meals for later reheating, the upgrade to borosilicate is justified. For occasional freezing of already-cold items, a quality tempered glass container will suffice.
What Not to Freeze in Glass: The Absolute No-List
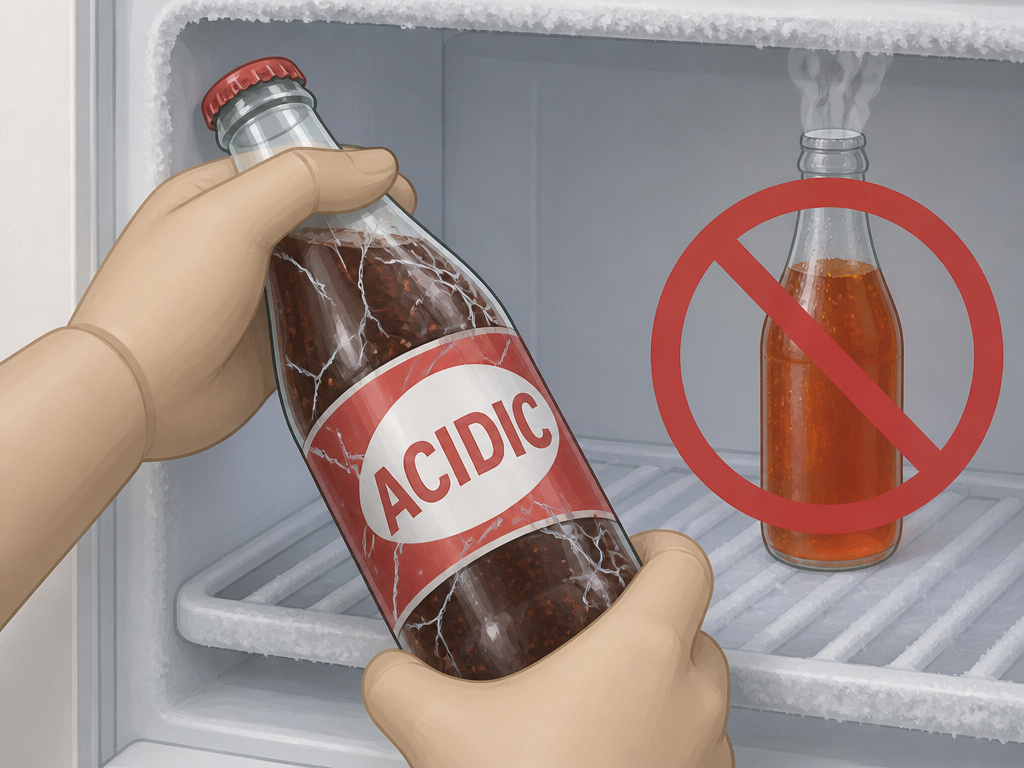
Some foods and scenarios turn the freezer into a hazard zone for glass, regardless of your precautions.
Carbonated or acidic beverages. This is a direct warning from appliance manuals: “Never put acidic beverages in glass bottles and cans into your freezer due to the risk of explosion.” The combination of carbonation pressure and expansion from freezing is volatile. A glass bottle of soda, beer, or sparkling water can explode with significant force.
Liquids in sealed, narrow-neck containers. Even non-carbonated liquids like juice, broth, or oil are dangerous in a sealed bottle. The expansion has nowhere to go, creating immense pressure. If you must freeze a liquid, use a wide-mouth container with ample headspace and leave the lid slightly loose until solid.
Uncooled foods, period. We covered this, but it bears repeating: the thermal shock from hot-to-freezer is a primary cause of failure. No exceptions.
Any container not labeled for freezer use. If the manufacturer didn’t design it for sub-zero temps, don’t experiment. The risks, lost food, glass shards in your freezer, injury, aren’t worth it. Stick to verified freezer-safe containers.
Frequently Asked Questions
Can you put glass with a plastic lid in the freezer?
Yes, but the lid is a separate consideration. The glass body must be freezer-safe. The plastic lid itself is usually fine, but its seal may become brittle at very low temperatures. For the best seal, ensure the lid is fully seated but not under tension from overfilling. Let the food cool before snapping the lid on to prevent steam from warping the plastic.
How full should a glass container be for freezing?
Fill it no more than 3/4 full. In practice, leave at least one inch (2.5 cm) of empty space at the top. This provides the necessary volume for the approximate 9% expansion of water-based foods as they freeze.
Can Pyrex glass go in the freezer?
Modern Pyrex made in the USA is typically tempered soda-lime glass and is generally considered freezer-safe when the guidelines are followed. Vintage Pyrex (often marked with “PYREX” in all caps) was made from borosilicate glass and is also safe. The rules are the same: cool food first, leave headspace, and avoid sudden temperature shocks when thawing.
Why did my glass container crack in the freezer?
The cause is almost always one of three things: 1. Overfilling: No room for expansion created outward pressure until the glass failed. 2. Thermal Shock: The food was too hot when placed in the freezer, or the frozen container was placed directly into a hot environment. 3. Unsuited Glass: The container was made from non-freezer-safe soda-lime glass, which cannot handle the stress of temperature cycling.
Is it safe to microwave frozen food in a glass container?
Yes, but with critical steps. First, remove any metal parts or lids. Second, if the container is very cold, let it sit at room temperature for a few minutes. Third, use the microwave’s defrost setting or medium power to heat gradually, stirring occasionally. Never microwave a sealed glass container, as steam buildup can cause it to burst.
Before You Go
Freezing in glass is a game of managing forces you can’t see: the 9% push of expanding ice and the silent strain of uneven cooling. Win that game by giving the pressure an escape route (the inch of headspace), eliminating temperature extremes (cool first, thaw slowly), and picking a container built for the fight (borosilicate or tempered, straight-sided).
For most home cooks, a set of straight-sided borosilicate containers with plastic lids covers 95% of freezing needs, from meal prep to single portions. They move seamlessly from freezer to fridge to microwave. The alternative, constantly replacing cracked jars and losing food, is more expensive and frustrating than the upfront cost of the right gear.
Glass is a brilliant, sustainable tool for food storage. Use it with respect for its physics, and it will serve you for years.
