
How to Keep a Lunch Box Cold: Tips & Ice Pack Timing Guide
This post contains affiliate links. As an Amazon Associate, we earn from qualifying purchases.
To keep a lunch box cold, you need two things: an insulated container and at least one frozen cold source. A standard ice pack keeps food safe for 4 to 6 hours. Perishable food must stay below 40°F and out of the temperature danger zone (40°F–140°F) for more than two hours to prevent bacterial growth.
That 4-to-6-hour window is the practical limit for a single ice pack in a typical lunch bag. It comes from public health guidance, not manufacturer claims. Once you cross it, the food inside drifts into the temperature range where bacteria double every 20 minutes.
What follows: the three non-negotiable rules from food safety agencies, the specific gear that meets those rules, and the pre-packing steps most people skip that cut your cooling time in half.
Key Takeaways
- The official temperature danger zone is between 40°F and 140°F. Food left in this range for over two hours is unsafe.
- A single ice pack provides 4 to 6 hours of safe cooling in a standard insulated bag, per the Gouvernement du Québec.
- Pre-chill your insulated bag and all containers in the freezer for 15-20 minutes before packing. A warm container steals the cold from your food and ice pack immediately.
- Brown paper bags are obsolete for food safety. They offer zero insulation and will breach the two-hour safety rule before lunchtime.
- For lunches that must last from 7 a.m. To 1 p.m., you need two frozen cold sources, like a gel pack plus a frozen juice box.
The Core Principle: Beat the Temperature Danger Zone
Food safety isn’t about vague “keeping things cool.” It’s about managing time within a specific, narrow temperature band where bacteria thrive. Every official guideline points to the same numbers.
The food temperature danger zone is between 4°C to 60°C (40°F to 140°F). In this temperature range, harmful microorganisms can grow quickly and cause foodborne illness.
This definition from Health Canada is mirrored by the USDA and university extensions. The mechanism is simple: bacteria present on food reproduce exponentially when kept warm. The two-hour clock starts the moment food leaves your refrigerator at 40°F and begins to warm toward room temperature.
Your lunch strategy is a race against that clock. The goal is to keep the food’s core temperature below 40°F for as long as possible, delaying its entry into the danger zone until after you’ve eaten. Insulation and cold sources are your tools to slow the warming.
Common mistake: Assuming a lunch left on a cool countertop is safe. A 70°F kitchen is still 30 degrees inside the danger zone. The two-hour countdown is absolute.
Why the Two-Hour Rule is Non-Negotiable
The two-hour limit is not a suggestion. It’s the maximum time perishable food can spend above 40°F before the risk of foodborne illness becomes unacceptable. In temperatures above 90°F, that window shrinks to one hour.
The consequences of ignoring it are physical, not theoretical. Pathogens like Salmonella and E. Coli don’t change the food’s smell or taste in the early stages of growth. By the time you eat a compromised chicken salad sandwich, the damage is already done.
| Food Type | Risk If Left in Danger Zone >2 Hours | Visual/Smell Warning? |
|---|---|---|
| Cooked meats (chicken, turkey, ham) | High risk of Salmonella, Listeria | Often none until severe spoilage |
| Dairy (yogurt, cheese, milk-based salads) | Risk of Listeria, Staphylococcus | May smell slightly sour |
| Eggs (egg salad, hard-boiled) | High risk of Salmonella | Usually none |
| Mayonnaise-based salads (tuna, pasta) | Risk of Staphylococcus toxins | Can look and smell normal |
The table shows the disconnect. You cannot rely on your senses to judge safety. You must rely on time and temperature control from the moment you pack.
The Gear That Actually Works
Forget cute designs and focus on function. Effective cold-keeping requires hardware that creates a stable, insulated microclimate. The right gear turns a six-hour separation from the fridge from a gamble into a routine.
Your first decision is the container itself. Here is the head-to-head breakdown that most buying guides gloss over.
| Container Type | Best For | Cold Lifespan (with ice pack) | The Catch |
|---|---|---|---|
| Insulated Lunch Bag | Daily school/work lunches, moderate climates. | 4–6 hours | Quality varies wildly. Thin polyester bags lose cold fast. |
| Hard-Sided Insulated Box | Long days, outdoor settings, rough handling. | 6+ hours | Bulky. Often lacks flexible space for odd-shaped items. |
| Insulated Thermos | Single, liquid-based items (yogurt, pudding, smoothies) or salads. | 5+ hours | Must be pre-chilled. Only holds one type of food. |
For the majority of users, a high-quality insulated lunch bag is the default. Look for thick, foam-backed lining and a sturdy zipper. Brands like PackIt and Built make bags where the entire liner is a freezable gel pack, which solves the “forgot the ice pack” problem.
A traditional lunch box cooler with rigid walls, like those from Igloo or Coleman, trades convenience for performance. It wins for beach days or construction sites where the bag might sit in the sun.
The Thermos is a specialist. Pre-chill it with ice water for ten minutes, fill it with cold food, and it will maintain temperature through the afternoon. It’s perfect for yogurt, fruit salad, or a layered parfait, but it’s not a full lunch solution on its own.
The Ice Pack: Your Portable Cold Source
The ice pack is the engine. The bag is just the chassis. Not all cold sources are equal.
The USDA FSIS specifies that frozen gel packs should be not smaller than 5×3-inches each. That size matters. A tiny, thin pack might be frozen solid, but its thermal mass is too low to cool a full lunch. It will be warm by 10 a.m.
You have three reliable options: 1. Standard Gel Packs: The workhorse. A 5×3-inch pack has enough mass. Use two for longer days. 2. Frozen Juice Box or Water Bottle: Dual-purpose. It acts as a cold source and a drink. It thaws slowly, extending the cooling effect. 3. Freezable Lunch Bag: The entire bag liner is frozen. This offers the largest cold mass and eliminates the chance of forgetting a separate pack.
Skip the gimmicks like frozen sponges or small, decorative shapes. Their surface area is high, but their total cold energy is too low. The thermal mass of a 5×3 gel pack or a full water bottle is what carries you to the 4-to-6-hour finish line.
The Packing Sequence That Doubles Cold Life
You can have the best gear and still fail with a bad pack. The order and temperature of every item you put in the bag determines how long the cold lasts.
Pre-chill everything. This is the single most skipped step. A container at room temperature is a heat battery waiting to drain your ice pack. * Place your empty insulated bag in the freezer for 15-20 minutes. * Put plastic food containers, a thermos, or stainless steel bento boxes in the fridge (or freezer for a few minutes) before filling them.
Now pack in layers, from bottom to top: 1. Layer 1 (The Foundation): Place your largest, frozen cold source on the bottom of the pre-chilled bag. This is your primary ice pack or frozen juice box. 2. Layer 2 (The Perishables): Directly on top of the cold source, pack the items that need the most protection: yogurt, cheese, meat sandwiches, mayo-based salads. You want them in direct contact with the cold. 3. Layer 3 (The Buffer): Add less-perishable items like whole fruits, raw vegetables, or crackers. They act as additional insulation for the core cold zone. 4. Layer 4 (The Top): Place items that don’t need refrigeration here: chips, cookies, a napkin. They provide a final insulating layer against warm air when the bag is opened.
This method creates a cold-sink at the bottom. Heat rises, so the most vulnerable food stays in the coldest part of the microclimate you’ve built.
Where this goes sideways: Putting the ice pack on top of the food. Cold air sinks. An ice pack on top cools the air above your sandwich, not the sandwich itself. The food warms from the bottom up while the top of the bag gets frosty.
What Not to Pack (And What to Use Instead)
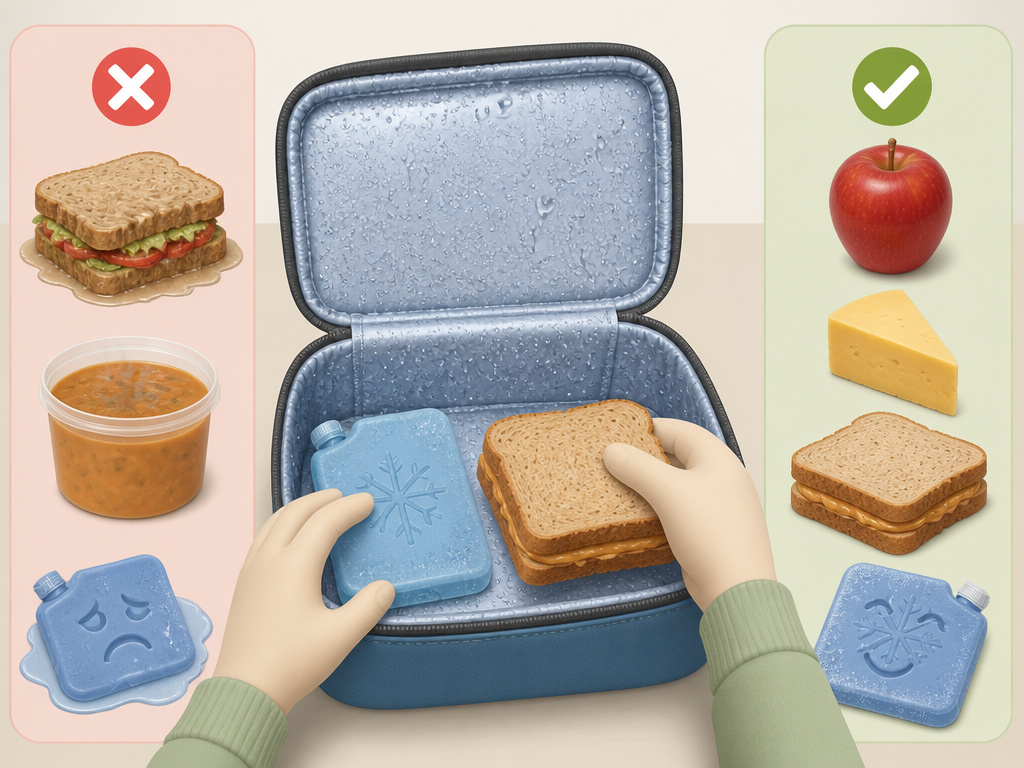
Some foods are terrible candidates for a cold lunch box. They either spoil too easily, become unappetizing, or actively work against your cooling system.
Avoid these before noon:
- Cooked Rice or Pasta (left unrefrigerated): These are high-risk for Bacillus cereus, a toxin-producing bacteria that isn’t killed by reheating.
- Avocado (sliced): It turns brown and mushy. Pack it whole with a knife.
- Deli Meats in a Damp Sandwich: Bread becomes soggy, and the texture ruins the meal. Pack meat and bread separately.
- Very Liquid Soups or Stews in a standard container: High water content conducts heat well, warming the entire container faster. Use a pre-chilled insulated food container designed for liquids.
Safe, sturdy alternatives that pack well:
- Hard cheeses (cheddar, gouda) instead of soft cheese.
- Whole, uncut fruits and vegetables (apple, orange, bell pepper strips).
- Nut butter sandwiches (no mayo, no sliced meat).
- Crackers, breadsticks, or pretzels instead of chips that can crush.
The rule is simple: if it’s wet, protein-based, and previously cooked, it needs the most aggressive cooling strategy. Dry, acidic, or whole foods are more forgiving.
Frequently Asked Questions
How many ice packs do I need?
You need at least one ice pack that meets the 5×3-inch size minimum. For a lunch that will be stored from 7 a.m. To 1 p.m. Or longer, use two frozen cold sources. The second can be a standard gel pack, a frozen juice box, or a frozen water bottle.
Can I use a frozen water bottle instead of an ice pack?
Yes. A frozen water bottle is an excellent cold source. It has high thermal mass and thaws slowly, providing cooling for hours. It also gives you a cold drink later. Ensure the lid is sealed tightly to prevent leaks.
How long will my lunch stay cold in an insulated bag?
With a properly frozen 5×3-inch ice pack and a quality insulated bag, food will stay safely cold (below 40°F) for 4 to 6 hours. This is the standard window cited by food safety authorities. Beyond that, you must assume food has entered the temperature danger zone.
Do I need to refrigerate my lunch bag at work or school?
If a refrigerator is available, use it. Placing your entire insulated bag inside a fridge is the ultimate safety measure. It stops the clock on the two-hour rule entirely. If no fridge is available, keep the bag in the coolest, shadiest spot possible—never in direct sunlight or a hot car.
Can I reuse an ice pack the same day?
No. Once an ice pack has fully thawed, it is no longer a cold source. It becomes a room-temperature mass that provides no cooling. You must refreeze it solid overnight before it is effective again.
The Bottom Line
Keeping a lunch box cold is a straightforward engineering problem. Start with an insulated container—a bag, a box, or a thermos. Power it with a frozen cold source that’s big enough, following the USDA insulated lunch bag advice on pack size. Build your lunch in cold-preserving layers, and never let the clock run past the two-hour danger zone rule.
The goal isn’t just to avoid sickness. It’s to open your lunch at noon and find a crisp, fresh meal that tastes like it just came out of your kitchen fridge. That result requires the right gear, used the right way, every single time. Skip the guesswork and follow the public health specs. Your stomach will thank you.
