
How to Keep Your Thermos Hot Longer With Our Simple Seal Test
This post contains affiliate links. As an Amazon Associate, we earn from qualifying purchases.
To keep a thermos hot, preheat it with hot tap water for 5 to 10 minutes with the lid on, then fill it with food or liquid heated to a boiling point. The container’s vacuum insulation works by reflecting radiant heat and eliminating conduction; preheating stops the inner wall from absorbing your meal’s initial thermal energy. Dairy, tomato, or homemade soup spoils faster than the 24-hour maximum, and carbonated drinks can force the stopper to eject.
That preheating window isn’t a suggestion. It’s the time the stainless steel needs to reach equilibrium so it stops acting as a heat sink. Skip it, and the first 30 minutes of your lunch’s heat vanish into the wall of the flask.
What follows is the sequence from the manufacturer’s service manuals, the one mistake that voids the five-year warranty, and the five-minute field test to know if your thermos is dead before you pack it.
Key Takeaways
- Preheating is non-negotiable. Use hot tap water with the lid sealed for a full 7–10 minutes, then empty it immediately before adding your piping-hot food.
- Test your thermos’s insulation annually. Fill it with boiling water, wait 5 minutes, and feel the outside. If it’s warm, the vacuum seal has failed and it won’t hold temperature.
- Never store carbonated drinks or dry ice. Internal pressure can build and launch the stopper with enough force to cause injury.
- Adhere to the 24-hour rule, but treat dairy, tomato, and partially consumed soups as 6–8 hour items. Bacterial growth accelerates in the insulated, moist environment.
- Hand wash only. Dishwashers degrade the seals and exterior finish, leading to leaks and reduced performance long before the 5-year warranty expires.
The 7-Minute Preheating Rule (And Why 5 Isn’t Enough)
Most guides say “preheat your thermos.” The official Thermos care documents specify a duration: 5 to 10 minutes with hot tap water, lid attached. The lower end is for a quick coffee top-up. For a lunch that needs to stay hot for six hours, you need the full ten.
Pre-heat/chill for 5 to 10 minutes before each use with hot tap water for hot drinks and cold tap water for chilled drinks, then empty prior to filling with beverage. Ensure stopper/lid is attached when pre-heating or chilling to avoid spillage. – Thermos Pty Ltd, Use, Care & Warranty (Form 200 – 201802)
The physics are simple. Stainless steel is an excellent thermal conductor. When you pour 90°C soup into a 20°C flask, the inner wall instantly absorbs a massive amount of energy to equalize. Your soup drops 10–15 degrees in the first minute. Preheating brings the entire inner chamber up to near-boiling, so that thermal shock doesn’t happen. The energy from your food now goes into maintaining temperature, not heating the container.
Here is the exact sequence, adapted from using a thermos for food:
- Boil your food or liquid. Soup, stew, or pasta needs to reach a rolling boil on the stove. This isn’t about eating it now; it’s about giving the thermos enough thermal mass to work with for hours.
- While it boils, preheat. Fill the thermos to the brim with the hottest water from your tap. Screw the lid on tightly. Set a timer for 7–10 minutes.
- Empty and fill immediately. The moment your food is ready, dump the preheat water and pour the food in. Leave a small space at the top, about a centimeter, for the lid to seal fully without pressure.
- Seal it fast. Close the lid while everything is steaming. The less ambient air you trap inside, the better.
If you skip step 2, your thermos performs like a mediocre insulated jar, not a vacuum flask. The difference is a hot lunch at 1 PM versus a lukewarm one by 11 AM.
What Actually Breaks a Thermos’s Seal
Insulation failure is almost always a physical breach, not magic. The vacuum between the double stainless steel walls gets compromised. Once air molecules are inside that space, they conduct heat directly from the inner wall to the outer one.
The most common points of failure are the seals you can see and touch. Every Thermos model has gaskets or O-rings on the stopper and lid. These flexible silicone rings create an airtight seal for the contents and help maintain the vacuum integrity. If they crack, warp, or go missing, two things happen: your thermos leaks, and ambient temperature bleeds in faster.
Check periodically to make sure any gaskets, O-rings, straws or stoppers are positioned properly, and are replaced if worn or damaged as missing or misaligned components may cause leakage of hot contents which may burn or scald user.
You should inspect these seals every few months. Look for cracks, a flattened shape that won’t spring back, or a gritty texture. A damaged gasket is a fifteen-dollar fix from the manufacturer, but running without one risks a burn and ruins your thermos insulation.
The other killer is impact. A hard drop onto concrete can dent the outer wall enough to touch the inner wall, creating a thermal bridge. Sometimes you’ll see a small dimple; sometimes the damage is internal. If your thermos ever feels warm on the bottom or one specific side after preheating, it’s likely a dent you can’t see has broken the vacuum.
The 5-Minute Insulation Test You Can Do at Home
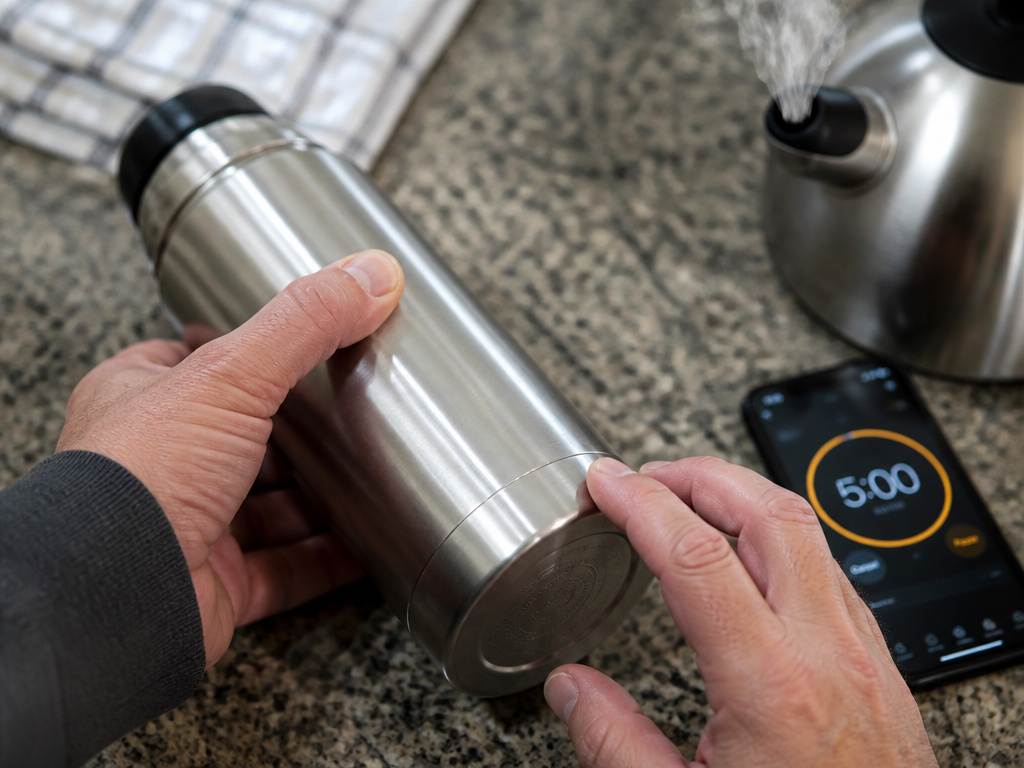
Don’t guess if your thermos is still good. Thermos provides a direct field test in their FAQ. It takes five minutes and boiling water.
Fill your product with boiling water and let it sit for 3-5 minutes. After this time has elapsed, feel the outside of the product. If it feels warm, then the insulation may no longer be working effectively.
This test is brutal and honest. A functioning vacuum flask will feel completely ambient, room temperature, on the outside after five minutes with boiling water inside. If you feel any warmth, especially on the bottom or along a seam, the insulation is compromised. The vacuum has failed.
| Test Step | What to Do | Pass/Fail Signal |
|---|---|---|
| 1. Boil Water | Use a kettle to get a full rolling boil. | N/A |
| 2. Fill & Seal | Pour water into a clean, dry thermos. Close lid tightly. | N/A |
| 3. Wait 5 Minutes | Set a timer. Do not move or tilt the thermos. | N/A |
| 4. Touch Test | Carefully feel the entire outer surface, especially the base. | PASS: Feels room-temperature. FAIL: Any part feels distinctly warm or hot. |
A fail means your thermos is now just a stainless steel bottle. It will keep things warm for maybe an hour, not all day. This is when you consult the 5-year warranty or start looking at a high-quality thermos replacement.
What Not to Put in a Thermos (The Safety Shortlist)
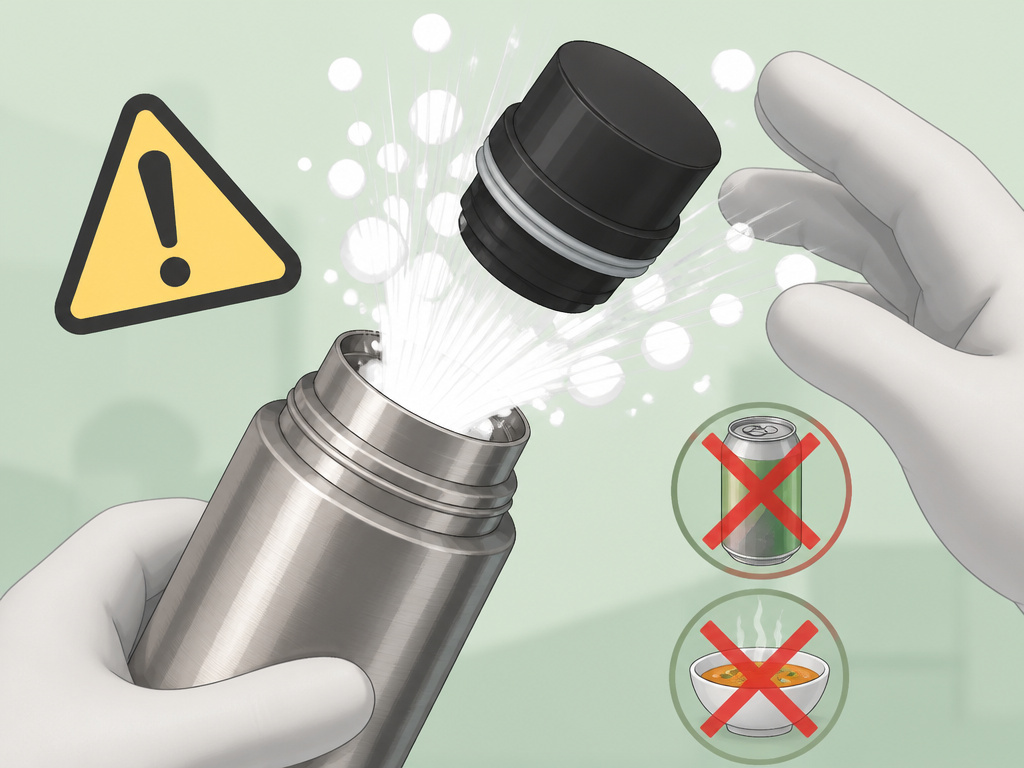
A thermos is not a universal container. The same insulation that keeps heat in also traps pressure and bacteria. Ignoring these rules can lead to spoilage, explosive pressure release, or a voided warranty.
Carbonated Drinks & Dry Ice
This is the manufacturer’s top warning. Carbonation continues to release gas inside the sealed, rigid container. Dry ice sublimates from a solid directly into carbon dioxide gas. In both cases, pressure builds with nowhere to go.
DO NOT store dry ice, or any carbonated beverages in the container as they may cause the stopper to eject forcefully. The stopper isn’t threaded; it’s a friction-fit plug. Enough pressure turns it into a projectile. This isn’t a slow leak, it’s a sudden, violent pop.
The 24-Hour Rule & Quick-Spoiling Foods
The official line is contents should not be left for longer than 24 hours. That’s the maximum for inert, non-perishable items like plain hot water or tea. For actual food, the clock runs much faster. The manual explicitly calls out dairy, homemade soup, and tomato-based foods. These spoil “much sooner.” The thermos’s moist, warm environment is a perfect incubator. A creamy soup left from morning until a late dinner is a gamble.
| Content Type | Recommended Max Time | Primary Risk |
|---|---|---|
| Broth, Plain Tea/Water | 24 hours | Staleness, not safety. |
| Homemade Meat/Vegetable Soup | 8–10 hours | Bacterial growth. |
| Cream-Based or Dairy Soup | 6 hours | Rapid spoilage, souring. |
| Tomato-Based Pasta/Sauce | 6–8 hours | Acidity accelerates breakdown. |
| Partially consumed food is the highest risk. Introducing bacteria from your mouth and then resealing it creates a petri dish. If you don’t finish your lunch, do not reseal it for later. Empty and wash the thermos when you get home. |
Cleaning and Maintenance for Maximum Lifespan
How you clean your thermos directly affects how long it keeps heat. Dishwashers are the enemy of longevity. The high heat and harsh detergents degrade silicone gaskets over time, making them brittle. The exterior finish on painted models will fade and chip.
Hand washing is the only method recommended in every care guide. Use warm water, mild dish soap, and a bottle brush. Pay attention to the threads under the lid and the groove where the gasket sits. Rinse thoroughly and let it air dry upside down with the lid off.
For stubborn coffee or tea stains, the manufacturer suggests denture tablets or coffee pot cleaner. Drop two tablets into the thermos, fill with hot water, and soak overnight. Baking soda paste also works for light stains. Never use bleach or abrasive scrubbers, they can damage the stainless steel and certainly void the warranty.
Regular cleaning prevents odors and lets you inspect the seals. A thermos that keeps drinks hot for 48 hours is a precision tool. Treat it like one, and it will last for the full five-year warranty period and beyond. Neglect it, and you’ll be shopping for the best insulated thermos again within a couple of years.
Frequently Asked Questions
How does preheating make such a big difference?
Preheating eliminates thermal mass theft. The stainless steel inner wall starts at room temperature. When you add hot contents, that wall absorbs heat to warm itself up, energy taken directly from your soup or coffee. Preheating saturates the wall with heat first, so your food’s energy is spent maintaining temperature, not heating the container.
Can I use a microwave to preheat my thermos?
Never. The manufacturer’s warning is absolute: “NEVER use in microwave oven, conventional oven, or any other heat source.” Microwaving a metal thermos is dangerous and can damage the vacuum seal. The plastic components on the lid can also warp or melt. Only use hot tap water for preheating.
My thermos is leaking from the lid. What do I do?
First, check the gasket. Remove the silicone ring from the stopper or lid. Look for cracks, tears, or a permanent flat spot. If it’s damaged, you need a replacement from Thermos. If the gasket looks fine, ensure it’s seated correctly in its groove. A misaligned gasket won’t seal. Finally, make sure you’re not overfilling. Liquid needs room to expand; filling to the very brim creates pressure that can force a leak.
Is it safe to put milk in a thermos for a school lunch?
Yes, but with a strict timeline. The Thermos FAQ states they don’t recommend keeping dairy inside for “long periods due to the risk of spoilage.” For a school lunch consumed within 4–5 hours, it’s generally safe if the milk was chilled first and the thermos was pre-chilled with cold water. For longer than that, the risk of souring increases quickly.
What’s the best thermos for keeping food hot all day?
Look for models with a wide mouth for easy filling and eating, a robust stainless steel build, and a reputation for durability. Brands like Thermos, Zojirushi, and Stanley consistently top reviews for all-day heat retention. Your choice between a food thermos and a thermos flask depends on whether you’re packing stew or coffee.
The Bottom Line
Keeping a thermos hot is a straightforward three-part process: preheat thoroughly with hot water for 7–10 minutes, fill with boiling-hot contents, and seal it tight. The technology is reliable, but it depends on your discipline. Skip the preheat, and you’ve defeated the primary mechanism. Forget to check the seals, and you’ll have a leak or a lukewarm meal.
Test your thermos once a year with the five-minute boiling water check. Respect the 24-hour rule and treat creamy or tomato-based foods as 6-hour items. And never, ever put a carbonated drink inside. Follow these rules, and your thermos will deliver a hot lunch or coffee for years, right up to the last day of its five-year warranty.
