
How to Prepare Beets for Canning & Keep Their Vibrant Hue
This post contains affiliate links. As an Amazon Associate, we earn from qualifying purchases.
To prepare beets for canning, you must pressure can them using tested procedures from a university extension service. The process is not optional, plain beets are a low-acid vegetable, and only a pressure canner reaches the 240°F needed to destroy botulism spores. You start by selecting small, firm beets, trimming them with a precise one inch of stem and roots to lock in color, boiling until the skins slip, then packing hot into sterilized jars with fresh boiling water, never the cooking water, and processing for 30 minutes (pints) or 35 minutes (quarts) at 11 PSI for dial-gauge canners at 0-2,000 feet.
That pressure and time are the non-negotiable floor for safety. Every variable after that, altitude, canner type, jar size, adjusts the numbers, not the requirement. Get one of those three wrong and the jars might seal, but the contents are not guaranteed safe after six months on the shelf.
What follows: the exact stem length that stops color bleed (it’s not what you think), the two water types that decide your jar’s clarity, and the altitude table that catches most first-timers. By the end you’ll know why pickled beets get a water bath and plain beets do not, and how to read a pressure dial the way the extension services teach.
Key Takeaways
- You must use a pressure canner for plain beets. A boiling water bath or steam canner cannot reach the 240°F required to destroy botulism spores in low-acid vegetables. Only pickled beets, with their added vinegar, are safe for water bath canning.
- Leave one inch of stem and roots attached during initial cooking. This isn’t about neatness. Trimming too close causes the red pigments to bleed into the cooking water, leaving you with pale, washed-out canned beets.
- Pack jars with fresh boiling water, not the water you boiled the beets in. The beet-cooking water is dirty and contains concentrated pigments and soil; it will cloud your jars and can affect sealing.
- Altitude changes your pressure setting, not your processing time. If you live above 1,000 feet, you must increase the pressure (PSI) according to published charts. The processing minutes (30 for pints, 35 for quarts) stay the same.
- For best quality, use beets 1 to 2 inches in diameter. Beets larger than 3 inches are often woody and fibrous, and they pack unevenly into jars.
The Non-Negotiable Rule: Pressure Canning or Nothing
Plain beets are a low-acid vegetable. Their pH is above 4.6, which is the critical threshold. In that pH range, the bacteria that cause botulism can survive and produce their deadly toxin in an oxygen-free jar environment. Only a pressure canner can generate the 240°F (116°C) needed to destroy those spores.
Before you start: Using a boiling-water-bath canner for plain beets is a documented botulism risk. The water bath maxes out at 212°F, which is insufficient. Do not substitute methods, double processing times, or guess. Follow the published pressure process.
This is why every university extension service resource, from the National Center for Home Food Preservation guide to the Penn State Extension root vegetable guide, mandates pressure processing. The only exception is pickled beets, where the added vinegar acidifies the product enough for safe water bath processing.
If you are new to pressure canning, read the manual for your specific canner model (Presto, All-American, etc.) and a general guide like the NDSU home canning safety publication before heating a single beet.
Choosing and Prepping Your Beets
Start with the right raw material. Size determines texture, and a simple trim decides final color.
Diameter is the first filter. For whole packs, select beets 1 to 2 inches across. These are tender and will fit neatly in a jar. Beets larger than 3 inches in diameter are often fibrous and woody in the center. You can still can them, but you must cut them into 1/2-inch cubes or slices.
The stem and root trim is where color lives or dies. Do not trim the taproot or stem flush. Leave a full one inch of both attached when you wash and boil them. This acts as a plug, preventing the red pigments from leaching into the cooking water. Peel and do the final trim after boiling, when the skins slip off.
Common mistake: Trimming beets clean for storage before canning. If you cut the stems and roots off before boiling, the color bleeds out into the pot. Your canned beets will come out pale, even after correct processing.
Scrub the beets thoroughly under cold running water to remove all garden soil. Dirt left on the beet introduces microbes and will cloud your canning liquid.
The Stem and Root Trim That Stops Color Bleeding
That one-inch rule is a spec, not a suggestion. The red pigment in beets, betanin, is water-soluble. Cutting the beet opens vascular channels straight from the flesh to the water.
When you leave an inch of stem and root, you keep those channels pinched shut during the initial boil. The pigment stays in the beet. After boiling and cooling, you slip the skins off and then trim the stems and roots flush. The pigment is now set in the cooked flesh.
Why does this matter for canning? Because the visual appeal of home-canned food is real. Pale beets look unappetizing, even if they are safe. This trim is the difference between a jar of vibrant red slices and a jar of pinkish-grey cubes.
The process is straightforward: 1. Scrub beets, leaving 1″ stems and roots. 2. Cover with water in a pot and boil for 15–25 minutes, until a fork pierces the largest beet easily. 3. Drain and plunge into cold water to stop cooking. 4. Slip skins off with your hands; trim stems and roots flush. 5. Keep beets warm. Proceed immediately to packing.
If you let the peeled beets cool completely, they become harder to pack tightly into hot jars and risk lowering the jar temperature too much before processing.
Boiling, Peeling, and Cutting
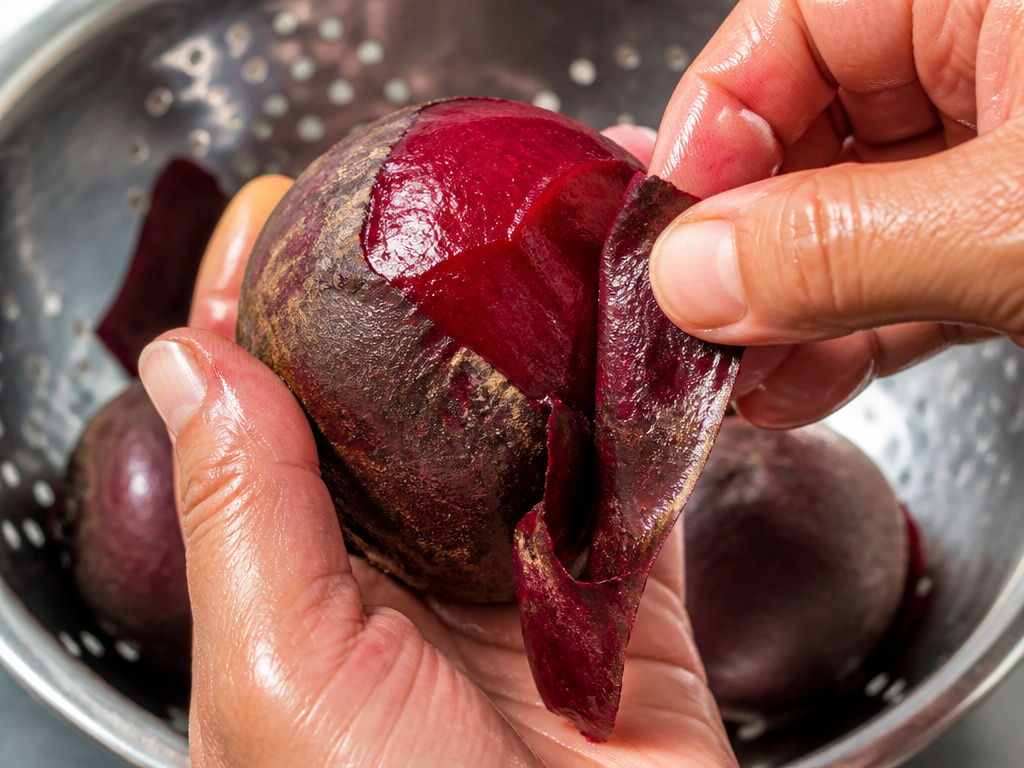 Your goal is tender beets with loose skins, ready for the jar. The boiling pot is not your canner, it’s just the prep station.
Boiling time is by size, not by clock. Small beets (1-2 inch) may be tender in 15 minutes. Large beets (3 inch) can take 25. Test by poking the largest beet with a fork. If it slides in with slight resistance, they’re done. Over-boiling makes them mushy and difficult to slice cleanly.
Cool just enough to handle. You don’t need an ice bath. Drain the hot water and run cold water over the beets in the pot for a minute. You should be able to handle them without burning your fingers, but they should still be very warm to the touch.
The peel should slip off by hand. Use your thumbs to push the skin away. If it resists, the beet needs more boiling. Do not use a peeler, you’ll waste flesh and make a mess.
Cut for your pack.
- Whole: Leave baby beets (under 1.5 inch) whole.
- Slices/Cubes: Cut medium and large beets into uniform 1/2-inch slices or cubes. Halve or quarter very large slices so they lay flat in the jar. Uniform pieces ensure even heat penetration during processing. Ragged chunks leave cold spots.
Why Your Packing Water Must Be Fresh
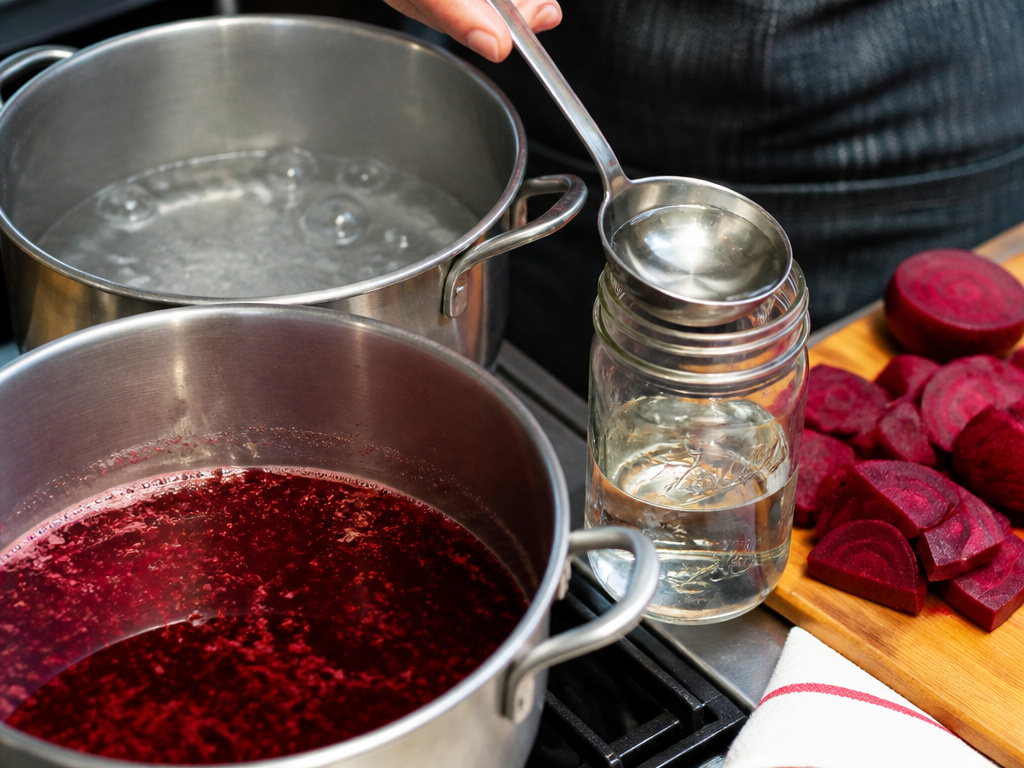 Here is the step every third tutorial misses. After you boil the beets, you have a pot of deep red, soil-flecked water. That water is contaminated.
Do not use it to fill your jars.
The official beet canning instructions are explicit: use fresh hot water that has been brought to a boil first. The beet-cooking water contains dissolved pigments, soil particles, and organic compounds that will cloud your jar and settle as sediment. It can also interfere with the pH at the jar’s surface, potentially affecting the seal over long storage.
Where this goes sideways: Using the pretty red beet water because it “looks flavorful.” By month six in storage, that jar will have a layer of gritty sediment at the bottom and the liquid will be murky. The beets are safe, but they look spoiled.
Have a separate kettle or pot of clean water boiling while you peel and cut. Your workflow should move directly from cutting board to hot jar, filled with clean boiling water.
The Packing and Processing Sequence
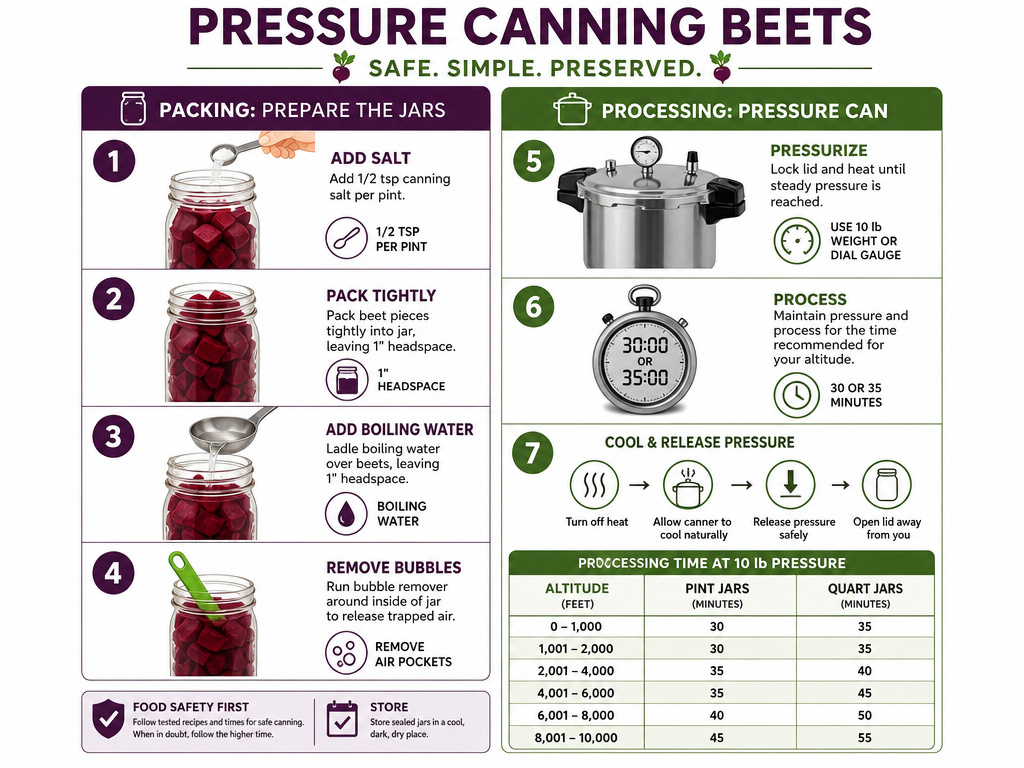 You have warm, peeled beets and a pot of fresh boiling water. Your canning jars and canning lids are sterilized and hot. Now you assemble.
Packing the jars:
- Add 1 teaspoon of canning salt per quart jar to the bottom (1/2 tsp for pints). This is for flavor only; it does not affect safety.
- Pack the warm beet pieces tightly into the jar, leaving a 1-inch headspace at the top.
- Ladle fresh boiling water over the beets, maintaining that 1-inch headspace.
- Run a bubble remover or plastic utensil around the inside to release trapped air bubbles.
- Wipe the jar rim with a clean, damp cloth to remove any food or salt residue.
- Apply the lid and screw band, tightening only until fingertip tight, resistance plus a quarter-turn. Do not crank it down.
Processing in the pressure canner:
- Place the filled jars on the rack in your canner, which contains 2-3 inches of hot water.
- Secure the lid, leave the vent port open or weight off, and heat on high until steam flows freely in a steady column.
- Vent steam for 10 minutes to purge air from the canner, then close the vent or add the weight.
- Bring the canner to the required pressure (see table below), then start your timer.
| Canner Type | 0 – 1,000 ft | 1,001 – 2,000 ft | 2,001 – 4,000 ft | 4,001 – 6,000 ft | 6,001 – 8,000 ft |
|---|---|---|---|---|---|
| Weighted-Gauge | 10 lb | 15 lb | 15 lb | 15 lb | 15 lb |
| Dial-Gauge | 11 lb | 11 lb | 12 lb | 13 lb | 14 lb |
Processing times are fixed: 30 minutes for pints, 35 minutes for quarts. Adjust pressure for altitude, not time.
- Maintain steady pressure for the entire processing time. For weighted gauges, a gentle rock 2-3 times per minute. For dial gauges, keep the needle at or slightly above your target.
- When time is up, turn off heat and let the canner depressurize naturally. Do not force-cool it. This takes 30-45 minutes.
- Once pressure is zero, wait 2 more minutes, then open the vent, remove the lid, and lift out the jars with a jar lifter.
- Place jars on a towel or cooling rack, spaced apart, and leave undisturbed for 12-24 hours.
- After cooling, check seals, remove bands, wipe jars, label, and store.
Easy to miss: Not venting the canner for a full 10 minutes before pressurizing. Trapped air lowers the effective temperature inside, even if the gauge reads correctly. Your processing time starts with a cold spot.
Altitude Adjustments: The Numbers That Are Not Suggestions
Atmospheric pressure drops as altitude increases. Water boils at a lower temperature. To compensate and still reach 240°F inside your jars, you must increase the pressure (PSI) inside the canner.
The table above is from the National Center for Home Food Preservation. If you live in Denver (5,280 ft), you process at 13 PSI on a dial-gauge canner or 15 PSI on a weighted-gauge. The minutes remain 30 or 35.
This is the single most common cause of under-processing. People follow a recipe from a low-altitude blog and use 11 PSI at 5,000 feet. The jars seal, but the center of the jar may not have reached a safe temperature. The risk is invisible.
Find your exact elevation via a GPS app or topographic map. Do not guess. If your canner’s dial gauge is old or hasn’t been tested in a year, have it tested by your local county extension office or use a weighted gauge, which doesn’t calibrate out.
After Processing: Cooling, Storing, and Troubleshooting
The work isn’t done when the jars come out. How you cool and store them decides their shelf life.
Cool jars on a towel or rack for 12-24 hours. Do not retighten lids, place them in a draft, or cover them with a cloth. Let them cool at room temperature.
Test every seal. Press the center of the lid. It should not move or make a popping sound. It should be concave (dipped down). If a jar didn’t seal, you can refrigerate and use it within a week, or reprocess it within 24 hours with a new lid.
Store correctly. Remove the screw bands, wash the jars, label them with contents and date, and store in a cool, dark, dry place. Home-canned beets are at peak quality within 12 months.
Troubleshooting two common issues:
- Pale beets: Color can fade during canning but often returns after a few days. If beets stay pale, you likely trimmed stems/roots too short before boiling.
- Cloudy liquid: Usually caused by using the beet-cooking water, hard water, or mineral-rich salt. Use fresh soft water and pure canning salt next time.
- Siphoning (loss of liquid): Caused by rapid pressure changes during processing or force-cooling the canner. Maintain steady heat and allow natural depressurization.
Frequently Asked Questions
Can you water bath can beets?
Only if they are pickled beets with a tested recipe containing enough vinegar to acidify the product. Plain, unpickled beets are a low-acid vegetable and must be pressure canned to be safe for shelf storage. The water bath canning method cannot reach the necessary temperature.
How long do home-canned beets last?
For best quality and nutrient retention, consume them within 12 months. As long as the seal remains intact and the jar is stored in a cool, dark place, they are safe indefinitely from a botulism perspective, but texture and flavor degrade over time.
Why did my beets turn brown or pale?
The red pigment in beets (betanin) is sensitive to heat and pH. Some fading during canning is normal, and color may return after a few days. Significant bleaching is usually due to trimming the stems and roots too short before the initial boil, which allowed pigment to escape.
Can I can beets with other vegetables?
Only if you follow a tested, mixed-vegetable recipe from a reliable source like a university extension. Different vegetables have different densities and acidities, which change the required processing time. Do not improvise mixes.
What’s the best way to preserve vegetables besides canning?
Beets freeze well for up to 10 months. Cook, peel, and slice or cube them, then pack into freezer bags. You can also pickle them for refrigerator storage or dehydrate them into beet chips. Each method for preserving vegetables has its own prep rules.
The Bottom Line
Preparing beets for canning is a sequence of deliberate steps, not a creative free-for-all. Safety anchors on the pressure canner and the altitude-adjusted PSI. Quality hinges on the one-inch trim and the fresh boiling water. Skip either and you get pale, cloudy jars that might not be safe in a year.
The tools are simple: a large canning pot, reliable jars and lids, and a tested pressure canner. The process is slower than freezing, but the reward is a pantry staple that needs no electricity. Follow the extension bulletins verbatim, respect the altitude chart, and your shelves will hold beets that are as safe as they are vibrant.
