
How to Seal Canning Jars | The 24-Hour Reprocessing Window
This post contains affiliate links. As an Amazon Associate, we earn from qualifying purchases.
To seal canning jars, match three things: the correct headspace for your food, new lids prepared without preheating, and screw bands applied fingertip tight. Jars that do not seal must be reprocessed within 24 hours for safety. If your processing method was wrong, that window shrinks to 2 hours.
That 24-hour clock is the line between a safe reprocess and a trip to the fridge. The headspace spec isn’t a suggestion, it’s the air gap the boiling contents need to push out before the vacuum pulls the lid down. Get it wrong, and the seal fails every time.
What follows: the exact headspace for jams, pickles, and meat. Why you should wash lids but never simmer them. The one torque mistake that buckles lids on the canner rack. And the storage temperature that kills a seal in weeks.
Key Takeaways
- Use new lids every time. The sealing compound compresses on first use and will not reliably seal again.
- Apply screw bands fingertip tight, just until you feel resistance, then a quarter-turn more. Overtightening buckles lids; undertightening lets air back in.
- Jars that fail to seal can be reprocessed within 24 hours. If you used the wrong processing time or method, you have only 2 hours to fix it.
- Match headspace to the food: 1/4 inch for jams, 1/2 inch for tomatoes and pickles, 1 inch for most vegetables, 1 1/4 inch for chicken.
- Store sealed jars between 50°F and 70°F. Warmer temperatures degrade the seal and food quality within months.
Why a Canning Jar Seal Isn’t Just a Lid
A seal is a vacuum. The food and air inside the jar expand when heated, pushing gas out past the lid’s rubber compound. As the jar cools, that contraction creates suction. The softened compound gets pulled against the glass rim, locking out air and microbes.
The lid is just the gasket. The seal is the outcome of pressure, temperature, timing, and space. Miss one variable, and the vacuum never forms.
Common mistake: Preheating lids in simmering water. Ball stopped recommending this a decade ago. Preliminary research shows it can cause lids to buckle during processing.
That buckling happens because the heated metal expands and contracts under pressure from an overtightened band. You’ll see a crimp or crease across the lid center. A buckled lid is not sealed, even if it feels tight.
The 7-Step Sealing Process (and the One Step Nobody Skips)
This sequence works for both water bath and pressure canning. The difference is the processing temperature, not the jar prep.
- Start with clean, standard jars. Check the rims for chips or cracks. Even a hairline fracture will break the seal when the glass contracts. Use a dedicated canning pot deep enough to submerge jars by an inch.
- Prepare new lids. Wash them in warm, soapy water. Rinse. Do not boil, simmer, or run them through the dishwasher. The heat can warp the metal and the dishwasher’s moisture rusts bands. Always start with quality canning lids from a known supplier.
- Fill jars, leaving the correct headspace. This is the unfilled space between the food and the lid. It is not flexible. | Food Type | Headspace | What Happens If You Skip It | | ———————- | ————- | ———————————————— | | Jams, jellies, syrups | 1/4 inch | Product boils over, seals rim with sugar, fails. | | Tomatoes, fruit, pickles | 1/2 inch | Insufficient pressure to vent, weak vacuum. | | Vegetables, meat | 1 inch | Food particles block venting, seal unreliable. | | Chicken | 1 1/4 inch | Low acid needs more venting; less risks spoilage.|
- Wipe the jar rim with a damp cloth. Any food residue, a seed, a speck of brine, a grease smear, blocks the sealing compound from contacting clean glass. Do this after filling, before the lid touches the jar.
- Apply the lid and screw band fingertip tight. Place the lid on the rim. Set the band over it. Turn the band clockwise just until you feel resistance, using your fingertips, not your whole hand. Then give it one more quarter-turn. That’s it.
- Process according to a tested recipe. Use either the water bath canning method for high-acid foods or pressure canning for low-acid foods. Time and temperature are non-negotiable.
- Cool jars undisturbed for 12-24 hours. Do not retighten bands. Do not tilt jars to test the seal. The glass and lid are contracting at different rates; disturbing them breaks the vacuum bond as it forms.
The step everyone rushes is rim wiping. They assume a clean fill means a clean rim. It doesn’t. A single basil leaf fiber on a tomato jar rim is enough to leave a micro-gap. That gap lets air seep back in over three months, and you’ll find the lid floating loose in storage.
Why Lids Fail (and the Fixes)
Seal failure has a cause. It is never random. The fix depends on when you discover it and why it happened.
Where this goes sideways: Overtightening the screw band. If the band is too tight, air cannot vent during processing. The pressure buckles the lid downward, creating a permanent crimp. The jar will never seal, even with a new lid.
Buckled lids are the most common physical failure. The lid looks creased or dipped in the center. The food is safe if you catch it within 24 hours and the jar was processed correctly. Refrigerate and use it. Do not store it.
Flat lids that pop up and down when pressed simply never achieved a vacuum. The most likely culprits, in order: 1. Damaged rim: A chip or crack you missed. 2. Food on the rim: You skipped the wipe. 3. Old or reused lid: The sealing compound was spent. 4. Incorrect headspace: Too little didn’t create enough pressure; too much left too much air to vent.
Reprocessing is your one safe do-over. The rules are strict and sourced from extension guidelines. * If the jar is fully processed but just didn’t seal, you have 24 hours. Check the rim, use a new lid, reprocess for the full time. * If you used the wrong processing method or time (e.g., water bath instead of pressure for green beans), you have 2 hours from the original processing start to reprocess correctly. After that, refrigerate.
The Clemson HGIC troubleshooting guide details these scenarios. The 2-hour rule exists because a botched process may not have killed all pathogens; waiting longer lets them multiply.
Headspace: The Measurements That Actually Matter
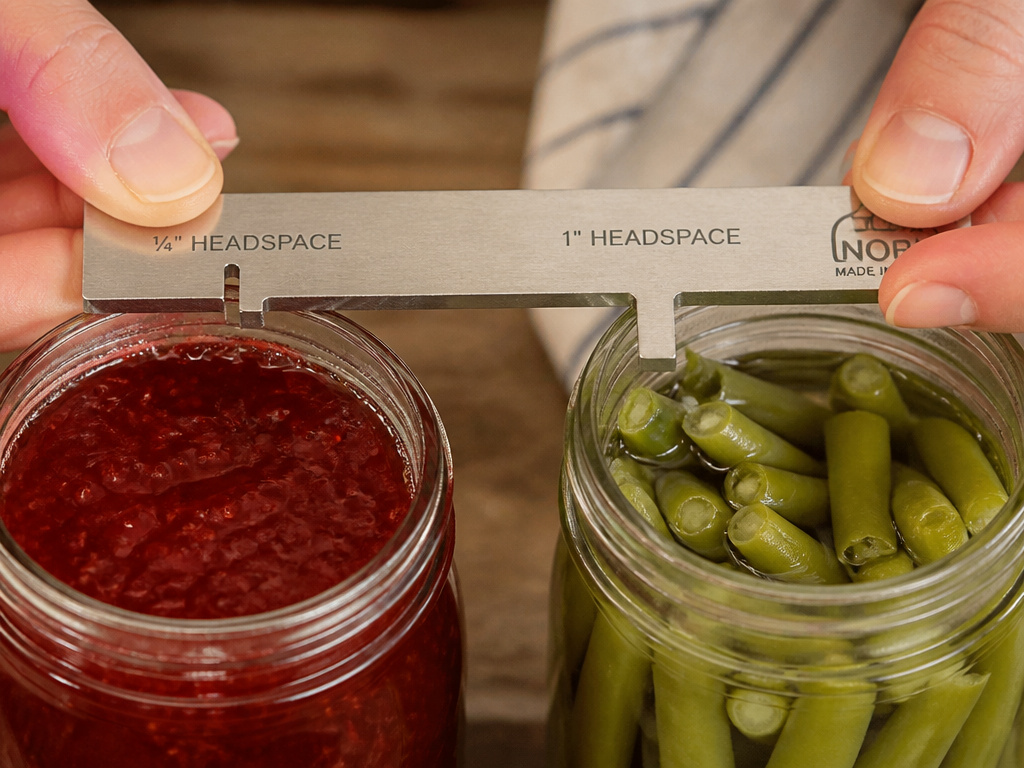 Headspace is a engineered gap, not leftover room. Each measurement corresponds to the food’s density, acidity, and expansion rate during boiling.
For example, thick jams and jellies expand very little. A 1/4 inch gap is enough room for the tiny amount of air inside to escape without the product boiling over. Vegetables expand more and need the full 1 inch to vent thoroughly.
This spec comes from the NDSU canning closures report (FN2028) and other extension publications. It is based on how much each food type foams and how much internal pressure it generates.
If you wing it, the jar either boils over or fails to vent. Both break the seal. Use a headspace tool, a plastic or metal gauge with notches. Don’t eyeball it.
Can You Reuse Lids and Bands?
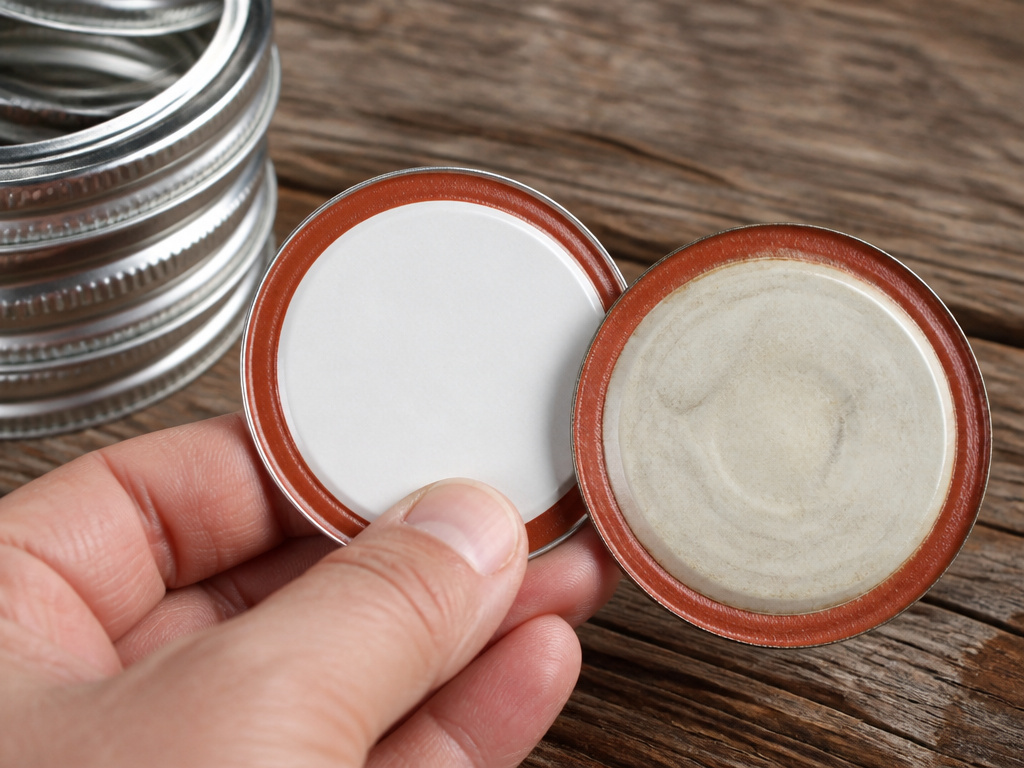 The short answer: bands yes, lids no.
Screw bands are reusable indefinitely as long as they are rust-free and not dented. Wash and dry them after each use. Store them separately from your sealed jars. A band left on a stored jar can rust onto the lid, making it impossible to open without breaking the jar.
Metal dome lids are one-time use. The sealing compound compresses permanently during the first seal. Even if it looks okay, its ability to soften and re-seal is compromised. Reusing it is a guaranteed way to get a failed seal on your next batch. If you want a reusable option, consider Tattler-style plastic lids with separate rubber gaskets. They require a different procedure, you must tighten the screw band immediately after removing the jar from the canner to form the seal.
The debate over reusing lids is settled by manufacturer guidance and food safety research. New lids are cheap insurance.
Storing Sealed Jars: Where Temperature Kills the Seal
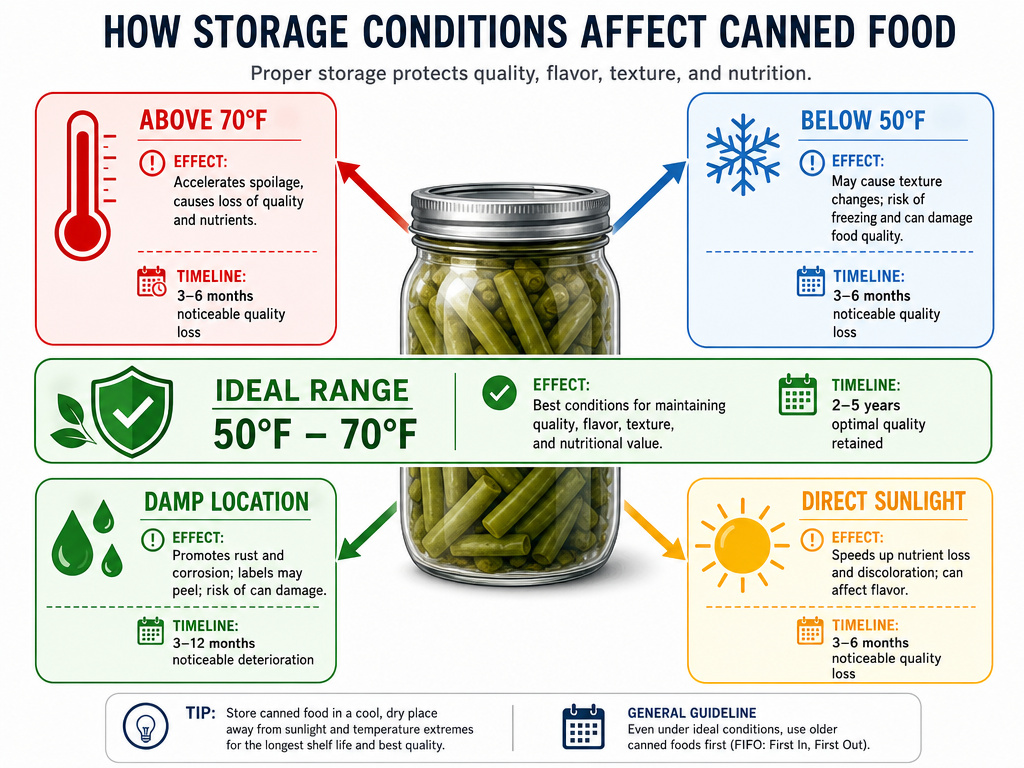 A perfect seal can die in storage. Two environmental factors destroy seals and food quality: temperature and moisture.
| Storage Condition | Effect on Seal & Food | Timeline to Failure |
|---|---|---|
| Above 70°F (21°C) | Heat degrades the sealing compound and accelerates food spoilage. | Quality loss in weeks; seal failure in months. |
| Below 50°F (10°C) | Extreme cold doesn’t harm the seal but can cause glass to become brittle and crack. | Risk increases with handling. |
| Damp or humid location | Moisture corrodes metal lids and bands, leading to rust and eventual leakage. | Visible rust within a season; leakage follows. |
| Direct sunlight | UV light and heat combined degrade food color, texture, and nutrients rapidly. | Noticeable quality loss in a month. |
The ideal storage range is 50°F to 70°F, in a dark, dry place. A basement shelf, a pantry interior, a closet, anywhere stable and away from furnaces, water heaters, or outer walls.
Label your jars with the contents and date. For best quality, use home-canned food within one year. The Penn State Extension seal guide notes that properly sealed jars can remain safe for years, but flavor and texture peak earlier.
Before You Go
Sealing jars is a physical process, not magic. It requires specific gaps, specific torque, and specific timing.
Use new Ball or Kerr lids every time. Apply bands fingertip tight. Match the headspace to your food. If a seal fails, you have 24 hours to reprocess, but only if the original processing was correct. Store your jars in a cool, dark, dry place.
Your essential canning supplies are a small investment: a good pot, a jar lifter, a headspace tool, and a steady supply of new lids. With those and this sequence, your seals will hold.
Frequently Asked Questions
Do I need to sterilize jars before canning?
For water bath or pressure canning, you do not need to pre-sterilize jars if you are processing them for 10 minutes or more. The processing time sterilizes the jar and contents. For jams and pickles processed for less than 10 minutes, you should sterilize jars by boiling them for 10 minutes before filling.
Why did my sealed jar become unsealed in storage?
This is usually caused by storage temperatures above 75°F or significant temperature swings. Heat causes the remaining air inside the jar to expand, breaking the vacuum. Extreme temperature changes can also crack the sealing compound. Always store in a cool, stable environment.
Can I seal a jar without a canner?
For long-term shelf-stable preservation, no. The canning process (water bath or pressure) is necessary to destroy spoilage organisms and create the vacuum. For short-term refrigerator storage, you can use vacuum sealing attachments for mason jars with a countertop vacuum sealer.
How tight is “fingertip tight”?
It’s lighter than you think. Place the band on the jar and turn it using just your thumb and two fingertips until you meet resistance. Stop. Then turn it about the width of your fingernail (a quarter-turn) more. You should be able to undo it with the same fingertip pressure after processing.
What’s the best type of jar for canning?
Use standard mason jars like Ball, Kerr, or Bernardin. These are manufactured to withstand thermal shock and have consistent rim dimensions for lids to seal. Decorative or antique jars often have irregular rims and are not safe for pressure canning. Start with quality canning jars designed for the job.
