
How to Store Rice to Prevent Bugs: A Complete Storage Guide
This post contains affiliate links. As an Amazon Associate, we earn from qualifying purchases.
Store rice to prevent bugs by meeting three non-negotiable conditions: an airtight barrier, a moisture level at or below 14%, and a storage temperature kept consistently below 20°C (68°F). Fail any one, and insects will find a way in.
That 14% moisture figure is the hard ceiling from the International Rice Research Institute’s grain storage manual, the point where mold growth and insect respiration kick into high gear. Storage isn’t just about putting rice in a jar; it’s a battle of environmental control where you set the rules.
What follows is the playbook from the labs and silos that actually do this at scale: the exact temperatures that halt insect reproduction, the container specs that create a lethal environment for pests, and the step-by-step method to seal your rice for a decade without a single bug.
Key Takeaways
- Seal the oxygen out. Airtight containers paired with oxygen absorbers drop O2 levels below 10%, suffocating any existing insects or eggs within 5–10 days.
- Control moisture religiously. Keep rice at or below 14% moisture. For seed or very long-term storage, target 12%. A hygrometer is more useful than a guess.
- Win with temperature. Store rice below 20°C (68°F). At 15°C (59°F) or lower, insect development stops completely, a finding proven in commercial Brazilian silos.
- Freeze first if you’re unsure. A 3–4 day deep freeze kills any eggs or larvae present in store-bought rice before you transfer it to long-term containers.
- Inspect with a flashlight. Check the tops of containers and bag seams monthly. Early detection means you can freeze a small batch instead of dumping your entire supply.
The Three Pillars of Bug-Free Rice Storage
Forget home remedies and hopeful guesses. Preventing insects in stored rice is an engineering problem with three measurable variables: atmosphere, moisture, and temperature. Get all three right, and infestation is mechanically impossible.
Sealed or hermetic storage systems kill insects through suffocation and dehydration. As insects consume the trapped oxygen and expire CO2, levels drop from 21% to below 10% within 5–10 days, curtailing all insect activity. (Source: IRRI grain storage manual)
The first pillar is an airtight barrier. This isn’t just about keeping bugs out; it’s about creating a sealed environment where the air itself becomes a weapon. Plastic tubs with locking lids often have microscopic gaps. Your best bets are genuine rice storage containers made of thick food-grade plastic with silicone gaskets, glass jars with two-piece canning lids, or Mylar bags heat-sealed shut. When you add an oxygen absorber to one of these sealed environments, you’re not just preserving freshness, you’re actively purging the last refuge of any hidden pest.
The second pillar is moisture content. The IRRI manual states grain must be maintained at 14% or less for safe storage. For seed, or if you’re planning long-term rice storage beyond a year, that target drops to 12%. Most store-bought white rice is dried to this level. The risk comes from humid storage spaces or containers that aren’t truly moisture-proof. Rice is hygroscopic; it will pull water from damp air until it reaches equilibrium. That’s how a seemingly dry batch in a porous container can creep into the danger zone within a season.
The third pillar is temperature control. The peer-reviewed science is clear: insects cannot develop outside a range of 13–35°C. A storage temperature below 20°C is recommended, and 15°C should not be exceeded. This isn’t just about slowing bugs down. At 15°C, their metabolism grinds to a halt. A University of California study on rice spoilage factors confirms that a cool, stable temperature is your strongest passive defense.
| Storage Pillar | Target Threshold | Why It Works | Tool You Need |
|---|---|---|---|
| Atmosphere | O₂ < 10% | Suffocates adults, larvae, and eggs by depriving them of oxygen. | Airtight container + oxygen absorbers |
| Moisture | ≤14% (12% for long-term) | Prevents mold and stops the rapid respiration that feeds insect growth. | Hygrometer / moisture meter |
| Temperature | <20°C (ideal ≤15°C) | Halts insect reproduction and development completely. | Thermometer / cool storage space |
If your storage setup doesn’t let you measure or control these three factors, you’re relying on luck. And in the bug world, luck has a very short shelf life.
What Kind of Bugs Are You Fighting?
You can’t defend against an enemy you can’t name. The usual suspects in rice are primary insects, pests whose entire life cycle happens inside a grain kernel.
The most common is the rice weevil (Sitophilus oryzae). A single female bores a hole in a grain, lays an egg inside, and seals it up. The larva eats the starchy interior, pupates, and emerges as an adult, leaving a hollowed-out shell. You’ll see the tiny, snout-nosed beetles crawling in the bag or find grains with neat, round exit holes.
The lesser grain borer and angoumois grain moth are other primary pests. The moths leave silken webbing, a clear sign of advanced infestation. Then there are secondary pests like sawtoothed grain beetles or Indian meal moths that feed on broken grains, dust, and debris. They indicate a problem with storage hygiene or that your rice was already damaged before you bought it.
Common mistake: Assuming store-bought rice is clean. Commercial processing is effective, but not infallible. Eggs can survive milling and packaging. Always treat new rice as potentially harboring the next generation.
The reason the three-pillar method works is that it doesn’t discriminate. Low oxygen kills all aerobic life. Low moisture denies them the water they need to metabolize. Cool temperatures stall their biology. It’s a comprehensive siege.
Your Step-by-Step Defense Protocol
This is the hands-on process that applies the three pillars. Follow it in order, and you’ll convert a bag of vulnerable rice into a sealed, stable asset.
1. Inspect and Freeze (The Pre-Emptive Strike).
Before your rice touches its long-term home, assume it’s not clean. Spread a batch on a baking sheet and look for dust, webbing, or moving specks. Then, bag it and put it in a deep freezer for 3–4 full days. This thermal shock kills any eggs or larvae. It’s the single most effective step for preventing bugs in flour and it works just as well for rice. Let the rice return to room temperature before the next step to avoid condensation.
2. Choose and Prepare Your Container.
Your container is your fortress. For most household quantities, a large glass jar with a clamp lid or a heavy-duty food-grade bucket with a gamma seal lid is perfect. For bulk long-term storage, #10 cans or Mylar bags are the professional standard. According to a Utah State University resource, a single #10 can holds about 5.7 lbs of polished rice. Clean your container thoroughly and ensure it’s completely dry.
3. Add an Oxygen Absorber and Seal.
Drop in the correct number of oxygen absorbers (usually 100cc for a gallon container). Pour in your room-temperature rice, leaving some headspace. Seal the lid immediately. You should hear the lid “pop” or see the sides of a Mylar bag contract within hours as the absorbers pull the oxygen out. This creates the lethal, low-oxygen environment detailed in the IRRI training manual on storage.
4. Label and Place in a Cool, Dark Spot.
Write the date and contents on the container. Store it in the coolest, darkest part of your pantry, basement, or climate-controlled garage. Remember the temperature target: below 20°C. A closet on an exterior house wall is often cooler than one next to the kitchen. This final step satisfies the last pillar, making your setup a complete bug-proof system.
Where this goes sideways: Skipping the freezer step because the rice “looks clean.” An egg is microscopic. That one missed egg hatches in the warm, sealed container you just made for it, and in 35 days you have a full colony with no way for the oxygen absorber to kill it fast enough. Always freeze first.
Temperature and Moisture: The Fine Print
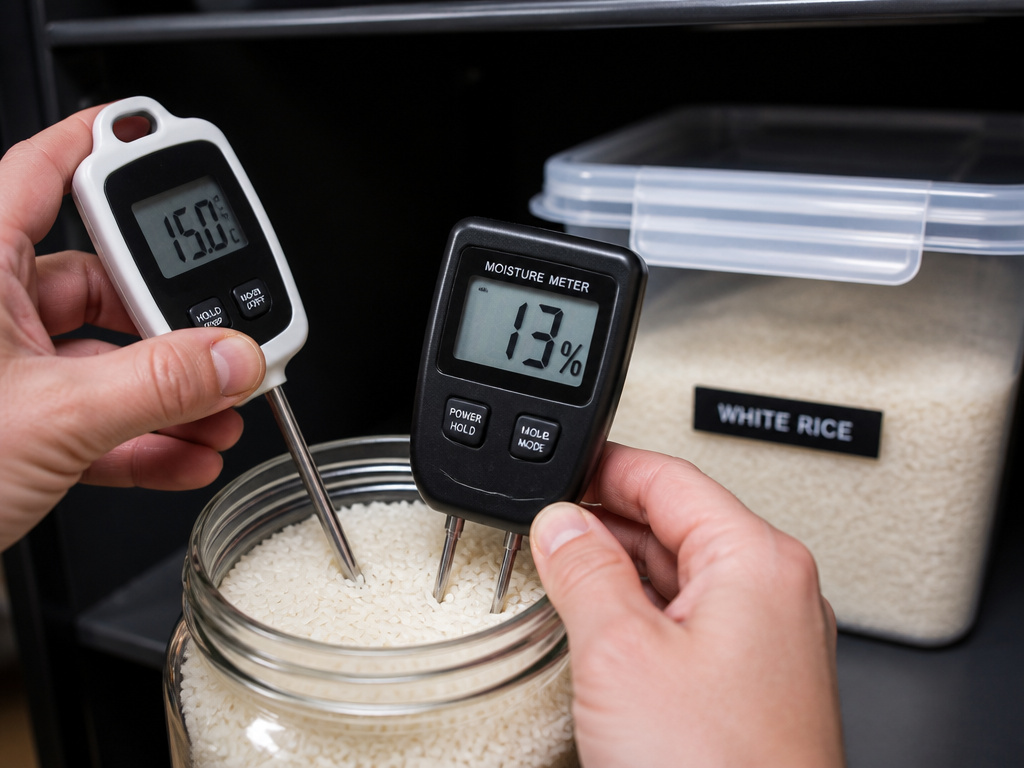 The broad targets (below 20°C, under 14% moisture) are your guides. But the real-world performance lives in the specifics.
Why does 15°C matter so much? Research from commercial facilities in Brazil, cited in a peer-reviewed MDPI journal, showed that chilling a large silo to 15°C controlled insect populations for about 60 days without re-chilling. At that temperature, insects enter a state of suspended animation. They don’t eat, move, or reproduce. It’s a permanent pause button. Your home storage won’t see the same scale, but the principle holds: the cooler, the better.
Moisture is a stealthier enemy. You can’t feel the difference between 13% and 16% moisture rice by hand. But at 16%, you’ve crossed into the zone where microbial respiration heats the grain mass slightly, a welcome mat for insects. The USU rice storage guide emphasizes that for storage beyond 10 years, cooler temperatures paired with oxygen-free sealing are critical. The famous BYU study they reference found rice retained nutrients and flavor for up to 30 years under those conditions.
| Symptom | Likely Cause | Immediate Action |
|---|---|---|
| Tiny beetles crawling on surface | Adult rice weevils emerging. | Isolate container. Freeze entire container for 7 days to kill all life stages. |
| Silky webbing in rice | Indian meal moth or grain moth larvae. | Discard infested rice. Deep clean storage area before introducing new stock. |
| Clumping, damp feel, off smell | Moisture too high, leading to mold. | Discard rice. Check storage area humidity and container seal. Use a dehumidifier. |
| Dust at bottom of container | Insect frass (waste) or grain fragments from feeding. | Sieve out good rice, freeze it, and repackage. Clean container meticulously. |
The takeaway? Controlling temperature and moisture is both preventive and diagnostic. If you have a problem despite a good container, one of these two factors is usually the culprit.
The Best Containers for the Job
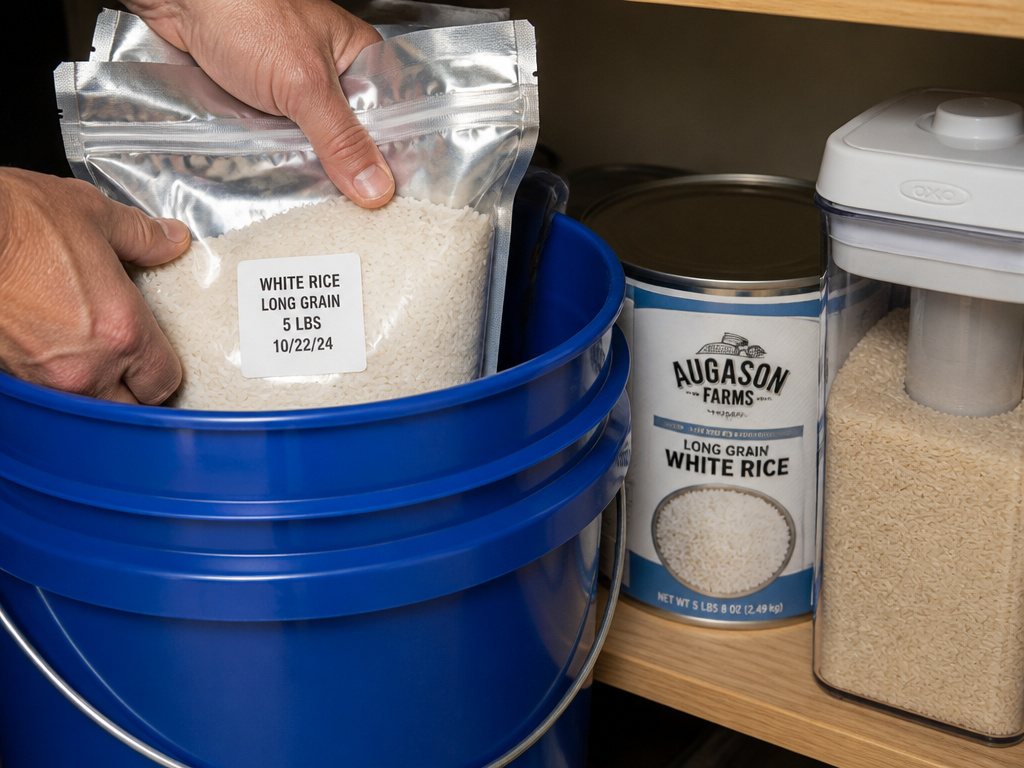 A recommendation without a named product is just a theory. Your container is your most important purchase, so here are the types that actually work.
For active pantry rotation (using rice within 6 months), the OXO Pop Container is a standout. Its plunger seal creates a genuine airtight closure, and the wide mouth makes scooping easy. For bulk storage (25 lbs or more), go with a 5-gallon food-grade bucket paired with a Gamma Seal lid. The screw-on lid makes access trivial while maintaining a solid seal. Line the bucket with a Mylar bag for an extra oxygen barrier.
For long-term prepping (10+ years), you can’t beat professionally packed #10 cans or Mylar bags with oxygen absorbers. Companies like Provident Pantry and Augason Farms sell rice pre-sealed this way. It’s the method the Utah State University research confirms for multi-decade storage.
The cheap plastic cereal keeper from a big-box store? It’s a bug hotel with a fancy lid. The seal is almost always the weak point. Press on the lid of a full container. If you hear a hiss of air escaping, it’s failing the first pillar.
How to Store Rice to Prevent Bugs: Pitchers vs. Bins vs. Sealed Bags
Your storage method should match your usage pattern. Storing rice for a large family that eats it weekly is different from storing a bulk buy for emergencies.
Open-Top Pitchers or Jars (Not Recommended)
The classic ceramic rice jar is for aesthetics, not protection. It offers zero barrier against humidity, airborne insect eggs, or crawling pests. It fails all three pillars immediately. Don’t use these for anything beyond a week’s supply.
Plastic Storage Bins (Conditional)
A standard plastic bin with a snap lid can work if, and only if, you use it as the outer shell for a sealed inner package. The bin protects against physical damage and light, but the inner Mylar bag or sealed #10 can does the real work. This is a good approach for general food storage organization.
Heat-Sealed Mylar Bags with Oxygen Absorbers (The Gold Standard)
This is the method used by universities and preppers for a reason. A 5-mil Mylar bag, heat-sealed with a flat iron after adding oxygen absorbers, creates a true hermetic environment. It’s flexible, space-efficient, and, according to the UC Davis spoilage factors PDF, it directly addresses the packaging factor in spoilage. For bulk rice you won’t touch for years, this is the winner.
The choice becomes simple. Are you storing for convenience or for survival? For convenience, a premium airtight plastic container suffices. For survival-grade, long-term storage, Mylar bags or #10 cans are the only proven choice.
Frequently Asked Questions
Can bugs get into sealed bags of rice?
Yes, they can if the bugs are already inside. Eggs are often present in rice when you buy it. A sealed bag just traps them inside with a perfect food source. This is why the pre-storage freeze is non-negotiable, it kills what’s already there before you seal the final container.
Does bay leaves or garlic keep bugs out of rice?
No. There is no scientific evidence that bay leaves, garlic cloves, or dried chili peppers repel rice weevils or other stored product pests. These items might mask odors but do not create a lethal environment or affect insect biology. Relying on them is a sure path to infestation.
How often should I check my stored rice for bugs?
Perform a visual inspection monthly. Look at the very top of the container inside the lid, and shine a flashlight along the seams of bags. Check for any loose dust (frass) or webbing. Early detection means you can salvage most of your stock by freezing the entire container.
Can I store brown rice the same way to prevent bugs?
You can, but it’s harder. Brown rice has the oily bran layer intact, which is more attractive to insects and has a shorter shelf life due to rancidity. The same three pillars apply, but you must be even more vigilant about temperature (cooler is better) and use oxygen absorbers to slow oxidation. Expect a shorter safe storage window than white rice.
What’s the first thing I should do if I find bugs in my rice?
Isolate the container immediately to prevent spread. Place the entire, sealed container in a freezer for at least 7 days to kill all life stages. After freezing, you can sift out the dead bugs and frass if the infestation is light, or discard the rice if it’s heavy. Then, deep-clean your pantry shelves before restocking.
The Bottom Line
Storing rice to prevent bugs is a system built on three measurable, controllable conditions: an airtight seal, low moisture, and cool temperature. Skip the folk remedies and invest in the tools that actually govern these conditions, a proper airtight container, oxygen absorbers, and a cool storage spot.
The data from extension services and research institutes is consistent. Follow their protocol, and your rice will outlast your worry about it. Start with your next bag. Freeze it, seal it with an oxygen absorber, and tuck it somewhere cool. That’s the difference between hoping for the best and knowing your food is safe.
