
How to Organize Freezer: Avoid Common Mistakes & Use Zones
This post contains affiliate links. As an Amazon Associate, we earn from qualifying purchases.
To organize a freezer, you need a system built on three things: verified temperature, logical zones, and ruthless labeling. Set the temperature to 0°F (-18°C), map items to the coldest and warmest zones, and label every container with contents and a date. The goal is to see everything at a glance and use food before quality degrades.
The 0°F target is the required threshold where food safety and quality timelines in your owner’s manual become real. A freezer at 10°F cuts the safe storage window for a whole chicken in half, and you won’t know until the texture turns spongy.
What follows is the method that works for a pull-out drawer, a top freezer, or a standalone unit. We’ll cover the tools that actually survive the cold, the mistake that burns out auto-feed motors in two weeks, and how to borrow a lab’s inventory system so you never lose a bag of peas again.
Key Takeaways
- Your freezer has temperature zones. The back and bottom are coldest, ideal for meat and long-term storage; the door is warmest, fit only for nuts or ice packs.
- Label with a date, every time. Food is safe indefinitely at 0°F, but quality nosedives—soups at two months, chicken at a year. A date is your only quality control.
- Use clear, shallow bins, not deep baskets. You need to see the back of the bin without digging. Deep containers become black holes.
- Freeze soups and sauces flat in bags, not upright in containers. They stack like books, thaw in 20 minutes in water, and save 40% of your space.
- The freezer door is for items immune to temperature swings. Never store sensitive meat, fish, or frozen fruit there.
The First Rule: Know Your Freezer’s Temperature Zones
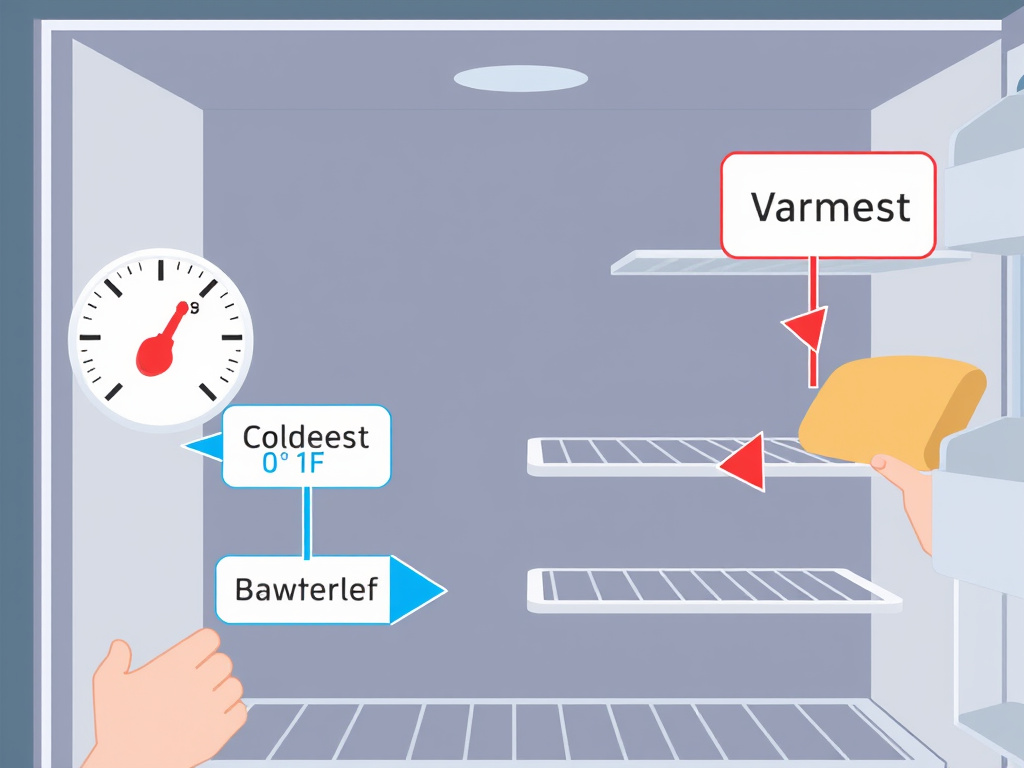
Head design changes the entire process. Look at the business end of your freezer. It isn’t a uniformly cold cave. Cooling coils typically line the back wall and sometimes the bottom or top shelf, creating pockets that are 5 to 10 degrees Fahrenheit colder than the front or the door.
This detail is the difference between freezer-burnt steak and a perfect chop.
The door shelves are the warmest part of the appliance and subject to the widest temperature fluctuations each time you open it. Do not store meat, seafood, or delicate frozen fruits there. Use that space for ice packs, bread, or nuts.
If you want proof, run a test. Place a freezer thermometer on the back wall of your top shelf and another in a door shelf. Wait 24 hours. The difference will be stark. This zone map dictates where everything should live.
| Freezer Zone | Typical Temperature | Best For | Never Store Here |
|---|---|---|---|
| Back Wall / Bottom | Coldest (0°F to -5°F) | Raw meat, poultry, fish, long-term bulk items, ice cream. | Bread, herbs, anything prone to freezer burn. |
| Middle Shelves / Front | Moderate (0°F to 5°F) | Frozen vegetables, prepared meals, fruits, leftovers. | Delicate seafood, ice cream. |
| Door Shelves | Warmest (5°F to 10°F+) | Ice packs, bread, nuts, butter, hard cheese, frozen juice concentrates. | Meat, fish, berries, any quality-sensitive item. |
Your owner’s manual knows this. The Bosch manual for its FDBM NF 1.0 model explicitly warns that leaving the door open causes a “considerable temperature increase.” It also notes that the storage container can hit 32°F (0°C)—right at freezing. That’s too warm for long-term meat storage.
The fix is simple. Treat your freezer like a library with dedicated sections. The cold, stable archives go in the back. The frequently checked-out paperbacks go in the front.
Step 1: The Empty and Audit
You cannot organize what you do not know. This step is non-negotiable. Pull every single item out and place it on the kitchen counter or in a cooler. Work quickly to prevent thawing.
As you empty, sort into three piles: 1. Keep: Clearly labeled, recent, and in good shape. 2. Toss: Freezer-burnt, unidentifiable, or older than recommended quality timelines. 3. Decide: The “maybe” pile—partially used bags, mystery containers.
Be ruthless with the “Decide” pile. If you don’t know what it is or when it went in, it goes in the trash. The goal is to reclaim space, not curate a museum of past meals.
This is also your chance to clean your freezer properly. Wipe down all surfaces with a mix of warm water and baking soda to neutralize odors. If you have significant frost buildup over a quarter-inch, you’ll need to defrost your freezer first.
Step 2: Choose the Right Containers and Tools
The wrong container guarantees failure. Deep, opaque bins are where food goes to die. You need visibility and accessibility.
Clear, shallow bins with handles are the gold standard. The clear side lets you see contents; the shallow depth means you never bury an item. Look for bins specifically rated for freezer temperatures, like the Sterilite Ultra Latch or iDesign Fridge Binz. They won’t become brittle and crack.
Your other non-negotiable tools: – A permanent marker and freezer tape. Write on the tape, not the container. It peels off cleanly. Include the item name and the date it was frozen. “Chili, 3/15” is perfect. – Heavy-duty freezer bags. Use them for freezing flat. The Ziploc Freezer Bag or Glad Freezer Zipper Bag work. Squeeze all the air out before sealing. – A vacuum sealer. For long-term meat storage or preventing freezer burn, a vacuum sealer is the best tool you can buy. The FoodSaver V4400 series is a reliable workhorse. It removes air far more effectively than the bag-and-sink-water method.
Common mistake: Using regular plastic containers or glass not rated for freezing. The plastic cracks, and the glass can shatter from thermal stress when moved from freezer to counter. Always use freezer safe containers.
Step 3: Implement a Zoning System
Now, place items back with intention. This is where you build the system that maintains itself. Don’t just put things where they fit. Assign them a home based on the temperature zone map and how often you use them.
For a standard top or side-by-side freezer: – Top Shelf (or Back Bottom in a drawer): Designate for ready-to-eat items and frequently used ingredients—frozen vegetables, fruits, pre-cooked meatballs, ice cream. – Middle Shelf: Use for prepared meals, leftovers, and soups. This is a great spot for those flat-frozen bags. – Bottom Shelf / Back Wall: The coldest zone. Reserve for raw meat, poultry, fish, and bulk items you won’t touch for months. – Door: Ice packs, butter, bread, nuts. That’s it.
Use your clear bins to enforce these zones. Have one bin for “Mixed Vegetables,” one for “Chicken Breasts,” one for “Prepared Soups.” It turns a jumble of bags into a single, grabbable unit.
For a chest freezer, the principle is the same, but execution is harder. The coldest area is at the bottom and along the walls. Use multiple small bins, not a few giant ones, and consider a hanging file system or a laminated map taped to the lid.
The Pro Moves: Freezing Flat and the Inventory Log
Two techniques separate a functional freezer from an exceptional one. They address the twin demons of wasted space and forgotten food.
Freezing Flat: This is the single biggest space-saver. Pour soups, sauces, or stews into a freezer bag. Seal it almost all the way, lay it flat on a baking sheet, and press out the remaining air as you finish sealing. Freeze the sheet. Once solid, you can stand the bags upright like a file folder or stack them. They thaw in a bowl of cold water in 20 minutes.
The Inventory Log: Borrow this from laboratory management. A simple notepad on the freezer door or a note on your phone. When you add four bags of flat-frozen chili, write “Chili – 4 bags – 3/15.” When you take one out, mark it off. This kills the “I think there’s more in the back” guessing game that leads to waste.
It also helps you plan meals. A glance at the log tells you what you have. No digging, no door-holding, no temperature spikes.
How to Maintain Your System (And What to Do When the Power Fails)
A system only works if you maintain it. Every three months, do a quick sweep. Check for any unlabeled items or bags migrating out of their bins. Replenish your freezer tape and marker.
The real test comes during a power failure. The standard advice is “keep the door closed.” Your Bosch manual states this explicitly to preserve temperature. But what if the outage lasts hours?
Your organized freezer is now an asset. You know exactly where the most valuable, temperature-sensitive items are (the meat in the back). If you must open the door to retrieve ice packs or move items to a cooler, you can do it in under 30 seconds. No rummaging.
Where this goes sideways: Putting a warm or hot container directly into the freezer. It raises the internal temperature, potentially thawing surrounding items and creating ice crystals that cause freezer burn. Always cool food to room temperature first, then refrigerate until cold, then freeze.
Frequently Asked Questions
What is the ideal temperature for a freezer?
The ideal temperature for a freezer is 0°F (-18°C). This is the standard recommended by appliance manufacturers like Bosch and the USDA for long-term food storage. It keeps food safe indefinitely and maximizes quality retention. Use a standalone freezer thermometer to verify this, as your fridge’s built-in display can be inaccurate.
How do you prevent freezer burn?
You prevent freezer burn by eliminating air exposure. Use a vacuum sealer for the best protection. For bags, use the water displacement method: submerge the sealed bag almost completely in water to push air out before final sealing. Always wrap items tightly in plastic wrap or foil before bagging, and ensure your freezer maintains a steady 0°F.
How long does food last in the freezer?
Food is safe to eat indefinitely at 0°F, but quality degrades. For best quality: soups and stews last 2-3 months, raw chicken pieces 9 months, raw steaks 6-12 months, and frozen vegetables 8-12 months. Fatty fish and pre-cooked sausages lose quality fastest. The date on your label is for quality, not safety.
What’s the best way to organize a deep freezer?
The best way to organize a deep freezer is with many small, clear bins and a detailed inventory log taped to the lid. Group like items in bins (e.g., “Beef,” “Vegetables,” “Fruit”). Place the bins you use most often on top. Consider creating a simple numbered grid map of the freezer floor to match your inventory list.
Does vacuum sealing really work?
Yes, vacuum sealing is the most effective home method to prevent freezer burn and extend quality storage times by 3-5 times. It removes nearly all air from the package, preventing ice crystal formation and oxidation. It is essential for long-term storage of expensive cuts of meat or bulk purchases.
The Bottom Line
An organized freezer is a functional system that saves money and reduces waste. It starts with a verified 0°F temperature and a map of the cold zones.It runs on clear bins, bold labels with dates, and the discipline to freeze soups flat. The door is for butter and ice packs, not for steak.
Check your freezer’s temperature tonight. If it’s above 5°F, adjust the dial. That single change does more for your food’s future than any bin you can buy. Then pick one shelf, pull it out, and zone it. The rest follows.
