
How to Store Potable Water Long Term for Emergencies & Safety
This post contains affiliate links. As an Amazon Associate, we earn from qualifying purchases.
To store potable water long term, you need three things: clean, sanitized food-grade containers; water treated with a precise amount of unscented chlorine bleach (5-9% sodium hypochlorite); and a cool, dark storage location away from chemicals. While properly disinfected water has an indefinite shelf life, rotating your supply every six months maintains optimum quality and is the standard recommendation from agencies like the CDC and New Mexico State University Extension.
That six-month mark isn’t arbitrary. It’s the point where you physically check seals, clarity, and location. Stored water doesn’t spoil like milk, but plastic can degrade, labels fade, and a forgotten container in a garage next to gasoline fumes becomes contaminated. The process is less about the water going bad and more about you verifying the system you built is still intact.
What follows is a breakdown of the official math for how much water you need, the three container rules that prevent chemical leaching, the exact bleach-to-water ratio for disinfection, and the difference between indefinite shelf life and practical rotation. By the end, you’ll be able to set up a system that lasts for years, not months.
Key Takeaways
- Store at least one gallon of water per person per day for a minimum three-day supply, with a two-week supply as the ideal target.
- Use only food-grade plastic, glass, or stainless steel containers that have never held milk, juice, or non-food substances.
- Disinfect water for long-term storage with 1/8 teaspoon (8 drops) of unscented chlorine bleach (5-9% sodium hypochlorite) per gallon.
- Store containers in a cool (50–70°F), dark place away from direct sunlight, gasoline, pesticides, or solvents.
- While water can be stored indefinitely, check and rotate your supply every 6 to 12 months to ensure container integrity and water quality.
How Much Water Do You Actually Need?
The math is simple but the consequences of getting it wrong aren’t. Official guidance from the CDC emergency water supply guide and the NMSU emergency water publication converges on one gallon per person per day as the baseline. This covers drinking and minimal cooking. If you plan for hygiene, washing hands, brushing teeth, cleaning a wound, you need to double that amount.
Where this goes sideways: Planning for “normal” days. In an emergency, stress and physical activity increase water needs. Children, nursing mothers, and the ill require more. A supply calculated for a sedentary three days collapses in a real crisis where people are hauling debris or fleeing a fire.
The most common planning frameworks are the 3-day supply and the 2-week supply. The 3-day supply is the absolute minimum for a sudden disruption like a major storm. The 2-week supply is the preparedness standard for a more prolonged event, like a supply chain breakdown or a pandemic wave.
| Supply Duration | Water per Person (Gallons) | For a Family of 4 (Gallons) | Best For |
|---|---|---|---|
| 3-Day Minimum | 3 | 12 | Sudden storms, short-term outages |
| 2-Week Prepared | 14 | 56 | Extended crises, supply disruptions |
| 1-Month Resilient | 30 | 120 | Serious long-term preparedness |
Remember that water weighs over eight pounds per gallon. A 55-gallon drum weighs over 450 pounds when full. Your storage plan must account for weight and access, you can’t move a full drum without a pump. This is why a layered approach to water storage works best: small portable containers for immediate grab-and-go, mid-sized jugs for campouts or minor outages, and large stationary drums for the core reserve.
The Three Non-Negotiable Container Rules
Your container is the single point of failure. A perfect water source poured into the wrong vessel becomes undrinkable in weeks. The rules come from material science and public health guidelines, not marketing.
Rule 1: Food-Grade or Nothing. The term “food-grade” means the plastic is certified to NSF/ANSI Standard 61, which verifies it won’t leach harmful chemicals into your water. For larger tanks, look for the CSA B126 Series standard. A used juice bottle or a milk jug is not food-grade for long-term storage. Milk proteins and fruit sugars linger in plastic pores, promoting bacterial growth no amount of bleach can fully conquer. New, purpose-built containers like the 5-gallon Aquatainer or 55-gallon polyethylene drums are the default choice.
Rule 2: Opaque and Dedicated. Clear plastic allows light to penetrate, which can promote algae growth and slowly degrade the plastic itself. Colored, opaque containers block light. More importantly, a water container should never store anything else. Never use a container that previously held gasoline, oil, pesticides, or even non-food cleaning products. Vapors from these substances can permeate plastic over time.
Rule 3: Secure Seal, Manageable Size. The container must have a tight-fitting, screw-on lid. Spigots are convenient but are an additional failure point for contamination; if you use one, keep it sealed until needed. Size dictates strategy. Seven-gallon jugs are portable for most adults. Five-gallon stacks save space. Fifty-five-gallon drums are for stationary, basement-level reserves. Your choice in water containers should match your ability to move and use the water.
Step-by-Step Guide to Cleaning, Sanitizing, and Filling
This is where most guides rush. They say “clean and sanitize” but skip the why-layer, which is why people get sick from their own stored water. Cleaning removes dirt and debris you can see. Sanitizing kills the microorganisms you can’t see. Skipping either step is how you inoculate your water with bacteria.
Before you start: Wear gloves when handling bleach. Work in a well-ventilated area. Use only unscented liquid household chlorine bleach that contains 5% to 9% sodium hypochlorite. Bleach older than six months may have lost half its strength.
- Wash the container. Use hot, soapy water and a clean bottle brush. Scrub every interior surface, especially the bottom and the threads of the neck where the lid screws on. Rinse thoroughly until no soap residue remains.
- Sanitize the container. Mix 1 teaspoon of bleach into 1 quart of clean water. Pour this solution into the clean container, seal the lid, and shake vigorously for 30 seconds, ensuring the solution contacts all interior surfaces. Let it sit for at least one minute, then pour it out.
- Fill with potable water. Use municipal tap water, which is already treated. If using well water, it must be disinfected first (bring to a rolling boil for 1 minute).
- Add bleach for long-term storage. This is the critical, sourced number: add 1/8 teaspoon (or 8 drops) of bleach per gallon of water. For a standard 5-gallon jug, that’s 5/8 teaspoon (or 40 drops).
- Seal and label. Tighten the lid securely. Apply a label with the preparation date. “April 2025” is fine.
The part nobody mentions: That final bleach addition is a residual disinfectant, not a one-time cleaner. It maintains a low level of protection in the stored water, preventing microbial regrowth during storage. This is what makes indefinite shelf life possible.
Store the filled container immediately in its final location, a cool, dark place like a basement interior wall, under a bed, or in a closet. Never on a concrete garage floor where temperature swings are extreme.
Indefinite Shelf Life vs. The 6-Month Rotation Rule
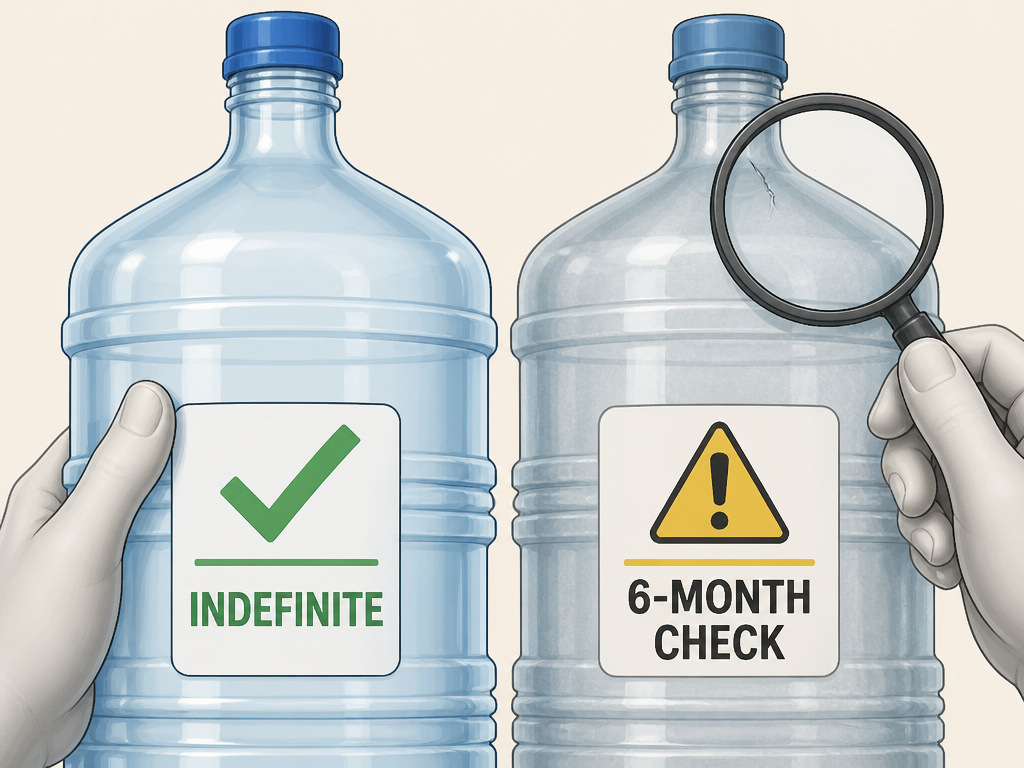
Here lies the greatest point of confusion in long-term water storage. Reputable sources state two seemingly contradictory things: 1. Properly disinfected and stored potable water has an indefinite shelf life (Utah State University Extension). 2. You should replace non-commercially bottled water every six months (CDC, NMSU Extension).
Both are true. The water itself, if sealed in a sterile container with a chlorine residual, does not expire. The system around the water decays. The plastic can become brittle, especially if exposed to heat or sunlight. Seals can dry out and crack. Labels fade, and you forget what’s inside. The six-month rotation is your scheduled maintenance check.
What to do every six months:
- Check each container for cracks, cloudiness, or algae growth.
- Ensure the storage area is still cool, dark, and free from chemical fumes.
- Smell the water when opened. It should smell faintly of chlorine or have no odor. A musty or sour smell means discard it.
- If the water passes inspection, you can keep it. Many preppers simply use the old water for cleaning or gardening and refill the container with a fresh batch, maintaining the cycle.
This maintenance schedule is the core difference between theoretical safety and practical, reliable emergency water storage.
Storing Water in a Freezer or Through Canning
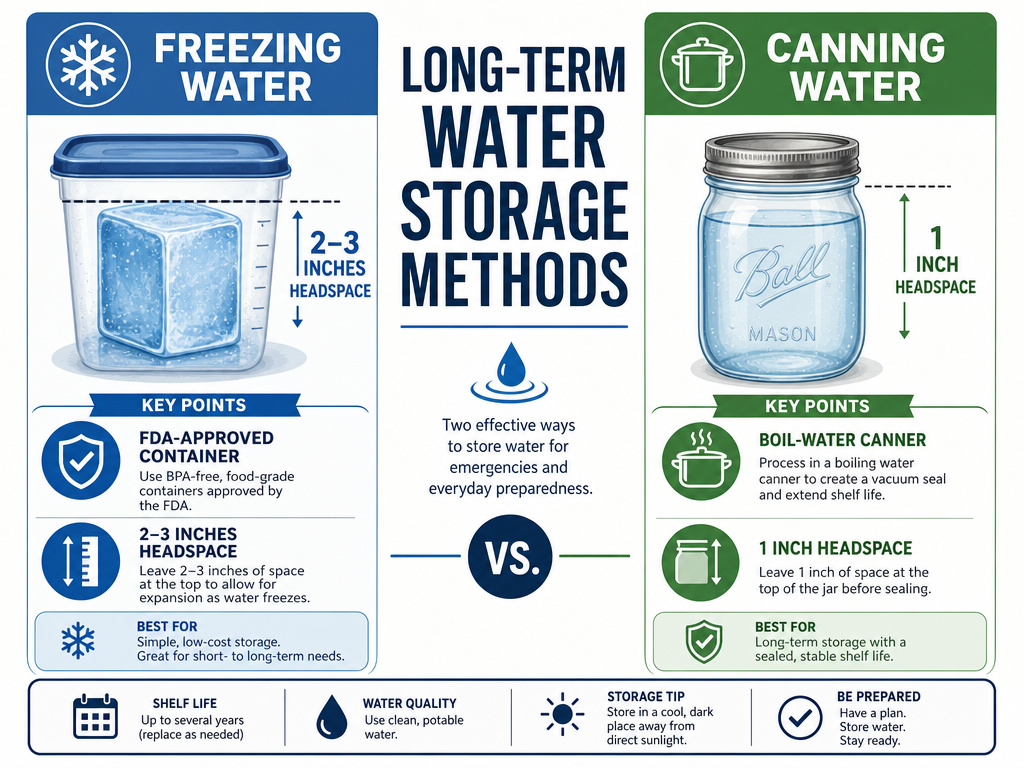
Freezing and canning are advanced methods that solve specific problems. Freezing is brilliant if you have excess freezer space; it acts as a thermal mass during a power outage, keeping other food frozen longer. Canning in glass jars provides the most chemically inert, long-term storage medium possible.
Freezing Water:
- Use only containers rated for freezer use (like FDA-approved polyethylene).
- Leave 2 to 3 inches of headspace at the top to allow for expansion as water freezes into ice. A completely full container will crack.
- This method is ideal for rotating water you use for camping or coolers, integrating preparedness into everyday life.
Canning Water (Boil-Water Method):
- Use clean, standard canning jars (quart or half-gallon sizes) and new lids.
- Fill jars with hot tap water, leaving 1 inch of headspace.
- Process in a boiling-water canner for 20 minutes (adjust time for altitude).
- The 20-minute boil sterilizes the water and the jar’s interior, creating a vacuum seal. Canned water stored in a dark place can last for decades.
Expert tip: I keep a dozen quart jars of canned water on a basement shelf. They’re my “forget-about-it” reserve. The glass won’t leach, and the seal is absolute. It’s the one part of my home water storage I never have to check.
Troubleshooting Common Problems
Even with perfect procedure, things can go wrong. Here’s how to diagnose and fix the most common issues.
| Problem | Likely Cause | The Fix |
|---|---|---|
| Cloudy water | Mineral particles from source water or plastic degradation. | Let it settle for 24 hours. If still cloudy, filter through a clean cloth and re-disinfect. If plastic is degraded, discard both water and container. |
| Plastic taste or smell | New container not properly sanitized, or low-quality plastic. | Pour water back and forth between two clean containers to aerate. Taste should improve. For future batches, sanitize more thoroughly or switch container brands. |
| Green algae spots | Light exposure (clear container) or organic residue left in container. | Discard the water. Scrub container with a 10% bleach solution, rinse thoroughly, and store in complete darkness. |
| No chlorine smell on opening | Old bleach used, or insufficient dose added. | Assume water is not protected. Use immediately for non-drinking purposes, clean container, and refill with fresh, properly treated water. |
If your water smells foul or has visible sediment, do not drink it. Use it for flushing toilets or watering plants. Your health isn’t worth the risk. This is why having a quality water filter, like a Berkey or Survivor Filter, is the final tier of any good water plan. It provides a final safety net for questionable water, whether from your own storage or an outside source.
Frequently Asked Questions
Can I store water in used soda or juice bottles?
You can, but it’s not ideal for long-term storage. You must clean and sanitize them extremely thoroughly to remove all sugar residues. For a core, long-term reserve, new food-grade containers are a much safer choice. For a short-term rotational supply, thoroughly washed 2-liter soda bottles are acceptable.
Does stored water really go bad?
The H2O molecules don’t expire. The risk is contamination from the container or the environment, and the loss of the protective chlorine residual over time. Properly disinfected water in a sound container remains potable for years.
What’s the difference between disinfection and sterilization?
Disinfection reduces harmful microorganisms to a safe level, like boiling water for 1 minute. Sterilization destroys all microorganisms, including bacterial spores. The 20-minute water canning process achieves sterilization, which is why canned water lasts indefinitely.
How do I use my stored water in an emergency?
Open the container and pour. If it’s been stored for over a year and you’re cautious, you can boil it for 1 minute before drinking or run it through a certified water filter. For water from questionable sources (rivers, lakes), always filter and disinfect before drinking.
Can I add flavoring to stored water?
Never add drink mixes, powders, or flavorings to your long-term storage water. They introduce organic material that can promote bacterial growth and make the water unsafe. Store flavorings separately and add them only to water you are about to consume.
The Bottom Line
Long-term water storage isn’t a product you buy; it’s a system you maintain. Start with the math: one gallon per person per day. Invest in solid, opaque, food-grade containers for water storage. Follow the bleach ratio to the letter, 1/8 teaspoon per gallon. Then, store it cool and dark. Mark your calendar to check everything every six months. That rotation habit is the real secret. It turns a static stash into a dynamic, reliable resource. Your future self in a crisis won’t remember the cost of the containers. They’ll remember the clean, safe water that’s there when the taps run dry.
