
How to Store Sourdough Bread for Lasting Freshness & Crust
This post contains affiliate links. As an Amazon Associate, we earn from qualifying purchases.
Store whole, uncut sourdough bread in a breathable cloth or paper bag at room temperature (60–70°F) for 4–6 days. Once cut, place the loaf cut-side down on your cutting board for daily use, or pre-slice and freeze portions in an airtight bag for up to 3 months. Never refrigerate fresh sourdough—cold temperatures accelerate staling and dry the loaf out faster than room temperature air.
That 4–6 day window isn’t a guess. It’s the observable outcome when you control two variables: external humidity and the loaf’s own internal moisture. Get either wrong and the timeline collapses—the crust turns rubbery in a day or the crumb dries out by day three.
What follows is the breakdown of those two variables, the four storage methods that balance them, and the one study-backed mistake that costs most people at least two days of fresh bread.
Key Takeaways
- Never refrigerate fresh sourdough. Cold temperatures force starch molecules to recrystallize faster, a process called retrogradation that turns the crumb dry and gritty within 48 hours.
- The first 48 hours are for the crust. Keep the whole loaf in a breathable bag (cloth or paper) at 60–70°F. This protects the crisp crust while letting just enough moisture escape to prevent sogginess.
- After cutting, switch tactics. Store the loaf cut-side down directly on your cutting board. The crust acts as a natural plate, sealing the exposed crumb from air.
- Freezing is the only long-term solution. For storage beyond a week, pre-slice, bag tightly in a Ziplock or similar airtight bag, and freeze. Thaw slices directly in a toaster.
- Plastic bags at room temperature invite mold. A 2021 study on mixed sourdough found plastic bags (LDPE) at 70°F grew Penicillium mold by day 10. Use plastic only for the freezer.
The First 48 Hours: The Critical Cooling & Initial Storage Window
Bread is still cooking after it leaves the oven. The internal temperature can stay above 175°F for an hour. Slicing into a steaming loaf releases that trapped steam, and the crumb turns gummy.
Before you start: Handle the hot loaf with dry oven mitts. The crust is fragile and can crack if bent before cooling. Place it on a wire rack, not a plate or cutting board, so air circulates underneath.
Wait at least two hours, ideally until the loaf feels completely room-temperature to the touch. A study on PDO Tuscan sourdough specified a 2-hour cool at room temperature before any packaging—that’s the benchmark.
Your goal in this initial phase is to preserve the crackling crust. That thick, caramelized exterior is the loaf’s primary moisture barrier. Trap it in a sealed container while it’s warm, and the escaping steam softens the crust into leather.
The Whole-Loaf Storage Decision: Breathable vs. Sealed
For an uncut loaf you’ll eat within two days, you need a container that balances moisture release. Too much escape dries the crumb; too little softens the crust.
| Storage Method | Best For | Risk If Skipped |
|---|---|---|
| Cloth bag or linen towel | Preserving a crisp crust for 2-4 days. | The crust stays hard, but the crumb can dry slightly faster than in paper. |
| Paper bag | Short-term storage (1-2 days) where some crust softening is acceptable. | Higher air flow dries the loaf completely by day 3, leading to premature staling. |
| Beeswax wrap | A compromise for softer crust lovers; more breathable than plastic. | Can create a slightly chewy crust texture, as it holds more humidity than cloth. |
| Dutch oven (cooled) | The ultimate crust protector if you baked in one. | Only works if the pot is completely dry and cool; any residual warmth steams the loaf. |
The cloth bag is the default. It’s the best storage for sourdough during this initial window because it mimics a bakery’s environment. A paper bag is a close second, but it trades some crust quality for convenience.
Where this goes sideways: Wrapping a warm loaf in any bag. The trapped steam condenses inside the bag, raising the relative humidity above 85%. That’s the threshold where mold spores, always present in your kitchen, find the water they need to germinate. You’ll see the first blue-green spots within a week.
The Room Temperature Toolkit: From Countertop to Bread Box
Once your loaf is cool and you’ve made the first cut, the game changes. Now you’re defending the exposed, moist crumb from the dry air.
The single most effective technique requires no special gear. Place the loaf cut-side down directly on your wooden cutting board. The crust creates a near-perfect seal against the wood. This is the method many professional bakers, like Matriarch Bread’s owner, use for daily consumption. It keeps the cut face from drying out overnight.
For longer room-temperature storage of a cut loaf, you need to manage humidity scientifically. A 2021 study in Foods journal measured the conditions inside different household containers.
They found a metal bread box maintained about 60-65% relative humidity (RH). A plastic bag at room temperature spiked to near 90% RH. That 25-point difference is everything. High humidity doesn’t just soften crust; it provides the liquid water mold needs to grow.
Choosing Your Container: A Humidity Guide
Your container decides the loaf’s texture and lifespan. Here’s how the common options perform over a 5-day span.
- The Bread Box (Metal or Wood): Maintains a low-humidity, dark environment. Ideal for keeping a whole or partially cut loaf for 4-5 days with minimal crust softening. It’s a dedicated bread storage container that beats any bag for balance.
- Reusable Cloth Bag: The go-to for whole loaves. Offers moderate breathability, keeping humidity around 70-75% RH. Expect a crisp crust for 3-4 days.
- Beeswax Wrap: More breathable than plastic, less than cloth. Creates a micro-climate that can keep the crumb soft but often yields a chewy crust. Best for half-loaves you’ll finish in 2 days.
- Paper Bag: High air flow. Good for 1-2 days if you prefer a slightly softer crust. By day 3, the loaf will be noticeably drier than one kept in cloth.
- Plastic Bag (LDPE): The worst choice for room temperature. The study recorded Penicillium mold growth on sourdough in plastic bags at 70°F after 10 days. It’s a sealed, humid incubator.
Easy to miss: The shape of your loaf matters. A long, thin batard has more surface area (crust) relative to its volume (crumb) than a round boule. It will dry out faster in the same container. Plan your storage timeline accordingly.
If you’re deciding on a dedicated tool, a bread box or a set of beeswax bread bags are the two investments that actually change outcomes. The box is for bakers who go through a loaf every 4-5 days; the beeswax bags are for households that eat half a loaf every two days.
Why the Fridge Fails: The Science of Staling
This is the rule with no exception: do not put fresh sourdough bread in the refrigerator. It’s not about preference; it’s a chemical acceleration.
Staling, or retrogradation, is the process where gelatinized starch molecules in the baked crumb lose water and recrystallize. This process happens fastest at temperatures just above freezing, around 32–50°F. Your fridge sits squarely in that range. At room temperature (70°F), the process is much slower.
Common mistake: Refrigerating bread to “prevent mold.” The sourdough’s natural acidity already inhibits mold better than yeast breads. By refrigerating, you trade the minimal mold risk for a guaranteed texture loss. The bread will taste and feel stale long before it would ever show mold at room temperature.
The only scenario where fridge storage is acceptable is if your sourdough contains moist mix-ins like cheese or cooked vegetables that could spoil at room temperature. Even then, plan to eat it within 2-3 days, and accept that the crumb will be drier.
For everyone else, the University of Illinois Extension sourdough guide is clear: freezing, not refrigeration, is the recommended method for long-term sourdough storage.
Freezing Sourdough: The Only Long-Term Solution
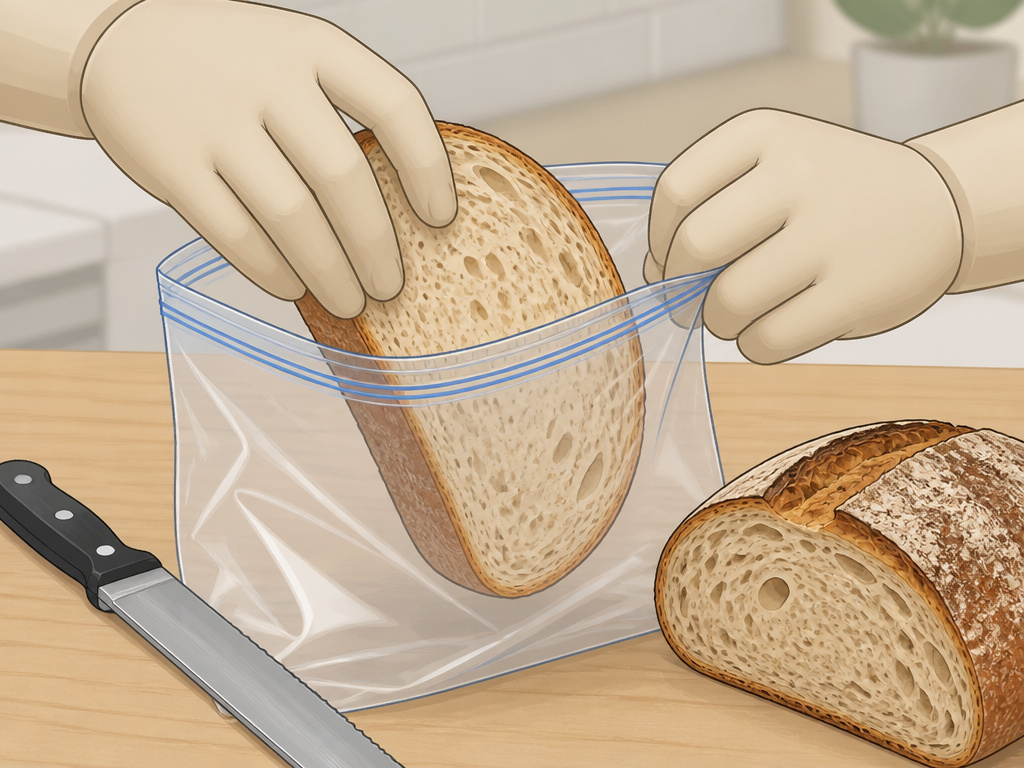
Freezing stops the staling process almost completely. Water molecules freeze, so the starch can’t retrograde. This is how you save a loaf for weeks, not days.
The method is specific, though. Freezing a whole loaf leads to a long, awkward thaw and potential freezer burn on the crust.
The right way to freeze sourdough:
- Slice it completely while fresh. Use a serrated bread knife. Thick slices (20mm) hold up better than thin ones.
- Bag it immediately. Place slices in a single layer in a high-quality bread storage bag or a Ziplock-style airtight bag. Press out all excess air before sealing.
- Freeze flat. Lay the bag flat on a freezer shelf. This lets you remove individual slices without thawing the entire block.
- Thaw in the toaster. For serving, take slices directly from the freezer and place them in a toaster or toaster oven. The direct heat refreshes the crust and crumb simultaneously.
Frozen sourdough maintains best quality for about 3 months. After that, while still safe to eat, it may develop mild freezer flavors. Label your bag with the date.
This process also answers what to do with the leftover half of a loaf. Instead of letting it stale on the counter for 5 days, store the cut sourdough by slicing and freezing the portion you won’t eat within 48 hours.
Reviving and Using Stale Sourdough
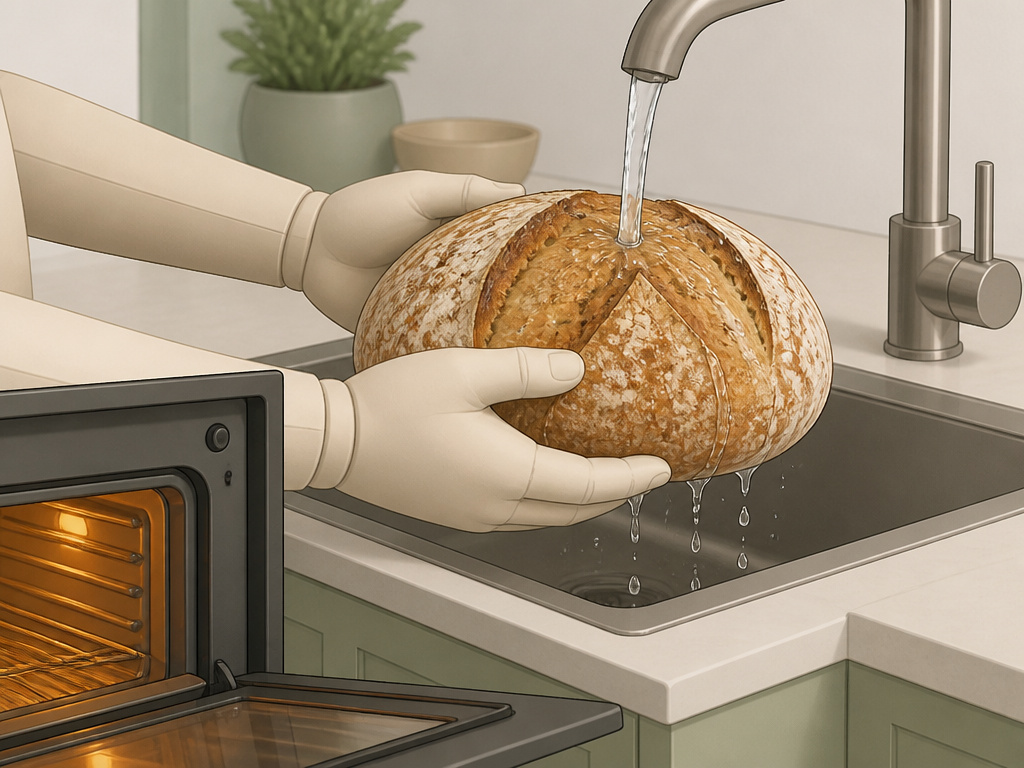
Even with perfect methods for storing sourdough bread, a loaf will eventually stale. Stale is not moldy. It’s simply dry.
You can partially reverse staling with heat and moisture. Preheat your oven to 300°F. Run the whole loaf quickly under the tap, lightly wetting the crust (avoid the cut face if possible). Place it directly on the oven rack for 5–15 minutes until warm and crisp. This re-gelatinizes some surface starch, softening the crumb and re-crisping the crust for a brief window.
If the loaf is too far gone for revival, don’t discard it. Stale sourdough is a kitchen asset.
- Croutons: Tear into chunks, toss with olive oil and salt, bake at 400°F until golden.
- Breadcrumbs: Process in a food processor, then toast in a dry pan until golden and fragrant. Store in a jar.
- Panzanella: The classic Tuscan bread salad relies on stale, dry bread to soak up dressing without becoming mush.
- Bread Pudding or Strata: Stale bread absorbs custard better than fresh, giving the final dish a superior texture.
Frequently Asked Questions
Can you store sourdough bread in a plastic bag?
You can, but only in the freezer. At room temperature, a plastic bag creates a high-humidity environment that promotes mold growth on sourdough within 7-10 days. For counter storage, always choose a breathable sourdough bread bag like cloth or paper.
How long does homemade sourdough bread last?
Whole, uncut homemade sourdough loaf lasts 4-6 days at room temperature in a breathable bag. Once cut, plan to consume it within 2-3 days using the cut-side down method, or freeze the remainder. The acidity from fermentation gives it a day or two longer lifespan than commercial yeast bread.
Does sourdough bread need to be refrigerated?
No. Refrigeration accelerates the staling process, making sourdough dry and gritty much faster than if kept at room temperature. The only reason to refrigerate is if the bread contains perishable add-ins like meat or soft cheese.
What is the best way to store sourdough bread long term?
Freezing is the only effective long-term method. Pre-slice the loaf, place slices in an airtight bag, remove excess air, and freeze. Thaw slices directly in a toaster. Properly frozen sourdough retains good quality for up to 3 months. For a step-by-step guide, see our article on how to thaw frozen bread.
Why is my sourdough bread moldy so fast?
Fast mold growth is almost always a humidity issue. Storing bread in a plastic bag, wrapping it before it’s fully cool, or keeping it in a warm, humid spot (like above a dishwasher) raises the relative humidity inside the packaging above 85%. This provides the water mold spores need to germinate. Always cool completely and use breathable storage.
Where is the best place to keep bread in the kitchen?
The ideal place for bread is a cool, dry, dark spot away from appliances, direct sunlight, and drafts. A countertop away from the stove or sink, inside a bread box or cloth bag, is perfect. Temperature stability is more important than absolute coolness.
The Bottom Line
Sourdough storage is a fight against moisture—keeping enough inside the crumb while letting enough escape to protect the crust and prevent mold. The fridge loses that fight on day one. Your countertop, with a cloth bag or a cut-side-down loaf, wins for 4-6 days. For anything longer, your freezer is the only ally that works.
Pick your method based on your eating timeline: cloth bag for the first two days, cut-side down for days three and four, freezer for everything after. That sequence keeps more loaves out of the trash and more slices on your plate, fresh.
