
Store Bread in a Bread Box Correctly: Avoid Common Mold Mistakes
This post contains affiliate links. As an Amazon Associate, we earn from qualifying purchases.
Store bread in a bread box by first letting it cool completely, then placing it cut-side down on a clean, dry surface inside the box. The box must have ventilation holes to manage humidity, which hits 89% inside a sealed unit. Loaves last 4-6 days before visible mold appears, with sourdough and rye breads holding out a day longer than plain wheat.
That 89% relative humidity figure isn’t a guess. It’s from a controlled study that logged conditions inside a standard metal bread box at room temperature. The air gets damp, and without a way for that moisture to escape, it settles on the bottom of your loaf.
What follows is a breakdown of that study’s numbers, the head-to-head performance of boxes against bags, and the specific steps that turn a bread box from a mold incubator into a useful tool. You’ll see the trade-offs in firming rates, learn why sourdough is your best bet for box storage, and get a clear timeline for when to move leftovers to the freezer.
Key Takeaways
- Bread boxes hit 89% relative humidity; without vents, mold appears on the loaf bottom within 4-6 days.
- Let bread cool for at least 2 hours before boxing it. Warm bread steams up the interior and cuts your freshness window in half.
- Sourdough and rye breads decelerate spoilage; their firmer crumb and acidity add 1-2 days to the safe counter life compared to white wheat loaves.
- For a crisp crust, pair the bread box with a PE-layered microperforated paper bag; it reduces moisture loss but accelerates firming.
- The freezer is the only option for storage beyond one week. Slice the loaf first for easy toast-from-frozen convenience.
Why Humidity Is the Whole Game
A bread box doesn’t preserve bread by sealing it in. It works by creating a microclimate. The goal is to balance the bread’s own moisture evaporating from the crumb with the ambient humidity of your kitchen. Get it right, and the crust stays crackly while the inside stays soft. Get it wrong, and you’re just building a terrarium for fungi.
Bread boxes create a highly humid atmosphere (89.0% RH) at 22.0 ± 0.5 °C, leading to mold growth, particularly on the bottom of loaves due to waterlogging from limited air circulation.
That’s the technical reality. The still, damp air is perfect for mold spores, which are everywhere in your kitchen, to settle and grow. The first sign is often a faint, fuzzy patch on the underside of the loaf where it rests on the box’s surface. This isn’t a design flaw in bread boxes. It’s the predictable outcome of putting a moist, porous food into a humid, enclosed space without a plan for air exchange.
The 5-Day Rule for Bread Box Mold
How long do you actually have? The same study that gave us the humidity number also tracked the visual appearance of mold. For loaves in a standard bread box, the first mycelium, the visible fungal network, showed up on day 4 for one test loaf, day 5 for two loaves, and day 6 for the remaining three.
That’s your window. Four to six days at room temperature, assuming a clean box and a fully cooled loaf going in. Push past day six and you’re gambling. The timeline shortens if your kitchen is particularly warm or humid, or if you store the box near a heat source like the oven or dishwasher.
Common mistake: Putting a warm loaf straight from the oven into the box. The escaping steam raises the internal humidity instantly, condensing on the cooler metal or ceramic walls and dripping back onto the bread. You can shave two days off your freshness window.
The Non-Negotiable Prep Step
Your bread must be stone-cold before it sees the inside of a box. For a standard 1-pound loaf, that means letting it rest on a cooling rack for a minimum of two hours after baking. Thicker, denser loaves like sourdough boules might need three.
The cut face is the other vulnerability. Once you slice into a loaf, the exposed crumb is a huge surface area for moisture loss. The standard fix is to store it cut-side down. The crust acts as a partial seal against the box’s surface, slowing the drying process. Some bakers will even save the heel, the end piece, and place it against the cut face before setting the loaf down.
What about pre-sliced bread? The game changes. Each slice has two exposed sides. For a pre-sliced loaf, your best move is to use a bread container designed with tight-sealing lids or to transfer it to a reusable bread storage bag before placing it in the box. The bag adds a moisture buffer.
Bread Box vs. Plastic Bag vs. Paper Bag
The bread box isn’t your only option. It sits between two extremes: the sealed plastic bag and the breathable paper bag. Each creates a different storage environment, with measurable trade-offs between moisture retention, firming (staling), and mold resistance.
| Storage Method | Avg. Humidity | Moisture Loss (Wheat Bread) | Firming Rate (Wheat Bread) | Best For |
|---|---|---|---|---|
| Bread Box (vented) | ~89% RH | 7.0% | 0.27 kPa/day | Crusty artisan loaves, 3-5 day consumption |
| Plastic Bag (LDPE) | ~90% RH | 3.5% | 0.25 kPa/day | Soft sandwich bread, preventing dryness |
| Paper Bag (microperf) | N/A | 10.3% | 0.47 kPa/day | Very short-term (1-2 days), crisp crust |
| Plastic Bag (Fridge) | ~91% RH | 3.1% | 0.30 kPa/day | Not recommended – accelerates staling |
The numbers tell a clear story. A plastic bag is champion at preventing moisture loss, your bread won’t dry out. But that same sealed environment softens the crust completely and, if left too long, becomes a mold hotspot faster than a vented box. The bread box offers a middle path: slightly higher moisture loss than plastic, but a similar slow firming rate, while (with vents) fighting off mold a bit longer.
The paper bag is the outlier. It lets moisture escape readily, which keeps the crust crisp but turns the crumb into a dry, firm brick within a couple of days. Its high firming rate of 0.47 kPa/day for wheat bread means it’s only for very short-term holding.
Where this goes sideways: Using the fridge as a default bread storage solution. The cold dramatically accelerates starch retrogradation, the process that makes bread taste stale, even while it slows microbial growth. Your bread will taste old long before it looks moldy.
Vents Are Not Optional
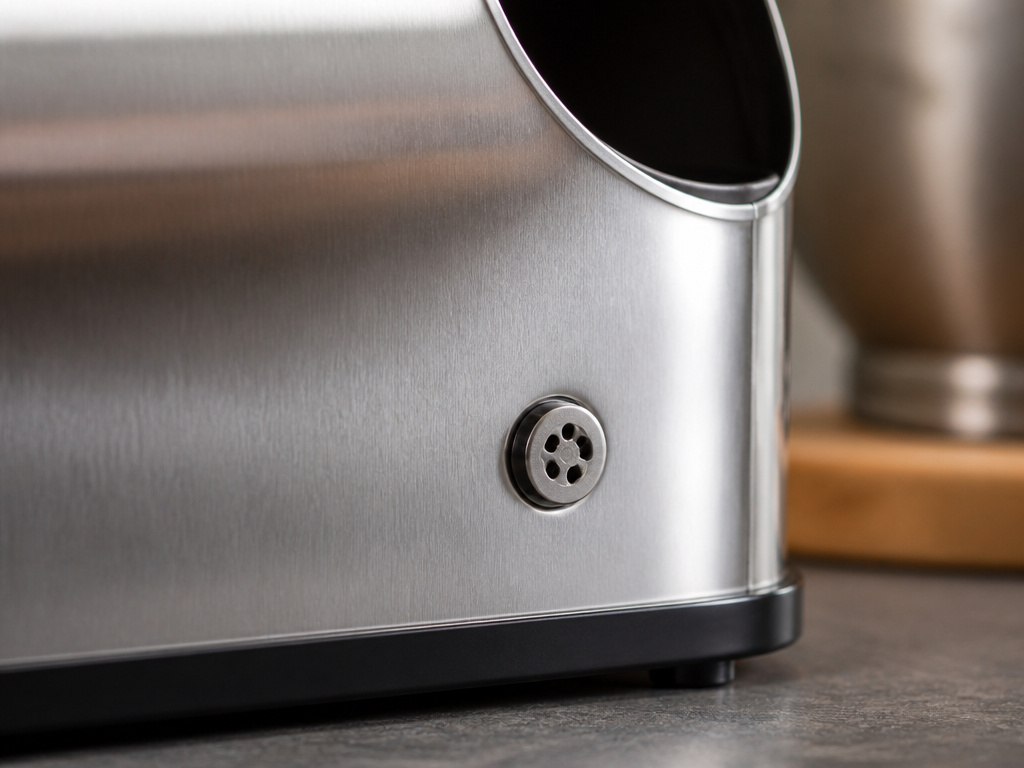 If your bread box doesn’t have ventilation holes, it’s a sealed container with a fancy name. Vents are the control mechanism for that 89% humidity. A few small holes on opposite sides of the box allow for gentle cross-ventilation. This lets excess moisture escape, preventing the stagnant, wet conditions that mold loves.
The ideal vent size is about a quarter-inch in diameter. You want enough airflow to exchange the air without creating a drying draft. Many modern boxes, like the Rösle Bread Bin, come with adjustable vents so you can fine-tune them for your local kitchen humidity. In a dry climate, open them fully. In a humid climate, close them halfway.
I won’t recommend a solid ceramic bread box for a daily loaf. They look beautiful on the counter, but without any airflow, the first slice you take after day three often has a faint, damp smell from the trapped moisture. Found that out the hard way with a rustic boule.
What if your box is vent-less? You can simulate ventilation. Place a clean, dry bamboo cutting board or a couple of chopsticks at the bottom of the box to lift the loaf off the surface, improving air circulation underneath. You can also crack the lid open an inch for a few hours each day to let the box “breathe.”
Your Bread Type Changes the Timeline
Not all breads are equal in the face of humidity. The study data shows mixed-type sourdough bread consistently lost more moisture and firmed faster than plain wheat bread in the same conditions. But, and this is critical, sourdough and rye breads are more resistant to microbial spoilage.
The acidity from the sourdough culture creates a less hospitable environment for mold. The denser, tighter crumb structure of rye flour also slows moisture migration. This means your whole-grain sourdough might feel firmer sooner, but it will actually last longer before showing visible spoilage. You might gain an extra day in the box compared to a basic white sandwich loaf.
The Step-by-Step Method for Box Storage
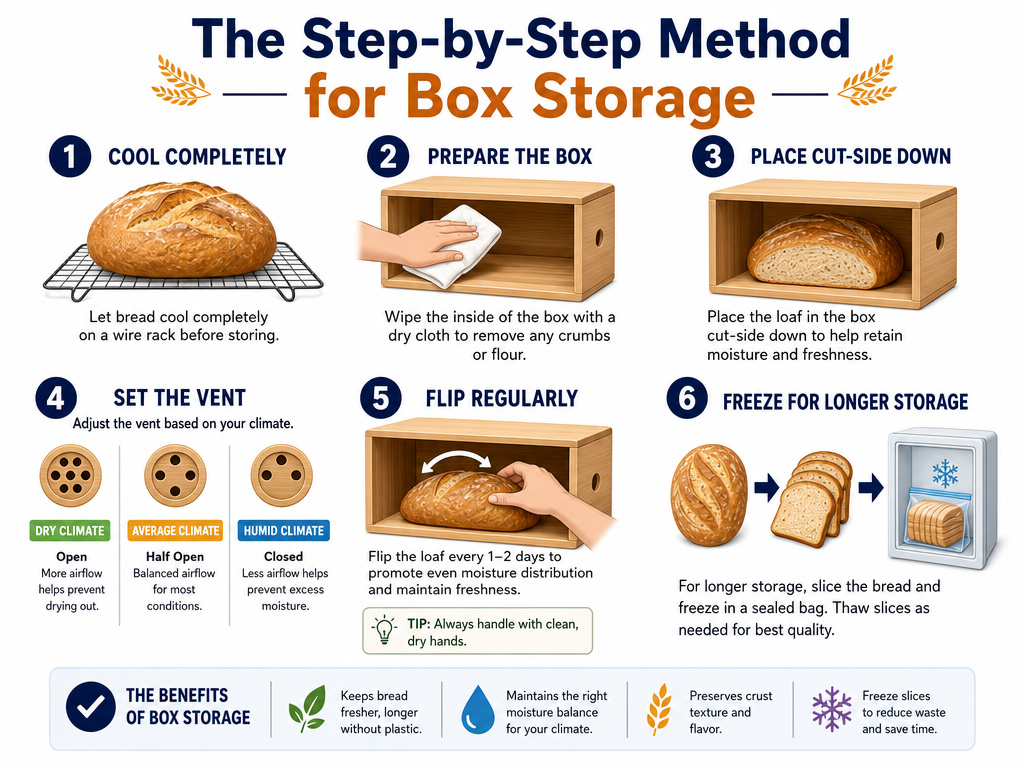 Follow this sequence. Skipping step one or two is how loaves go bad by day three.
- Cool Completely. After baking, transfer the loaf to a wire cooling rack. Let it sit for 2-3 hours until the crust feels room temperature and no residual warmth comes from the bottom.
- Prep the Box. Ensure the interior is clean and dry. If your box lacks a raised rack, place a piece of parchment paper or a clean linen napkin on the bottom.
- Position the Loaf. Place the loaf cut-side down. If you’ve already taken several slices, position the loaf so the cut face is flush against the bottom or side of the box.
- Manage Vents. Set vents to half-open for average kitchen humidity (40-60%). In dry climates (<30% RH), open fully. In humid climates (>60% RH), keep them only a quarter open.
- Check Daily. On day 3, flip the loaf over to inspect the bottom. If you see any condensation on the box walls, wipe them dry and increase vent opening slightly.
- Plan for the Freezer. By the end of day 4, decide: will this be eaten in the next 48 hours? If not, slice and transfer to a bread container for the freezer. This is the only reliable method for storing bread beyond one week.
Skip this if: You bake only once a week and consume bread slowly. For you, the workflow should be: cool → slice → freeze → thaw slices as needed. The box is for short-term convenience, not long-term archiving.
When to Abandon the Box for the Freezer
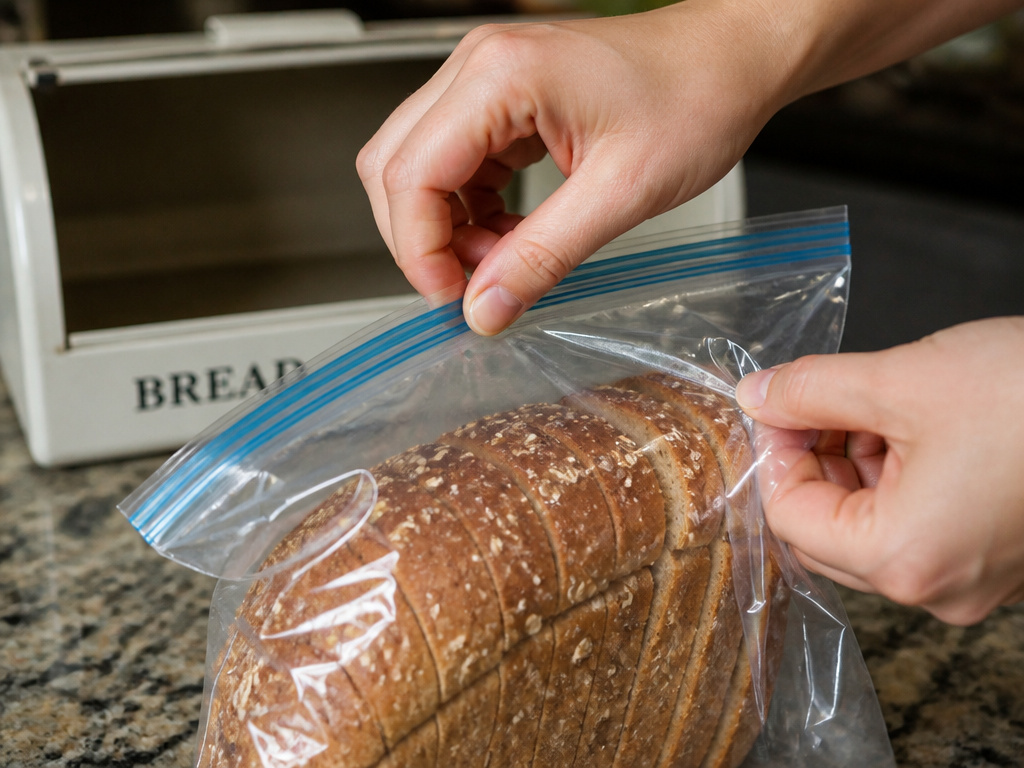 The bread box is a short-term holding chamber. Its physical limits are defined by humidity and mold spores. For any loaf you know won’t be consumed within five days, the freezer is the only correct next step.
Slice the loaf first. This allows you to remove individual slices without thawing the entire brick. Use a reusable bread bag or a heavy-duty freezer bag, squeeze out as much air as possible, and seal it. Label with the date. Homemade bread, like the kind from a Breville BBM800, freezes well for up to a month without serious quality loss, as its manual notes.
The part nobody mentions: Thawing a full frozen loaf at room temperature takes 4-5 hours and often leaves a gummy, damp line in the center where ice crystals melted. Thawing individual slices in a toaster or toaster oven takes 3 minutes and delivers a perfect result every time.
This makes freezing the superior strategy for keeping bread fresh if your household doesn’t go through a loaf quickly. The common worry that freezing dries out bread is misplaced, it’s the thawing process that causes moisture damage if done slowly. Fast, direct heat avoids the problem.
Frequently Asked Questions
Does a bread box need to be airtight?
No, and it shouldn’t be. Airtightness is the enemy. You need some air exchange to manage humidity. Vents or a slightly loose-fitting lid are essential features. A completely sealed box will trap moisture and accelerate mold growth.
Can I store different types of bread together in one box?
You can, but be cautious. A very moist banana bread or a cheesy garlic loaf can transfer flavors and excess moisture to a plain sourdough. If you must mix, place each loaf in its own beeswax bread bag first. The waxed fabric provides a breathable barrier.
Why did my bread get moldy in 3 days even in a bread box?
Three common reasons: the loaf was still warm when stored, the box has no ventilation and sits in a humid spot (like under a window), or the box itself wasn’t clean. Mold spores can linger on crumbs from a previous loaf. Wipe the interior with a vinegar-water solution every few uses.
Is refrigerating bread better than a bread box?
Almost never. Refrigerating bread causes starch retrogradation to happen 6-8 times faster than at room temperature. Your bread will taste stale and dry within a day or two, even if it doesn’t mold. The bread box is the better room-temperature option for short-term storage.
How do I thaw bread from the freezer if I didn’t slice it first?
For a full loaf, the best method is thawing bread in its wrapping on the counter for 3-4 hours. Once pliable but still cool, remove it from the bag to let the crust re-crisp. For a faster method, wrap the frozen loaf in foil and place it in a 300°F oven for 20-30 minutes. This reheats and thaws simultaneously.
The Bottom Line
A bread box is a tool for managing humidity, not defeating time. Use it with the understanding that its inner climate hits 89% relative humidity, giving you a 4-6 day window before mold becomes a visual reality. Start with a cold loaf, cut-side down, in a vented box. Sourdough and rye will buy you an extra day.
For crusty loaves, the box is the best room-temperature option. For soft sandwich bread, a plastic bag might serve you better. But for any timeline measured in weeks, not days, your true best container for bread is the freezer. Slice, bag, freeze, and toast directly from solid. That’s the method that actually extends freshness without the trade-offs.
