
Guide to Storing Sweet Potato Vine Tubers Through the Winter
This post contains affiliate links. As an Amazon Associate, we earn from qualifying purchases.
To store sweet potato vine tubers over winter, dig them before the first frost, cure them for a day or two in a dry, shaded spot, then pack them in a single layer inside a ventilated box filled with slightly damp peat moss or coco coir. Store the box in a dark location that stays between 55–60°F (13–16°C) with about 85% humidity for 6–8 months.
That temperature and humidity window is the whole game. Stray outside it and the tubers either sprout prematurely, shrivel into mummies, or rot into mush. Most garages and basements fail on humidity, not temperature.
What follows: the exact curing timeline for ornamental versus edible tubers, the three storage mediums that work, and the one household appliance you must never use. By the end, you’ll know whether to dig, cut, or bring the whole plant inside.
Key Takeaways
- Dig tubers just before the first light frost. A hard freeze damages the roots and ruins their storage potential.
- Cure ornamental tubers for only 1–2 days in a dry, shaded area. Edible sweet potatoes need weeks; ornamentals just need their skins to dry.
- Maintain 85% humidity in storage. Use a slightly damp medium like peat moss or coco coir, and check it monthly for drying.
- Never store tubers in a refrigerator. The temperature is too cold and will cause chilling injury, killing the tuber.
- Check stored tubers every 4–6 weeks for shriveling or premature sprouting. A sprout before spring means your storage is too warm.
Why You Can’t Just Leave Them in the Ground
Ornamental sweet potato vines (Ipomoea batatas) are tropical plants. They treat freezing soil like a death sentence. The tubers you’ve spent all summer growing are nothing more than stored energy for the plant, and that energy turns to rot when the ground temperature drops near freezing.
A light frost triggers dormancy, which is good. A hard frost ruptures cell walls inside the tuber. Once that happens, the tissue turns to a waterlogged, brown mess that won’t recover, even in perfect storage conditions.
The exception is tiny and specific. If you garden along the coast of South Carolina or in another USDA Zone 9 microclimate where the ground never freezes, you can sometimes leave them in place. For everyone else, from Zone 8 down, digging is non-negotiable. The Clemson HGIC sweet potato vine guide notes this coastal overwintering possibility, but it’s a gamble even there. Digging is the guaranteed path.
The 7-Step Tuber Storage Process (And the One Step Nobody Skips)
This isn’t a gentle suggestion list. It’s the sequence that determines whether you have viable tubers in April or a box of compost.
1. Time the Dig for Dormancy
Watch the forecast for the first light frost. That’s your cue. The plant needs that cold signal to start shutting down and diverting energy to the tubers. Digging too early in late summer means the tubers are underdeveloped. Digging after a hard freeze means they’re already damaged.
2. Cut Back the Vines
Use pruners to remove all the long, trailing vines, leaving about an inch of stem above the soil. This makes digging easier and reduces the mess. Don’t be gentle here, you’re not trying to save the foliage.
3. Dig Wide and Shallow
A garden fork is better than a shovel. Insert it a good 8–10 inches away from the main stem and lever the soil up gently. The tubers spread laterally, and a shovel blade will slice through them. You’re lifting the root ball, not stabbing it.
4. Shake and Brush, Don’t Wash
Gently shake off the loose soil, then use your hands or a soft brush to remove the rest. Do not wash the tubers with water. Water introduces moisture that can lead to rot during curing, and it removes the natural protective layer on the skin. Think of it like handling a storing potatoes, dry cleaning is mandatory.
5. Cure in Dry Shade
Here’s where ornamental and edible sweet potatoes diverge. Edibles need a warm, humid cure for 1–2 weeks to convert starches to sugars. Ornamentals just need their skins to toughen. Lay the tubers in a single layer in a garage, shed, or covered porch out of direct sun and rain. Give them 24 to 48 hours. That’s it.
6. Pack for Humidity
This is the critical step everyone rushes. You need a medium that holds moisture but also breathes. * Peat moss: Slightly dampen a large bag. It should feel like a wrung-out sponge, not wet. * Coco coir: Same deal, rehydrate it until it’s damp, then squeeze out excess water. * Wood shavings: Unscented, dry pet bedding works in a pinch, but you’ll need to monitor humidity more closely.
Line a plastic or wooden crate with a few inches of your chosen medium. Place tubers in a single layer, ensuring they don’t touch each other. Cover them with more medium, seal the crate loosely, and label it with the variety and date.
7. Store in the Sweet Spot
Find a location that naturally holds 55–60°F. A cool basement corner, an unheated spare room, or an insulated garage often works. An attached garage that dips below freezing is a death sentence. This is the same principle used for long-term carrot storage, consistent, cool, and dark.
What Temperature and Humidity Do Tubers Need?
Get these two numbers wrong and nothing else matters.
| Factor | Ideal Range | What Happens If You Miss It |
|---|---|---|
| Temperature | 55–60°F (13–16°C) | Below 50°F: Chilling injury, tuber death. Above 65°F: Premature sprouting within weeks. |
| Humidity | ~85% | Below 70%: Tubers shrivel and dehydrate in 4–6 weeks. Above 90%: Fungal rot sets in. |
| Light | Total darkness | Any light: Triggers sprouting. Green shoots drain the tuber’s energy before planting season. |
| Airflow | Gentle, indirect | Stagnant air: Promotes mold. Direct draft: Dries out the storage medium too fast. |
Where this goes sideways: Storing tubers in a household refrigerator. The average fridge runs at 37°F (3°C). At that temperature, the tubers suffer chilling injury, cell breakdown that might not be visible until you take them out in spring, soft and lifeless.
The 85% humidity figure isn’t a guess. It’s the level that prevents dehydration without encouraging rot, drawn from professional post-harvest potato storage practices. If your basement air is dry, the damp medium in the sealed crate creates a microclimate. Check it monthly. If the peat moss feels dry to the touch, lightly mist the inside of the crate, never the tubers directly.
The Two Other Ways to Overwinter Sweet Potato Vine
Storing tubers is the most common method, but it’s not the only one. Your climate and available space might make one of these a better fit.
Overwintering as a Houseplant
If you’ve grown your vine in a container, this is the easiest path. Before the first frost, bring the entire pot indoors. 1. Cut the vines back hard to about one foot long. This reduces the shock and makes the plant manageable. 2. Inspect the leaves and soil meticulously for pests like aphids or spider mites. A quick spray with insecticidal soap can prevent an indoor infestation. 3. Place the pot in your sunniest window, preferably south or west-facing. It will grow slowly over winter, needing only occasional watering when the soil is dry an inch down.
The plant won’t look spectacular, but it survives. Come spring, put it back outside and it will explode with new growth faster than a tuber-sprouted plant.
Overwintering from Cuttings
This method is for the propagator. It saves the genetic line of a specific cultivar when you don’t want to dig up the mother plant. 1. In late summer, take 6-inch cuttings from healthy vine tips. 2. Remove the leaves from the bottom half and place the stems in a jar of water. 3. Set the jar on a bright windowsill. Roots will form in 1–2 weeks. 4. Once rooted, pot the cuttings in soil and treat them as a houseplant through winter.
It’s more hands-on, but it guarantees you have vigorous, ready-to-plant vines in spring without any storage hassle. It’s also a smart technique to know if you’re into preserving potatoes and other crops through multiple means.
Tuber Storage vs. Houseplant: Which One Wins?
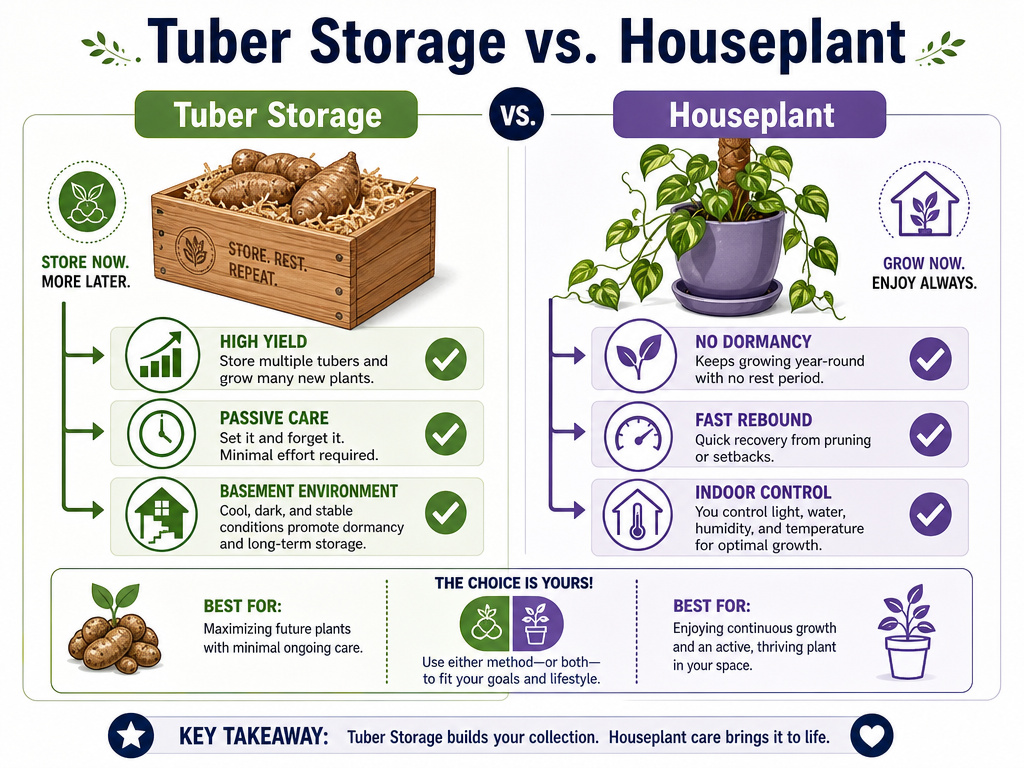 Your goal decides the method.
| Goal | Best Method | Why It Wins |
|---|---|---|
| Save space, maximum yield | Tuber Storage | One crate in the basement yields 10+ plants. It’s passive after setup. |
| Keep a specific container specimen | Houseplant Method | No digging, no curing. The plant never goes fully dormant, so it rebounds fastest. |
| Share plants with friends | Cuttings Method | You can take many cuttings from one plant. Rooted cuttings are easy gifts in spring. |
| Live in a humid, cool climate | Tuber Storage | You can replicate the 85% humidity in a cellar or root cellar environment. |
| Live in a dry, heated apartment | Houseplant Method | You control the environment. Dormant tubers would shrivel in your dry air. |
For most gardeners with a standard cool, dark basement, tuber storage is the default. It’s how you save the best potato storage conditions for ornamentals. The houseplant method is for container gardeners or those without a good storage space.
Monthly Check-Up: What to Look For
Storing tubers isn’t a “set it and forget it” operation. Mark your calendar for a quick check every 4–6 weeks.
First Sign of Trouble: Shriveling.
If the tubers look wrinkled and dry, your storage medium has lost its moisture. The humidity has dropped below 70%. Lightly mist the inside of the crate or box, or add a fresh, damp layer of peat moss. Do not wet the tubers.
Second Sign: White Fuzz or Soft Spots.
This is mold or rot, meaning humidity is too high (above 90%) or a tuber was damaged during digging. Immediately remove any affected tubers. If the medium feels soggy, replace it with fresh, slightly damp material. Increase ventilation by cracking the lid open a bit wider.
Third Sign: Sprouting.
A pale green shoot means the storage location is too warm (above 65°F) or too bright. You have two choices: move the crate to a cooler, darker spot, or pot up the sprouting tuber and grow it as a houseplant. Letting the sprout continue in storage will weaken the tuber.
These checks are the same vigilance required for keeping onions or other root crops through winter. A five-minute inspection saves months of effort.
When and How to Wake Them Up in Spring
Your stored tubers will often begin to sprout on their own as daylight increases in late March or April, even in darkness. That’s your signal.
- Gently unpack the tubers from their storage medium.
- Discard any that are soft, shriveled beyond recognition, or moldy.
- Pot the healthy ones in 4-inch containers with fresh potting soil. Plant them horizontally, just covered with soil.
- Place the pots in a warm, bright spot (70–75°F). A sunny windowsill or under grow lights works.
- Water lightly to moisten the soil. Shoots will emerge within 1–2 weeks.
Once the shoots are 6–8 inches tall and nighttime temperatures are consistently above 50°F, you can harden them off and plant them outdoors. You’ve just cloned last year’s favorite vine for free. The process mirrors starting sweet potatoes from slips, but you’re using your own stored tubers as the seed stock.
Frequently Asked Questions
Can you eat ornamental sweet potato vine tubers?
Technically, yes, they are Ipomoea batatas. However, ornamental varieties are bred for foliage color and vigor, not flavor. Their tubers are often bitter, stringy, and bland compared to culinary varieties like ‘Beauregard’ or ‘Garnet’. Don’t bother.
How long do the tubers actually last in storage?
Under ideal 55–60°F and 85% humidity conditions, they can remain viable for 6–8 months. Beyond that, the risk of dehydration or spontaneous sprouting increases dramatically. Plan to plant them the following spring, not two springs later.
My tuber sprouted in January. What now?
Your storage area is too warm. Pot it up immediately. Plant the tuber in a container with soil, place it in a sunny window, and treat it as a houseplant. It will continue growing, and you can plant it outside after the last frost. This is a common issue noted in the K-State Research and Extension article on overwintering.
What’s the best container for storage?
Plastic or wooden crate with ventilation holes is ideal. Cardboard boxes work in a pinch but will degrade in high humidity. The goal is a container that holds the humid medium but doesn’t seal completely, allowing for the gentle airflow that prevents issues in any vegetable storage containers.
Can I just take cuttings in the fall and forget the tubers?
Absolutely. This is a fantastic, space-saving method. Take 6-inch cuttings in early fall, root them in water, pot them up, and keep them on a sunny windowsill over winter. You’ll have established, ready-to-plant vines in spring without ever digging a tuber.
The Bottom Line
Dig before the frost, cure for two days max, and pack them in damp peat moss at 55 degrees. That’s the recipe. The tubers aren’t fragile, but they are specific, they need that narrow band of coolness and dampness that mimics a perfect underground winter. Skip the fridge, check the crate every month, and pot up any early sprouters. By May, you’ll have more of the same vibrant vine that filled your pots last summer, and you won’t have spent a dime at the garden center.
