
Master Freezing Soup in Freezer Bags for Faster Thawing
This post contains affiliate links. As an Amazon Associate, we earn from qualifying purchases.
Freeze soup in freezer bags by cooling it to at least 70°F, filling a labeled “freezer” bag (not a “storage” bag), leaving 1/2 to 1 inch of headspace, sealing out all air, and laying it flat to freeze solid before stacking. This method preserves flavor, prevents freezer burn, and cuts thawing time significantly.
The 1-inch headspace rule for quarts is the essential margin that stops a sealed bag of hot liquid from expanding into a leak or bursting a seam when the contents freeze. Skip that gap, and you trade a future easy meal for a frost-coated mess at the bottom of your freezer.
What follows is the breakdown of that process: the three non-negotiable phases (before, during, and after filling), the exact storage times that keep flavor intact, and the two ingredient swaps that prevent a thawed soup from turning to mush.
Key Takeaways
- Use only bags marked “freezer”, they are thicker than “storage” bags and provide a critical barrier against freezer burn and odor transfer.
- Leave 1/2 inch of headspace for pint bags and 1 inch for quarts to allow for expansion during freezing, a specification from Iowa State University Extension.
- Flatten filled bags and freeze them solid on a flat tray before stacking; a thin, flat shape freezes faster and thaws in half the time of a lump.
- Dairy-based soups are best within two months, broth-based within three; after that, safety isn’t the issue, but flavor fades and texture degrades.
- Omit potatoes from soup before freezing; they become waterlogged and mushy upon thawing. Add freshly cooked pasta or potatoes when reheating instead.
The Essential 3-Step Process (Before, During, and After Filling)
Get this sequence wrong, and you fight leaks, ice crystals, and a thaw that takes all day. The goal is to freeze soup in a state that makes reheating a 20-minute task, not a project.
Step 1: Cooling the Soup Safely. The 2-Hour/4-Hour Rule
Hot soup straight from the pot will steam inside a sealed bag, creating ice crystals and risking bacterial growth in the warm, moist environment. You must cool it first.
Before you start: Pouring boiling soup into a bag risks melting the plastic at the seams and can scald you if the bag tips. Always cool the soup in the pot or in a shallow container set in an ice bath.
The Iowa State University Extension guide sets a clear standard: cool soup from 140°F to 70°F within two hours, and from 70°F down to 40°F within four hours. This keeps it out of the “danger zone” where bacteria multiply fastest. – To speed cooling: Transfer the soup to a wide, shallow metal bowl or pan. This increases surface area. – Stir it occasionally. This moves the warmer center soup to the edges. – Use an ice bath. Set the pot or bowl in your sink surrounded by ice water.
Skipping this step or letting the pot sit on the counter overnight invites trouble. The soup spends hours in the perfect temperature range for spoilage organisms, which freezing doesn’t kill, it just pauses them.
Step 2: Bagging, Sealing, and Labeling
This is where you choose your tools and commit to the details. A “storage” bag is about 1.5 mils thick; a freezer bag is typically 2.5 to 3 mils. That extra millimeter is what stands between your soup and the dry, frosty patches of freezer burn.
| Action | How To | What Happens If You Skip It |
|---|---|---|
| Choose the Bag | Use a name-brand freezer bag like Ziploc Freezer Bags or Glad Freezer Bags. | A thin storage bag allows moisture to escape (freezer burn) and odors to enter. |
| Leave Headspace | Leave 1/2 inch for pints, 1 inch for quarts (per Iowa State Extension). | Liquid expands as it freezes. No space means the bag stretches, leaks, or bursts at the seal. |
| Remove Air | Lower the bag into a bowl, fold the top edges over, and slowly seal while pressing air out. | Trapped air contains moisture that sublimates into ice crystals on the soup’s surface. |
| Label | Write the soup name, date, and any reheating notes (“add cream”) with a permanent marker. | You get a mystery brick. In three months, you won’t know if it’s chili or chowder. |
After sealing, wipe any drips from the outside of the bag with a damp cloth. A clean exterior prevents bags from freezing together in a solid block.
Step 3: The Flat Freeze and Stack Method
This is the space-saving secret. Do not just toss the filled bag into the freezer. Place it on a flat, stable surface like a baking sheet, quarter sheet pan, or even a small cardboard square.
Freeze foods in a thin, flattened shape in freezer bags. A rounded shape takes longer to thaw through to the middle. Flatter packages also will stack better in your freezer. . UNL Food freezer bag guide
A lumpy, rounded bag of frozen soup can take 24 hours to thaw in the refrigerator. The same volume, flattened to about an inch thick, will thaw in 8 to 12 hours. The increased surface area lets the cold leave faster. – Freeze solid first. Leave the bags on the flat tray until they are completely rigid, usually overnight. – Then stack vertically. Once frozen, you can stack them like books on a shelf or stand them upright in a bin. This is the core principle behind any effort to organize your freezer efficiently.
Soup-Specific Guidelines: Timelines and Texture Tricks
Not all soups freeze the same. A creamy chowder and a beef broth behave differently in the deep cold. These timelines mark the point where flavor degradation becomes noticeable.
How Long Does Frozen Soup Last?
Freezing stops microbial growth, but it doesn’t stop chemical and physical changes. Fats can oxidize, flavors mute, and textures break down. The clock starts the day you seal the bag.
| Soup Type | Optimal Flavor Timeline (at 0°F) | Notes |
|---|---|---|
| Broth-Based (chicken noodle, vegetable) | 3 months | After this, the herbs and spices begin to taste flat. |
| Dairy-Based (cream of mushroom, chowder) | 2 months | Dairy can separate upon thawing; it’s still safe but may need re-blending. |
| Meat & Vegetable Stews | 2-3 months | Meats are fine, but vegetables continue to lose crispness over time. |
| Pureed Soups (butternut squash, tomato) | 4-6 months | The smooth texture holds up well, but acidity can change over very long storage. |
These numbers come from a synthesis of guidelines from the Iowa State soup freezing guide and UC Davis Food Safety. Soup kept longer is almost always safe to eat if kept at 0°F, but the quality guarantee is gone.
Ingredients That Freeze Poorly (And How to Fix It)
Some components simply lose a war against ice crystals. Plan your recipe with freezing in mind, or prepare for disappointment.
Common mistake: Freezing soup with regular potatoes or pasta. The potatoes become grainy and waterlogged. Pasta bloats into mush.
- Potatoes: Omit them entirely. If the soup needs potatoes, add freshly cooked diced potatoes when you reheat it. For thickening, use a freezer-stable option like tapioca flour.
- Pasta & Rice: Undercook these by about half the normal time if they must be frozen in the soup. Better yet, freeze the soup base and add freshly cooked pasta or rice upon reheating.
- Dairy (Milk, Cream, Sour Cream): These can separate or become grainy. Stabilize cream-based soups with a slurry of arrowroot or waxy rice flour before freezing. An immersion blender can often fix separation after thawing.
- Leafy Greens (Spinach, Kale): They will wilt and lose all texture. Stir them in fresh when reheating the soup.
If you’re freezing a large batch, consider using soup containers for portions you plan to thaw in the microwave, as some plastics aren’t microwave-safe.
Avoiding the Big Freezer Bag Mistakes
The difference between a perfect freezer meal and a frost-burned brick often comes down to a few skipped details. These are the critical failure points.
Mistake 1: Using the Wrong Bag
This is the most common error. A freezer bag is a specific product with a thicker plastic formulation and a more robust seal. A “storage” or “sandwich” bag is too thin. – The thin plastic allows water molecules to escape (sublimate) from your soup, leading directly to freezer burn, those dry, grayish patches. – It also provides little barrier against strong freezer odors permeating your soup.
Invest in quality freezer bags designed for long-term storage. For an eco-friendly option, sturdy silicone freezer bags are also excellent, provided they are truly rated for freezing.
Mistake 2: Ignoring Headspace and Air Removal
Liquid expands when it freezes. That 1-inch gap for a quart bag is your expansion joint. Fill the bag to the brim, and the freezing soup will either force the seal open or find the weakest point in the plastic to rupture.
The technique for air removal matters. Don’t just zip it closed. Use the water displacement method: lower the filled bag into a bowl of water, letting the water pressure push air out until the seal is just above the surface, then close it. This gets you a near-perfect vacuum, which is the gold standard for preventing freezer burn.
Mistake 3: Thawing and Reheating Incorrectly
You’ve frozen it perfectly. Now don’t ruin it in the final stretch.
Safe Thawing: The best method is in the refrigerator for 8-12 hours (for a flattened bag). For a quicker method, you can submerge the sealed bag in cold water, changing the water every 30 minutes. Never thaw soup at room temperature on the counter, the exterior enters the danger zone while the center is still frozen.
Reheating to Temperature: Whether on the stovetop or in the microwave, reheat the soup to a rolling boil or at least 165°F. This ensures any bacterial growth that may have occurred during thawing is eliminated. For cream soups, reheat gently over a double boiler or on low heat, stirring frequently to recombine.
If you reheat in the microwave, transfer the soup to a glass container unless your freezer bag is explicitly labeled as microwave-safe.
Freezer Bag vs. Container: Which Should You Use?
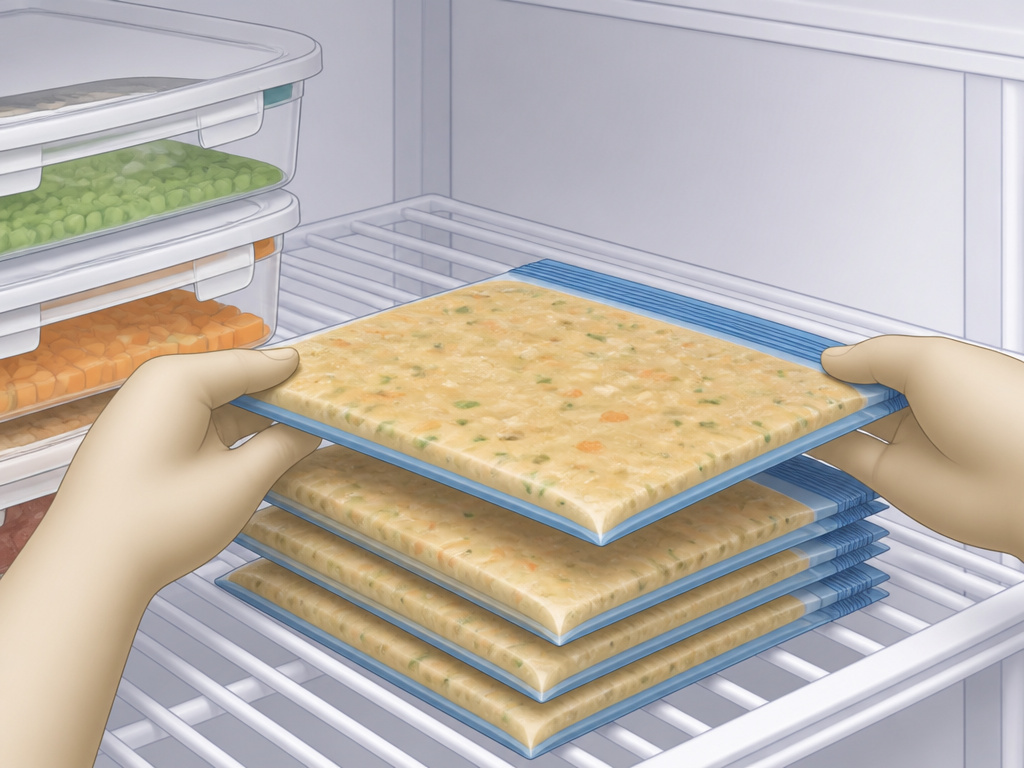 Freezer bags win on space and speed. But they aren’t the only tool. The choice often comes down to your freezer’s layout and how you plan to reheat.
For a standard upright freezer where shelf space is prime, the flatten-and-stack method with bags is unbeatable. It turns soup into flat, modular bricks that are easy to organize. For a chest freezer, rigid containers might stack more securely without toppling.
| Aspect | Freezer Bags | Rigid Containers |
|---|---|---|
| Space Efficiency | Excellent (flatten & stack) | Good (they stack, but with air gaps) |
| Freezing/Thawing Speed | Fast (thin profile) | Slow (thick walls and mass) |
| Reheating | Must transfer to another dish (usually) | Often microwave-safe |
| Risk of Leaks | Low if sealed properly | Very low |
| Best For | Bulk storage, saving space, broth-based soups | Cream-based soups, single servings, microwave reheating |
If you choose containers, ensure they are made of freezer-safe materials like polypropylene (PP #5) or tempered glass. Leave the recommended headspace here, too.
Frequently Asked Questions
Can you freeze soup in Ziploc bags?
Yes, but only in Ziploc Freezer bags. Their standard “Storage” bags are too thin for long-term freezing and will lead to freezer burn. Always check the label for the word “freezer.”
How do you prevent freezer burn on soup?
Freezer burn is caused by air exposure and temperature fluctuations. Use thick, quality freezer bags, remove all possible air before sealing, flatten the bag for fast freezing, and maintain a constant freezer temperature of 0°F or below. Consistent temperature is a key part of any freezer storage system.
Can you freeze soup with potatoes in it?
You can, but you shouldn’t. Potatoes in soup become mushy, grainy, and unpleasantly watery after freezing and thawing. The UMN Extension preserving soup resource explicitly recommends omitting potatoes. Make your soup base, freeze it, and add freshly cooked potatoes when you reheat.
Is it safe to thaw soup in the bag?
It is safe to thaw soup in a sealed freezer bag in the refrigerator or in a cold water bath. It is not safe to thaw it in the bag at room temperature. Do not cook or boil soup directly in a plastic freezer bag unless the manufacturer’s instructions explicitly state the bag is designed for it.
How much soup should I put in one bag?
Freeze in portions you’ll use at one time. For a single serving, 1.5 to 2 cups is standard. For a family meal, 4 to 6 cups (a quart to a quart and a half) is practical. Label the bag with both the contents and the volume.
The Bottom Line
Freezing soup in bags is about controlling physics: expansion, moisture loss, and heat transfer. Use a thick freezer bag, leave an inch of headspace, and press out every bubble of air. Flatten it. Freeze it solid on a tray. Then stack it.
That sequence turns a pot of soup into a library of easy future meals. Skip a step, and you get ice crystals and wasted food. Follow it, and you have a ready-made dinner that thaws during a workday. The best bag for the job is a dedicated freezer bag from a reputable brand, it’s the one piece of gear that makes everything else work.
