
Learn How to Store Banana Bread After Baking the Right Way
This post contains affiliate links. As an Amazon Associate, we earn from qualifying purchases.
Store banana bread at room temperature for up to 4 days, wrapped airtight in plastic wrap or foil. Refrigerate only if your kitchen is above 75°F or humidity exceeds 60%, for up to a week. For long-term storage, freeze fully cooled slices or the whole loaf in a double layer of plastic wrap and foil for 2-3 months. Never store warm bread sealed, it traps steam and invites mold within 36 hours.
That “refrigerate only if” clause is the whole decision. Most guides treat the fridge as a default longer-life option. It isn’t. The cold air actively re-crystallizes the bread’s starch molecules, a process called retrogradation that happens fastest between 50 and 20°F.
What follows is a breakdown of the three storage tiers, counter, fridge, freezer, with the specific temperature, humidity, and timing numbers that actually dictate your choice. You’ll learn why a bread box sometimes loses, the one mistake that causes crust separation in the freezer, and how to read your own kitchen’s conditions.
Key Takeaways
- Refrigeration accelerates staling in the 50–20°F range; use it only when heat or humidity force your hand.
- Freezing is the only long-term method that preserves texture, but you must cool the loaf for an hour before wrapping to prevent crust separation.
- Warm bread sealed in any container creates condensation that molds in under two days. Cool it completely on a rack first.
- For room temperature storage, an airtight container or a double wrap of plastic and foil beats a bread box in humid climates.
- Thaw frozen slices directly in a toaster or toaster oven; slow thawing at room temperature re-triggers the staling process.
The 50–20°F Danger Zone and Why Your Fridge is the Problem
Your refrigerator runs between 32 and 40°F. That places it squarely inside the temperature band where staling happens fastest. The Global Cold Chain Alliance’s manual for bakery storage identifies 50 to 20°F (10 to -7°C) as the critical range.
Staling is more rapid in the temperature range of 50 to 20°F (10 to -7°C). Products should pass very rapidly through this range.
At the molecular level, starch molecules in the bread recrystallize. This isn’t simple drying out, it’s a structural change that makes the crumb firm and gritty even if the moisture content is technically the same. A fridge extends mold-free life by slowing microbial growth, but it trades that for a noticeably worse texture within 18 hours.
So when does the fridge make sense? Only when ambient conditions are worse than the staling trade-off.
The Humidity and Heat Thresholds for Refrigeration
Use the refrigerator only if your kitchen temperature stays above 75°F (24°C) or the relative humidity exceeds 60%. In those conditions, mold growth at room temperature becomes a bigger and faster threat than staling. The fridge becomes the lesser of two evils.
If you must refrigerate, the strategy changes. You are fighting moisture loss. A single layer of plastic wrap is not enough. Use an airtight container or a double-layer wrap: first plastic wrap pressed directly onto the cut surfaces, then a sealed foil overwrap. This minimizes the bread’s exposure to the fridge’s dehydrating air.
Even with perfect wrapping, plan to eat refrigerated banana bread within a week. The texture will be firmer. Reheat slices in a toaster oven for 4-5 minutes at 325°F to re-gelatinize some of the starches and restore a semblance of softness.
Room Temperature Storage: The Default That Works (With One Caveat)
For a typical kitchen, the counter is the best place for banana bread you’ll eat within four days. The goal is to balance moisture retention with just enough air circulation to prevent sogginess.
The best bread storage containers are airtight plastic or glass with a silicone gasket. A good ceramic bread box with ventilation holes can work in dry climates, but in humid areas it often traps too much moisture. For most people, a simple, airtight container is more reliable.
| Wrapper | Best For | Risk If Skipped |
|---|---|---|
| Plastic wrap (direct contact) | Short-term, 2-3 days | Exposed cut surface dries out and hardens within 24 hours |
| Aluminum foil | Retaining warmth for serving | Lets moisture escape, leading to dry edges by day 2 |
| Airtight container | Humid kitchens, up to 4 days | Condensation if bread is warm, leading to mold in 36-48 hours |
| Plastic bag + twist tie | Transport only | Bread sweats and gets gummy within a day; promotes mold |
Step 1: Cool Completely. This is non-negotiable. Place the loaf on a wire rack for at least 2 hours, until the bottom feels room temperature. Wrapping warm bread is the single most common error in storing bread. The trapped steam creates a wet environment where mold spores thrive.
Step 2: Wrap for the Environment. For a dry kitchen, wrap the whole loaf tightly in plastic wrap. For a humid kitchen, use an airtight container. If you’ve cut into it, press a piece of plastic wrap directly onto the exposed crumb before putting the loaf in the container.
Step 3: Choose the Right Spot. Store it in a cool, dark cabinet, away from the stove, oven, or dishwasher. This stable bread storage location avoids temperature swings that cause condensation inside the wrapper.
Common mistake: Using a bread box in a humid coastal kitchen. The slight ventilation can’t keep up, and the loaf develops surface dampness by day three. Switch to an airtight container.
A loaf stored this way should stay moist and tender for four days. By day five, the staling process becomes noticeable even at room temperature.
Freezing Banana Bread: The Only Real Long-Term Solution
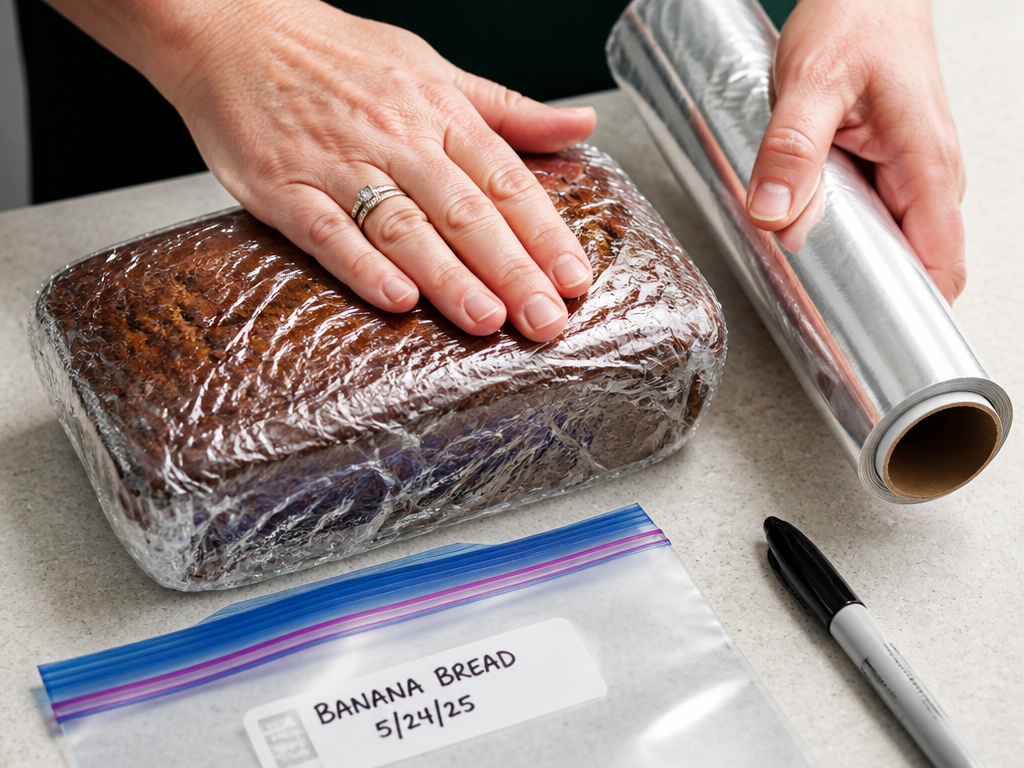
Freezing stops the clock. Microbial growth and staling reactions are virtually paused at 0°F. The GCCA manual notes that baked yeast breads and quick breads have a storage life of 2-3 months at 0°F (-18°C). This is your method for keeping banana bread for more than a week.
The enemy here is freezer burn and texture damage from ice crystals. You win by freezing fast and wrapping tight.
The Pre-Freeze Ritual: Why You Wait an Hour
Do not wrap and freeze a fresh-from-the-oven loaf. Do not even wrap a fully cooled loaf immediately. Here’s the nuance most home bakers miss.
If buns are frozen too quickly after baking and before cooling and packaging, separation of the crust from the crumb may occur during frozen storage and thawing.
The manual recommends a 1-hour hold at room temperature after cooling, before packaging. This allows moisture to equalize between the moist crumb and the drier crust. Skipping this step creates a tension point; during freezing and thawing, the crust can literally peel away from the bread.
Step 1: Cool + Equalize. Cool on a rack for 2 hours. Then, let the naked loaf sit for another hour.
Step 2: Portion. Freeze the whole loaf if you’ll use it all at once. For flexibility, slice it first. Slices thaw faster and you can remove only what you need.
Step 3: Double-Wrap. This is critical. 1. Wrap tightly in plastic wrap, squeezing out air pockets. 2. Wrap again in heavy-duty aluminum foil or place the plastic-wrapped bread in a freezer-safe zipper bag. Press out all air before sealing. 3. Label with the date and contents.
Step 4: Freeze Fast. Place the wrapped package directly against a freezer wall or on a shelf, not buried in the door or under other items. You want it to freeze as quickly as possible to minimize ice crystal size.
| Stage | Goal | Wrong Move & Consequence |
|---|---|---|
| Cooling | Release steam, stop cooking | Wrapping warm: Condensation and mold in bag |
| Equalizing | Balance crust/crumb moisture | Freezing immediately: Crust separates on thawing |
| Wrapping | Create vapor-proof barrier | Single-layer bag: Freezer burn in 3-4 weeks |
| Freezing | Rapid temperature drop | Placing in door: Slow freeze forms large ice crystals that rupture crumb |
This process is the gold standard for freezing bread of any type. A loaf prepared this way will taste nearly fresh after two months.
How to Thaw Frozen Banana Bread Correctly
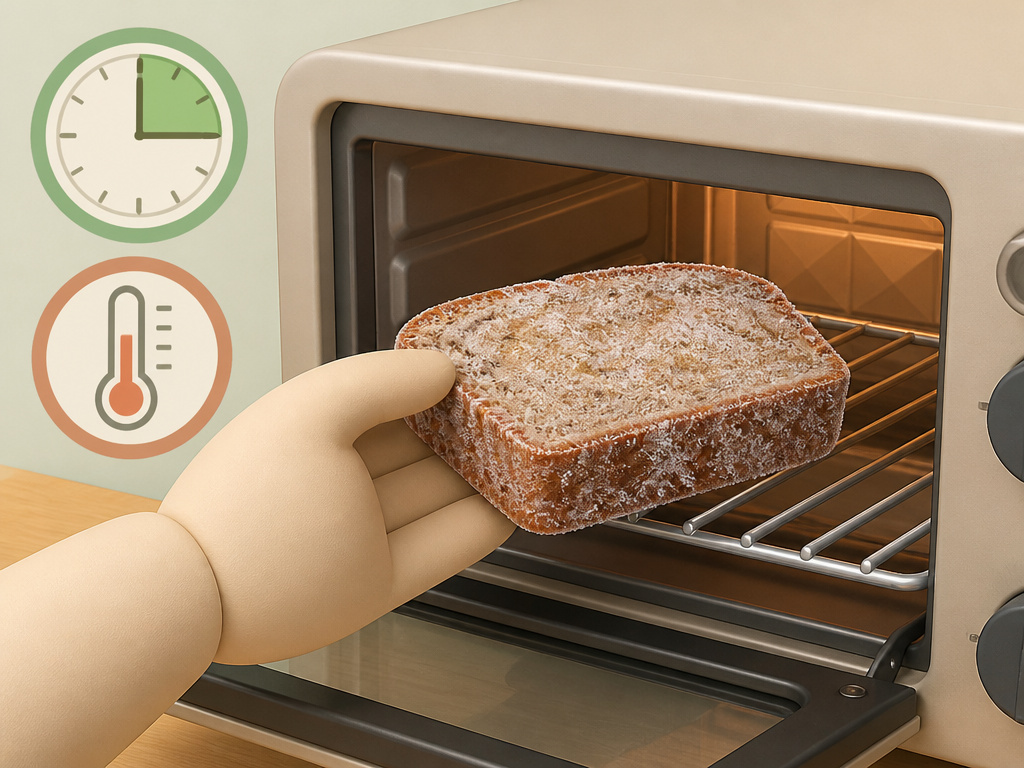
Thawing is not just waiting. The same dangerous 50–20°F staling zone you avoided in the fridge is active during thawing. You must move through it quickly.
The Best Method: Direct to Heat. For one or two slices, skip thawing altogether. Place the frozen slice directly in a toaster oven at 325°F for 6-8 minutes, or in a regular toaster on a medium setting. The heat denatures the ice crystals inside the crumb, effectively reheating and re-softening the bread in one step.
The Planned Method: Overnight in the Fridge. For a whole loaf, transfer it from the freezer to the refrigerator 8-12 hours before you need it. The cold thaw is slow and minimizes condensation on the bread itself. The condensation forms on the outside of the wrapper.
The Worst Method: Counter Thaw. Leaving wrapped, frozen bread on the counter for hours is an invitation to staling and sogginess. The outer layers warm up and enter the staling zone while the core is still frozen. The resulting texture is uneven and often unpleasantly damp.
Once thawed, treat it like fresh bread. Consume within 2-3 days. Do not refreeze previously frozen banana bread, the texture breakdown is severe.
For more detail on this phase, see our dedicated guide on thawing frozen bread.
Special Cases: Nuts, Cream Cheese, and Gluten-Free Loaves
Add-ins and alternative flours change the storage equation. The standard rules need adjustments.
Loaves with Nuts. Walnuts, pecans, and other nuts contain oils that can turn rancid. At room temperature, off-flavors can emerge in 3-4 days. If your banana bread is packed with nuts, default to the freezer after 2 days on the counter. For optimal bread storage of nut-heavy loaves, the freezer is not just an option, it’s necessary for flavor preservation.
Cream Cheese Frosting or Swirl. Dairy changes everything. The University of California’s safe food handling extension document categorizes frosted cakes differently. Frosted banana bread should be refrigerated and consumed within 4-5 days. For best results, freeze the unfrosted loaf and add fresh frosting after thawing.
Gluten-Free Banana Bread. Flours like almond or rice are more absorbent and fragile. They dry out faster and are more prone to crumbling when frozen and thawed. Store gluten-free loaves in an airtight container at room temperature for only 2 days maximum, then move to the freezer. Use the direct-to-toaster thawing method to minimize handling.
Frequently Asked Questions
Can I store banana bread in the oven?
No. A turned-off oven is not a food storage appliance. It lacks air circulation, traps humidity, and is often warmer than room temperature, creating a perfect environment for mold. Always use a proper container on the counter, in the fridge, or in the freezer.
Does banana bread need to be refrigerated?
Not usually. Refrigeration is recommended only to prevent mold growth in hot/humid conditions, but it will increase staling. The Clemson HGIC pantry storage guide explicitly states that storing bread in the refrigerator promotes staling. Choose the fridge only when your kitchen is above 75°F or very damp.
What is the best container for banana bread?
An airtight plastic or glass container with a snapping lid is best for room temperature storage. For the freezer, a double wrap of plastic and foil inside a freezer bag is superior to any rigid container, as it minimizes air space. Check our review of the best bread containers for specific models.
How can I tell if banana bread has gone bad?
Look for visible blue or green fuzzy mold, often starting in cracks or on the bottom. Smell it, a sour, alcoholic, or musty odor means fermentation or spoilage. If it feels excessively hard, dry, or has an oily rancid smell (especially with nuts), it’s past its prime for quality, even if not unsafe.
Can I use a bread bag?
Reusable bread bags made of cotton or linen are excellent for short-term (1-2 day) storage of crusty artisan breads. For moist, dense banana bread, they are too porous and will lead to drying out. Stick with plastic wrap, foil, or airtight containers.
Before You Go
The right method depends entirely on your timeline and kitchen climate. For eating within four days, an airtight container on the counter wins. If heat and humidity are high, reluctantly choose the fridge. For any period longer than a week, the freezer is your only reliable friend, just remember the crucial one-hour equalization period before you wrap.
Your goal isn’t just to prevent mold, but to preserve the tender, moist crumb you worked for. That means understanding the science of staling, respecting the 50–20°F danger zone, and never, ever wrapping a warm loaf.
